How To Make A Bezel Setting
/When I first started silversmithing I thought for sure a prong setting would be easier to tackle before trying to make a bezel setting. I was told over and over by my smithing friends that I should master bezel making before attempting a prong setting.
I couldn't understand how this logic made any sense, surely a prong setting is easier because there's less material, right? I was so wrong. I recall shedding a few tears when trying to make a prong setting, it was a disacter. I've since gotten the hang of it but I now see why my peers were warning me.

How To Make A Bezel Setting by Maker-Monologues.com
*This post contains some affiliate links, which means I may receive a small commission if you click on or purchase from certain links listed. This is how I'm able to run this blog, share my knowledge, at no cost to you. All opinions are my own and always will be. Thanks for supporting Maker Monologues!
Today I'm going to attempt to teach you how to make a bezel, I've been putting this blog post off for a few weeks because there are tons of videos on YouTube showing you how to make a bezel but I'm certainly going to try to teach you through photos and writing, after all, everyone learns in different ways.
For this project here's what I'm using:
26g, 1/8" Fine Silver Serrated Bezel Wire
#2 Cut Equalling Needle File

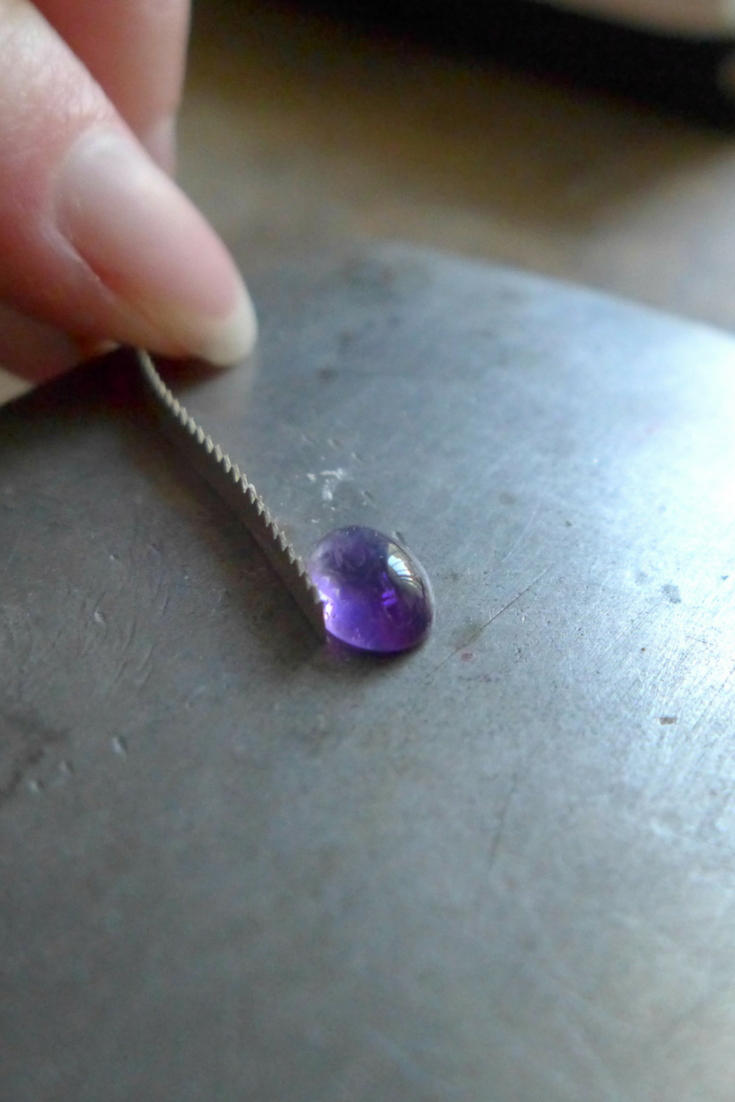
Step 1: Wrap the Bezel Around the Stone
This part can be very tricky, especially with these super tiny stones. Start at the long side of your stone because you want to avoid having your solder seam on a point (even though my stone is an oval it's best to put the seam somewhere where there will be less stress on the seam). Obviously, if your stone is a circle this doesn't matter.
Using your fingernails, if possible, hold the wire at the bottom of the stone, and with your other hand wrap the wire around the stone. You don't want to push the bezel over the top of the stone which is why it's important to hold the wire at the bottom of the stone so the wire stays straight. This is where we wish we had 3 hands.
A little tip I got from fellow jeweler Addie Kidd from Facet is to take a piece of tape, cut it to the size of your bezel width, wrap your stone with the tape, cut the excess and then lay that piece of tape over your bezel wire and add the gauge of the wire (about 1mm for 26g) to account for the thickness and cut your bezel wire and it should be the perfect size for your stone.
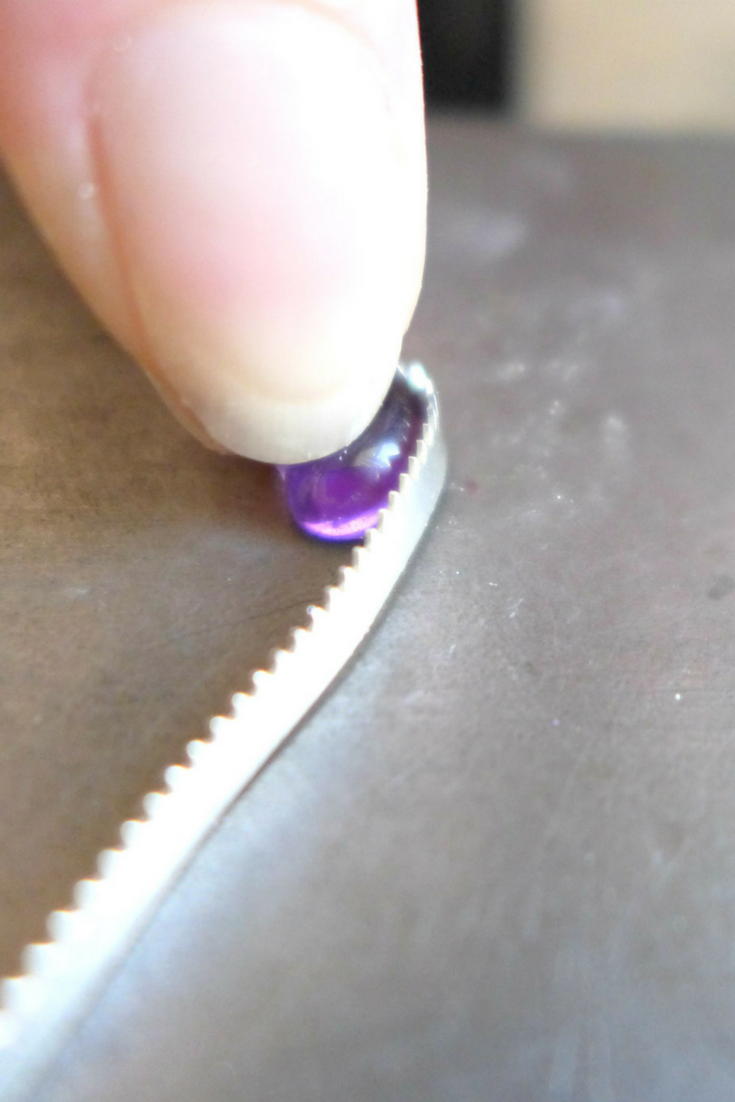

Step 2: Cut The Wire To Length
Where the bezel wire overlaps, mark it with a sharpie. There will always be a bit of a gap where the bezel wire overlaps because it's no longer laying flat against the stone, it's actually starting to overlap where the bezel wire started, so be sure to account for this gap and mark it just before where it actually meets up with the start of the bezel wire.
Then snip at that point with your flush cutters. (I snipped behind my Sharpie mark just so you are able to see where my seam is throughout the tutorial, it will always be just to the left of it when the bezel is right-side up. In your case you would be snipping right on the line.)


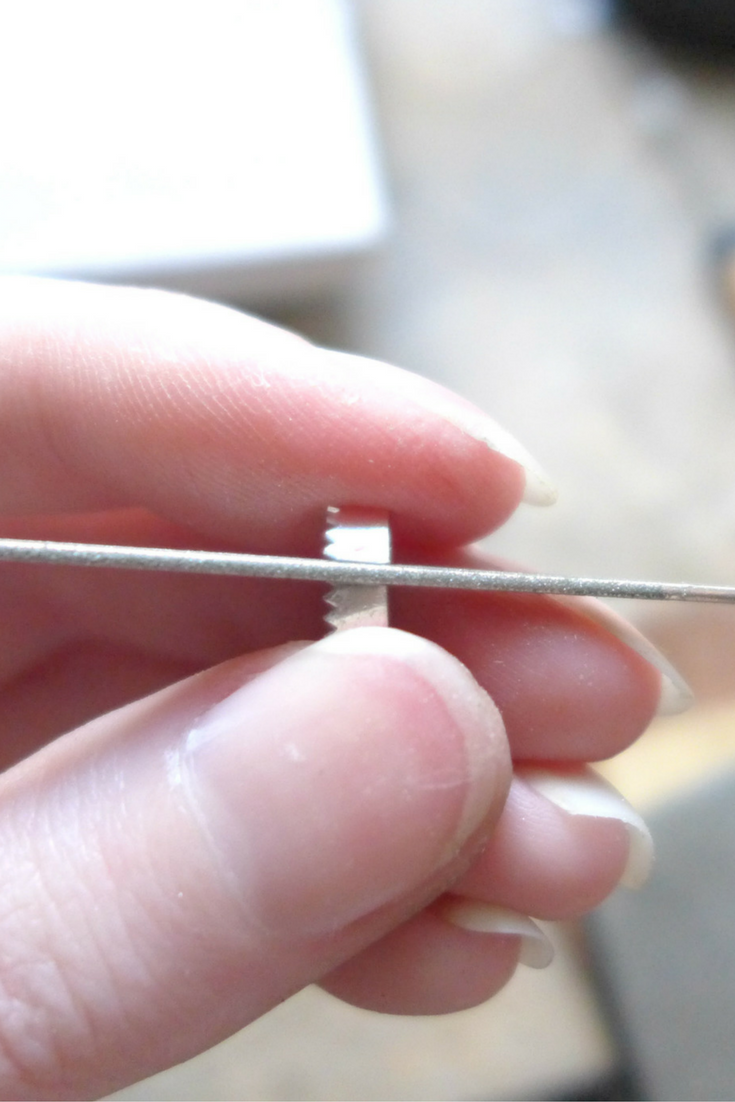
Step 3: File The Ends Flush
When you snip with your flush cutters, even though they're called "flush cutters" you'll still have some uneven cuts that you'll need to file flat.
This is one of the most tedious parts, getting both ends of your bezel wire perfectly flat so that when you go to solder them you get a strong bond. Solder will not fill any gaps. I'll get more into the conditions you need for your solder to flow.
Take your flat-edged file and start filing the ends squared. Take your time, check your work and make sure you're not filing at an angle. We often put pressure on one side so make sure you're filing flat. I like to use what's called an equaling file, and I hold it between both ends of my bezel wire and file both ends at the same time so no matter what they'll close flush when it's time to solder. That's what you see in the photo on the left below.
You can see to the left of my red Sharpie mark that my ends are flush together, there are no gaps. A way to check to see if you have any gaps is to close your ends together and hold it up to the light, if you see light passing through your seam then you need to keep working at it.

Step 4: Flux The Seam
This step is so easy it shouldn't even be its own step. Take your flux and with a flux brush (or any brush you have on hand) apply it to the front and back of your bezel seam.

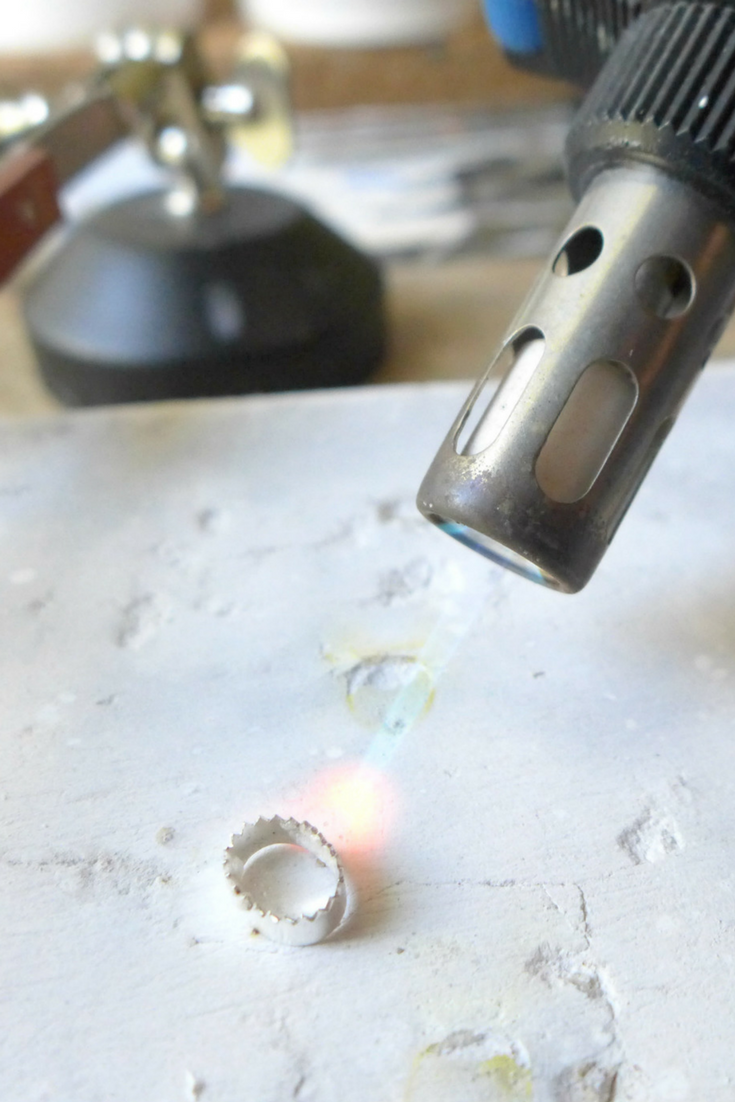
Step 5: Solder The Bezel Seam
There are a few conditions you must meet in order to get a seamless solder seam:
Make sure your metal is clean. You can throw it in the pickle for a quick minute then rinse, flux and you're ready. You can also take some sandpaper and rub down the ends you're going to solder. You cannot have any oxides, oils, etc. on your metal, it must be perfectly clean.
Both ends of the joint must be flush. This goes back to filing your ends perfectly square. Solder will not fill any gaps. Fellow jeweler Andrew Barry from At The Bench gives a metaphor about the solder acting like water being spread between two panes of glass, how it just spreads instantly as the two panes come together flush.
There are many ways to solder. Some use a third hand, some pick solder, some lay the solder under the piece, etc. I use a butane torch so my torch doesn't get that hot so I can heat my bezel from the top, where the serrated edge is, while the bezel is sitting on top of the piece of solder. If you're using a big girl/boy torch then you may want to use a third hand and pick solder so you don't melt the vulnerable serrated edge.
For me, though, I'm going to cut a tiny piece of hard solder, about 1mm long (I use wire solder). Then I place that piece of solder on my solderite block and then sit my bezel seam right on top of that piece of solder. With the heat of my torch coming from above the solder will follow that heat right up the seam.
Once the solder flows you'll see it fill the seam, take your torch away immediately. Use your cross-lock tweezers to pick it up and quench it in water.


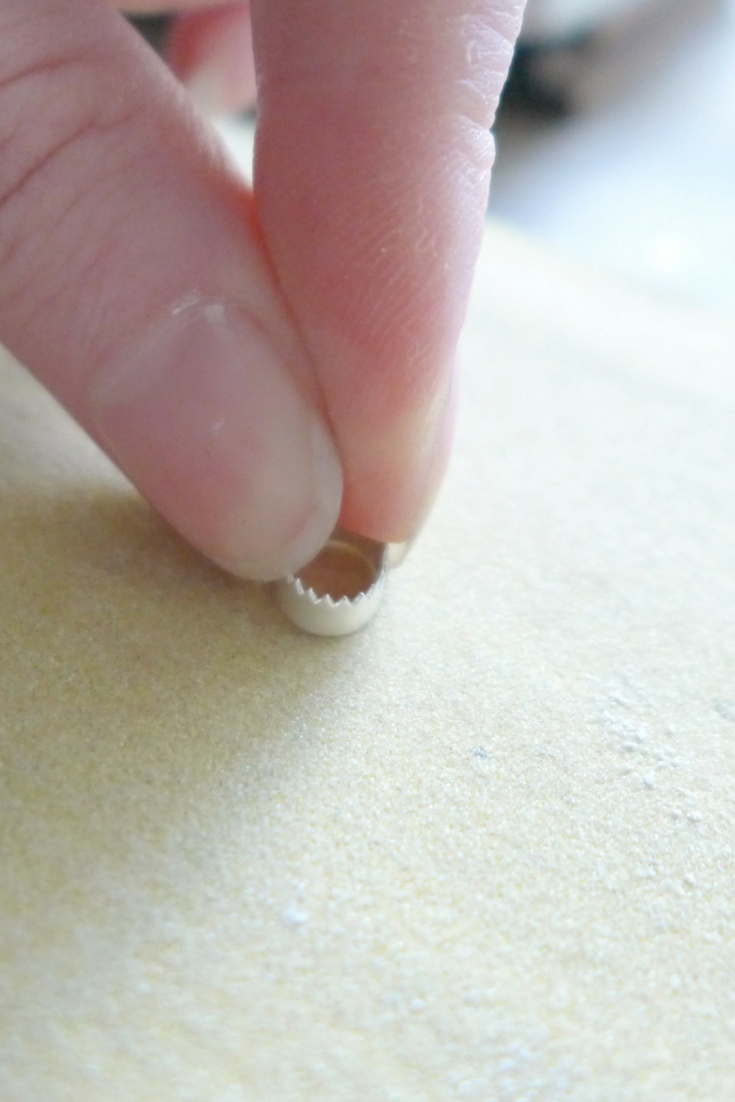
Step 6: Check Your Fit
You've made sure your solder joint is good and now you need to check the fit of your bezel around your stone. Slide the bezel over the stone and make sure it fits snug around your stone. If it's too small you can slide your bezel around a bezel mandrel and roll the mandrel on your steel block to stretch the metal. If it's too big you'll need to snip where your solder seam was, cut out a section, and re-solder. It's always better if it's too small than too big because it's easier to stretch the metal than to re-solder.
My bezel fits my stone like a glove. But, the 1/8" bezel wall height is too high for my stone. I'll need to sand down my bezel until it covers less of my stone.

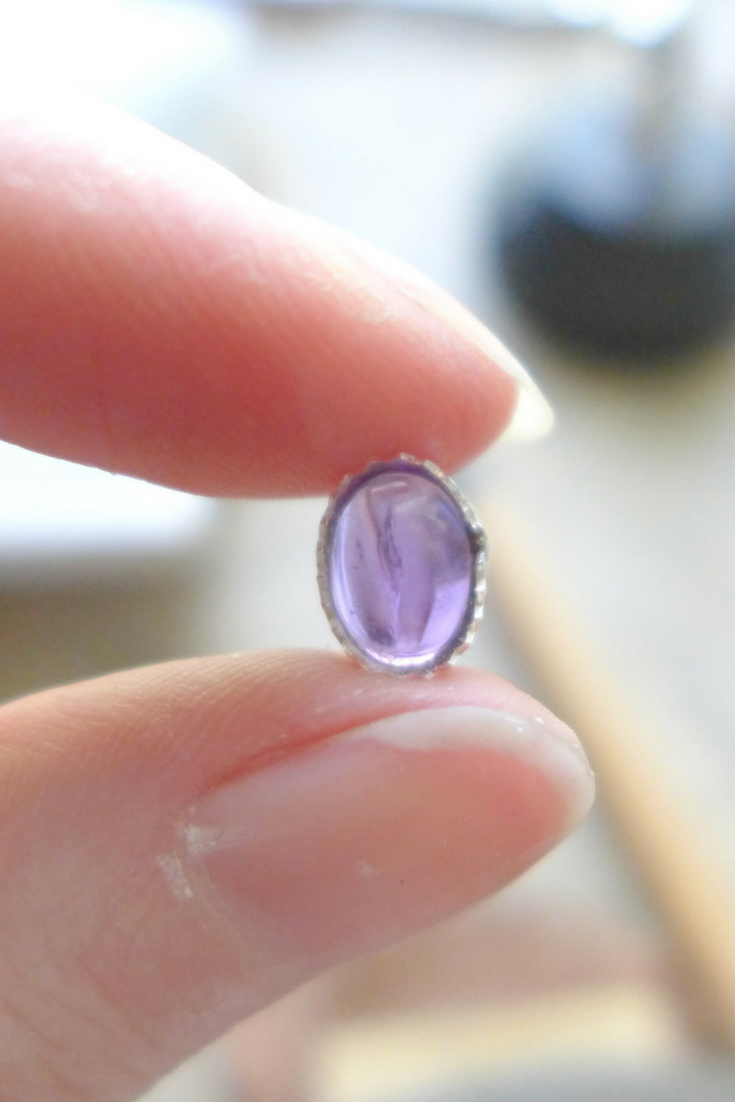

I like to use something super coarse, like 180 grit sandpaper just to remove a lot of material fast, then I'll go over again with something like 600 grit to sand it smooth. This does double duty as it gives the bottom of your bezel some tooth and cleans it so solder flows better.
You can also solder an oval jump ring to the bottom of the bezel instead of sanding so your stone sits up higher in the bezel. I've done both but I find it harder to make an oval jump ring so I just sanded it this time.


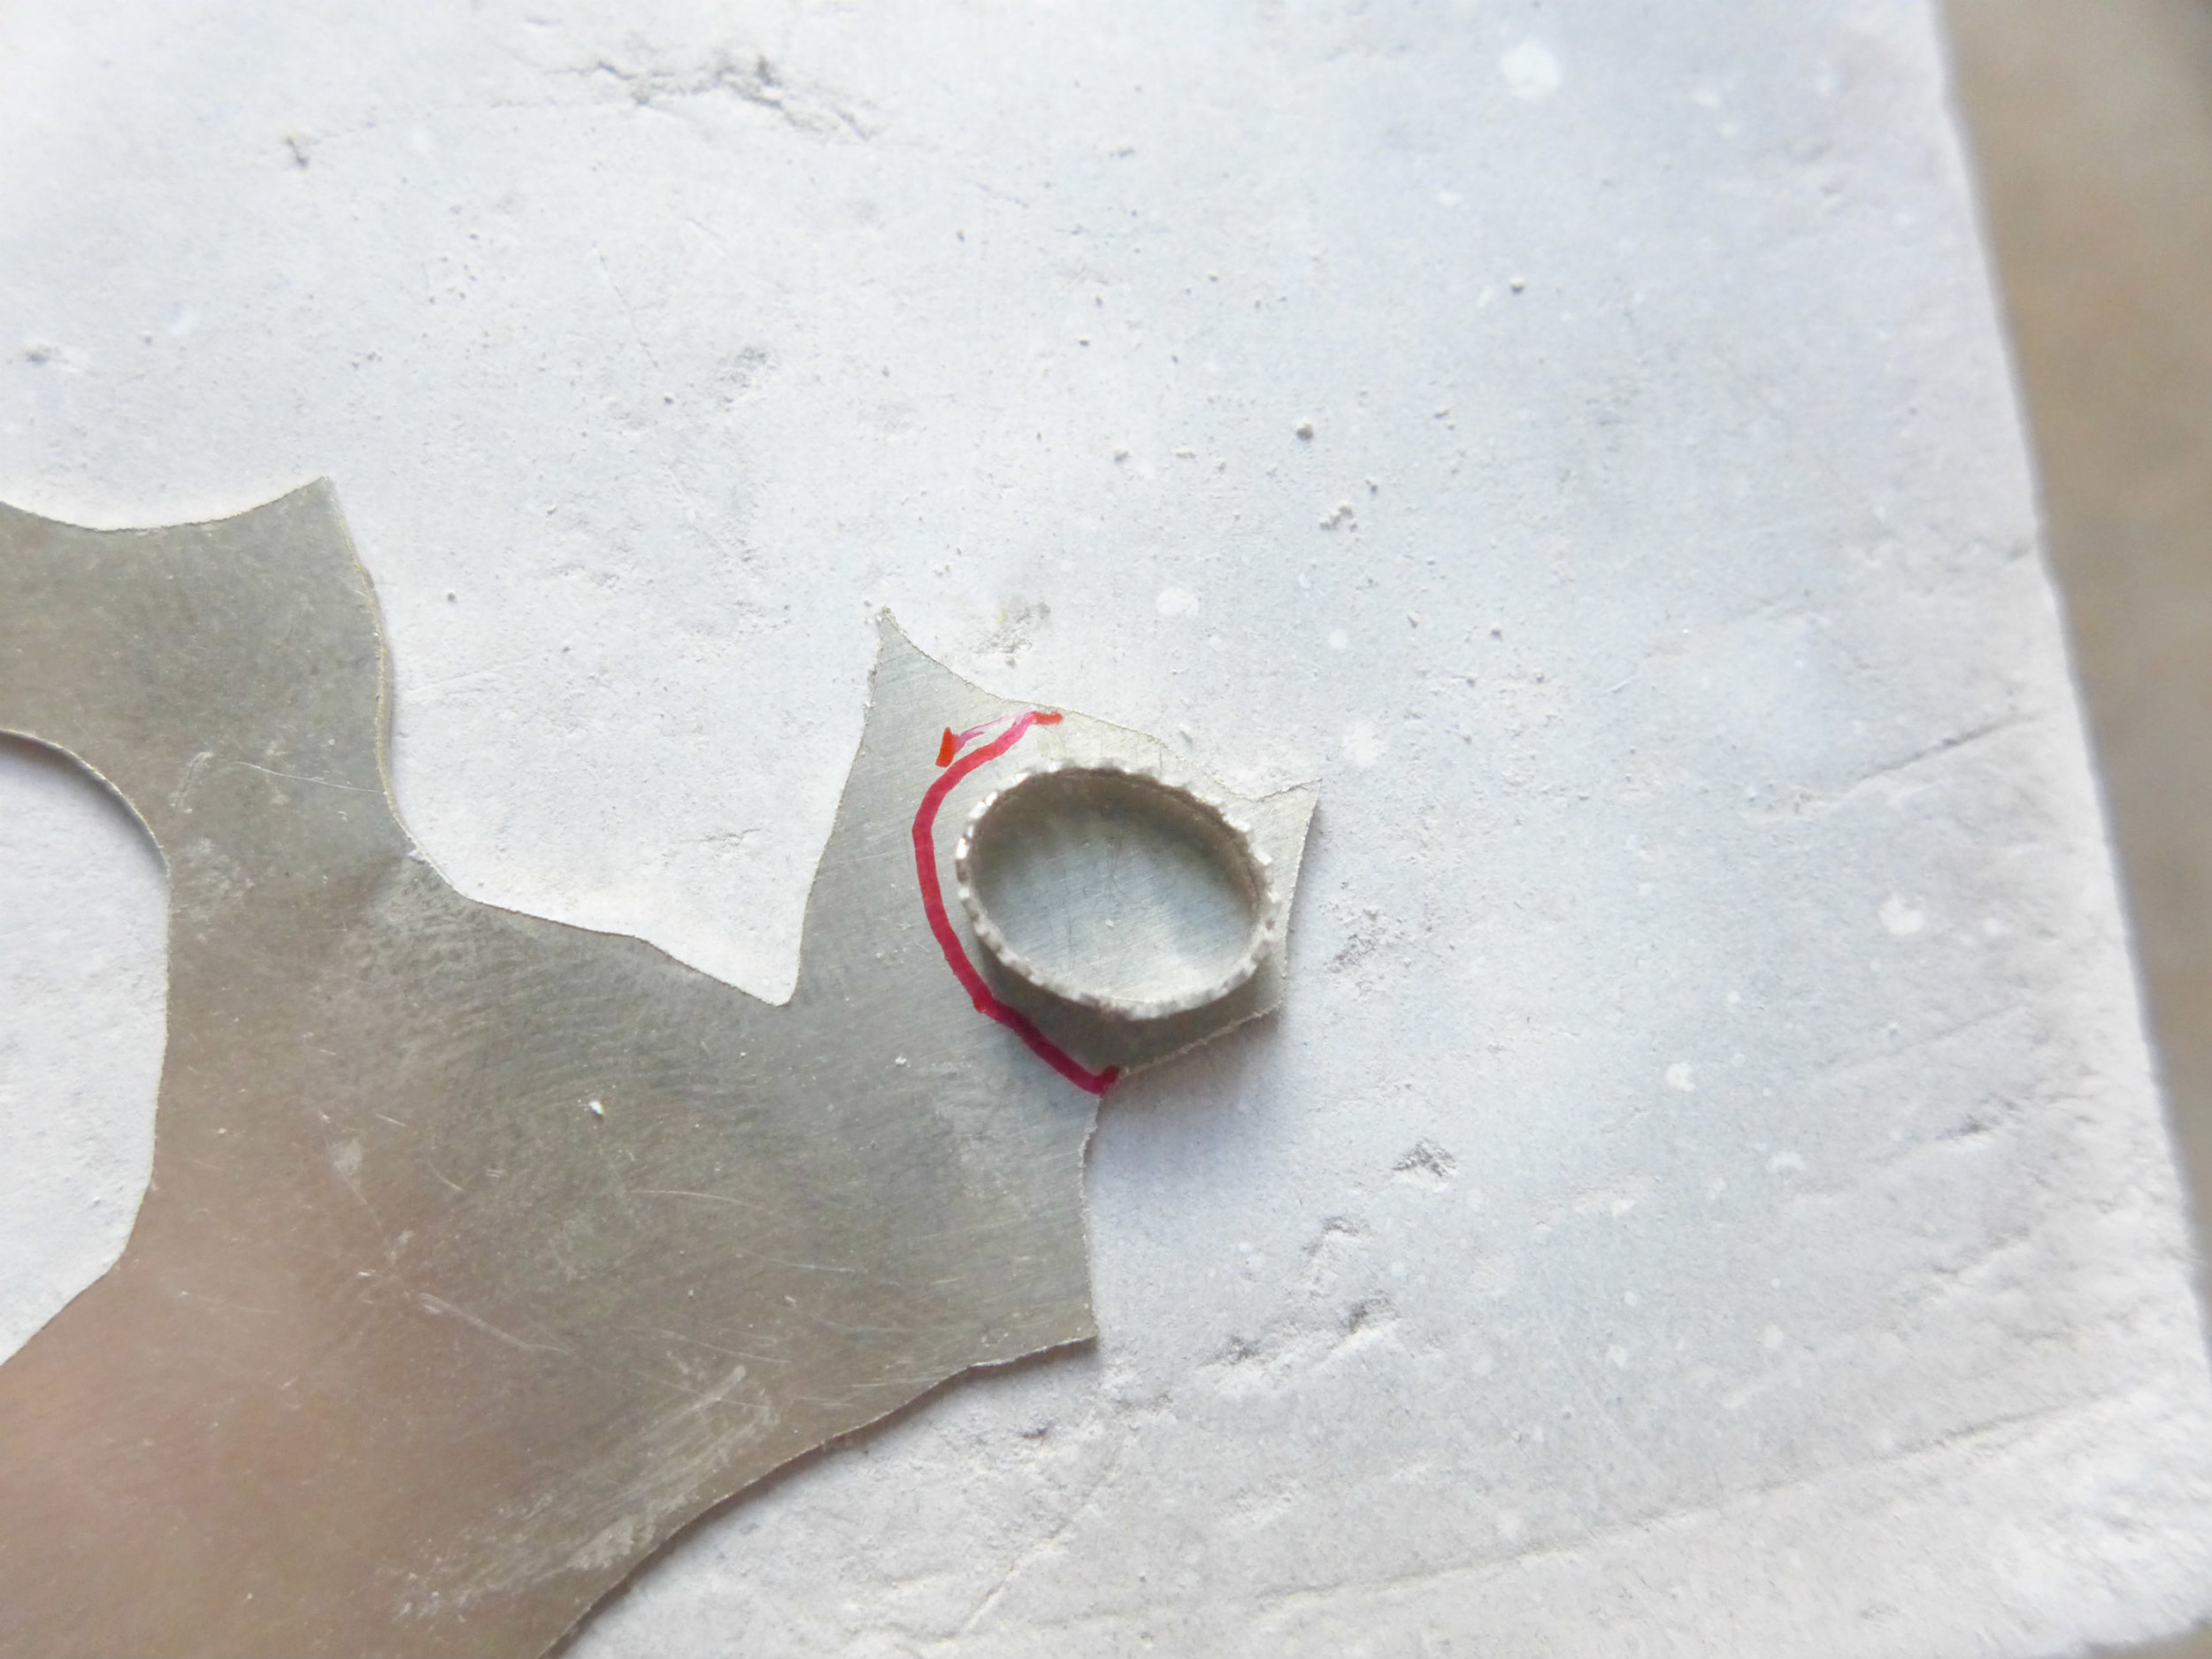
Step 7: Saw Out The Backplate
Take your bezel and place it on top of your silver sheet and use your Sharpie to draw out a line where you'll cut out your backplate. If you want to do extra detailing, like roping or beaded wire around your bezel then you'll need to account for the space needed to do so. I'm making a plain bezel so I'm just sawing out enough space to solder my bezel to my backplate.
I use a 3/0 saw blade which seems to be great for everything I do. But the rule of thumb is you want 3 teeth to the thickness of the metal you're cutting. So there will always be 3 teeth cutting at all times.
Take your saw blade and insert it into your saw frame with the teeth pointing down, because you cut on the downward motion when sawing. Allow the blade to do all the work when sawing, you only need to apply very light pressure when sawing downward, then when you come back up you don't apply any pressure.


You want to use lubrication when you're sawing, I just slide my blade through my cut lube before I saw it, you can also spread this lubrication on your metal where you'll be cutting. You can also use beeswax and other types of lubricant.
When sawing you want to make sure you're almost eye-level to your bench pin, it makes for better posture when you're sawing. You want to place your metal in the V slot on your bench pin so that you can saw your metal while both sides of the metal are still being supported.
Now you're ready to saw. It might not feel natural at first but you'll get the hang of it.


Step 8: Solder Bezel To Backplate
Same with the first solder step you want to make sure the back-plate and the bottom of your bezel are clean. I just run them over some 600 grit sandpaper. Flux the entire backplate, flux the bottom of the bezel, you can even go around the inside and outside of the bezel a bit.
Place the bezel in the spot you want it, center on the backplate. Cut enough pallions of solder, but this time, since it's our second solder joint, we want to use medium. Medium solder flows at a lower temperature than hard solder so we want medium solder to flow faster than the hard solder as to not melt the hard solder we used on the bezel joint and possibly ruin our bezel joint.
Easy solder flows at 1325°F
Medium solder flows at 1360°F
Hard solder flows at 1450°F
Sterling silver melts at 1640˚F to 1650˚F
Fine silver melts at 1761˚ F
I like to place my solder pieces on the inside of the bezel, I start by putting a tiny piece, around 1mm, at the top, then one at the bottom, then the right, then the left. Then I put a piece of solder in between each of those if I need it. It may sound like a lot of solder but these pieces are tiny, you don't want to overdo it with solder and have to do a lot of clean up.
Little Tip: I pre-cut my solder bits and place them in those little gemstone containers you get when you buy a gemstone tray. Just be sure to label both the cap AND the bottom so you don't get your solder mixed up when you take the caps off. I had to throw out all my pre-cut solder and re-do everything because I only labeled the tops.


After soldering, you want to see a nice meniscus, a smooth curve of solder, connecting the bezel wall to the backplate. If there are any disconnections or gaps then re-apply solder in that spot.

Step 9: Pickle Your Bezel
Now you want to turn your pickle pot on, I put mine on high, allow your pickle to warm up, and toss your piece in there. You want to get a crockpot that has an inner stoneware pot. You don't want steel because there's a chemical reaction that happens when you mix steel and sterling silver in a pickle solution that brings the copper up to the surface of the sterling silver making it look copper plated. That also goes for the tongs you use to fish out your silver, you want those to be copper or wood.
You can make your own pickle at home using 1 cup of white vinegar per 1 generous tbs of salt. That's it, no harmful chemicals. This mixture will remove the fire scale and leftover flux from your piece. You can better see the nice solder line after it's cleaned.
I tell ya, watching solder flow is one of the most satisfying things to me, I don't know what it is, it's like watching that Satisfying Sand Instagram account.


Step 10: Remove The Backplate Excess
Now you want to saw off the excess of the backplate. You want to saw about half a millimeter away from your bezel wall. You'll then file away the rest.


Now you want to take your #2 cut file, a bigger one than your needle file because it's hard to hold that tiny thing when filing something like this bezel backplate. I recently got a Vallorbe Swiss cut half-round file (which is not the one you see in the photo below) and I honestly had no idea how easy it could be to file metal off. One of the best tools I've gotten and I do not suggest skimping on your hand files.


There's our beautiful, handcrafted, quality-made bezel! It takes a lot of work but it sure beats buying those manufactured bezel cups that are just too thin and flimsy. As fellow jeweler Soham Harrison stated (not verbatim), "If you're going to make a handmade ring, HAND MAKE the bezel."
Next time I'm going to show you how to set a stone. I ended up placing this bezel with some cute half-moon charms as a pendant.
Let me know if this post was helpful for you, I know there are so many videos showing you how to make a bezel, which is often more helpful, for me in particular, but sometimes I do want a written tutorial to look back to as I'm making something.
And I have yet to really dig into my video settings on my camera but it's a goal of mine to make some videos for you guys.