Aves Studio 2-Part Apoxie Sculpt Copper Electroformed Pendant Tutorial
/
I had a completely different intro to this tutorial when I wrote the rough draft last week. But now with what is going on in the world and how much life and routine have just changed for us, I just wanted to address this before jumping into this tutorial. Stay at home, keep busy by making beautiful jewelry and stay safe Makers!
There are so many cool and unique designs you can make when it comes to copper electroformed jewelry. If you can dream it up you can figure out a way to bring that design to life. And your creativity can go wild when you add epoxy clay to your design process, and that’s exactly what I’m going to share with you today!
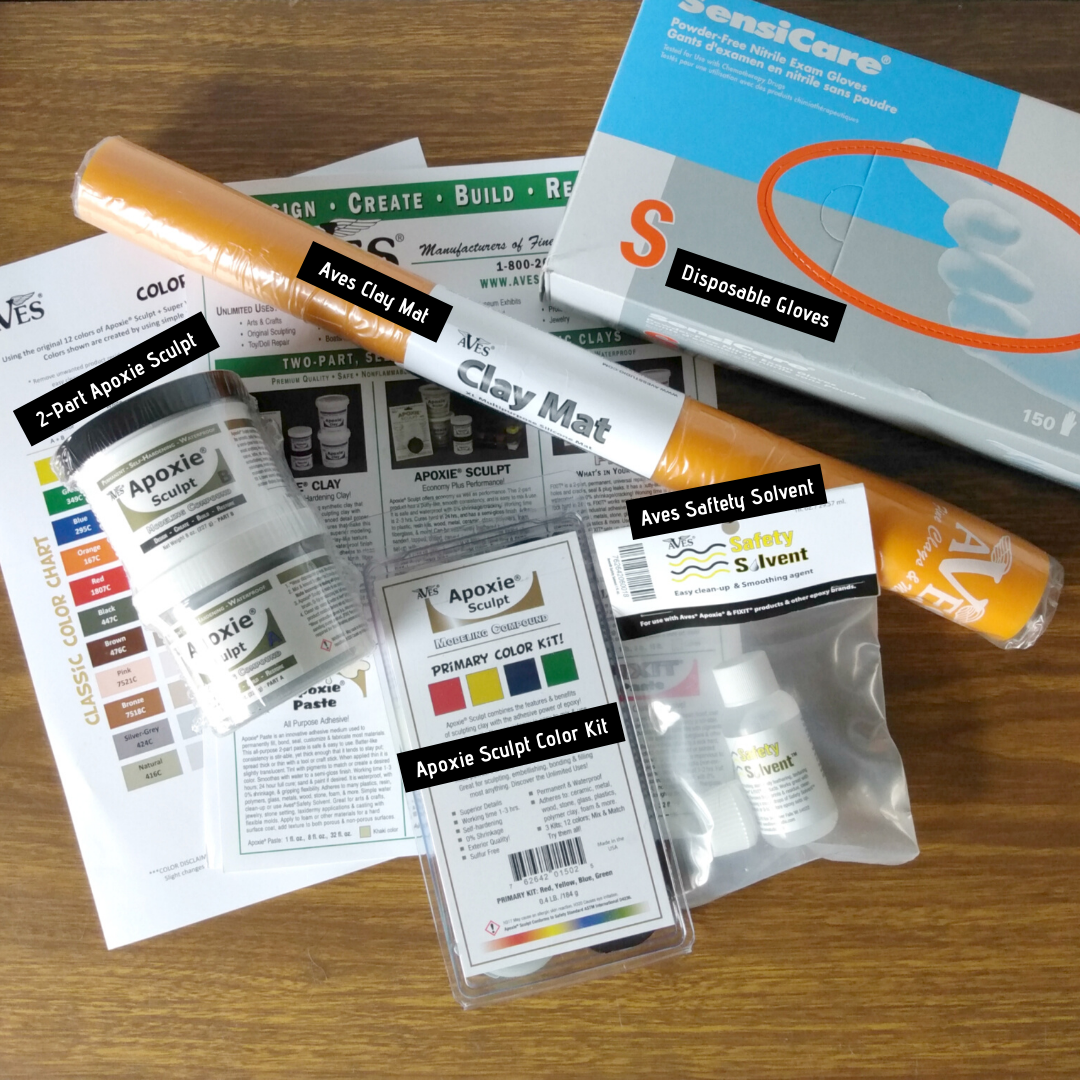
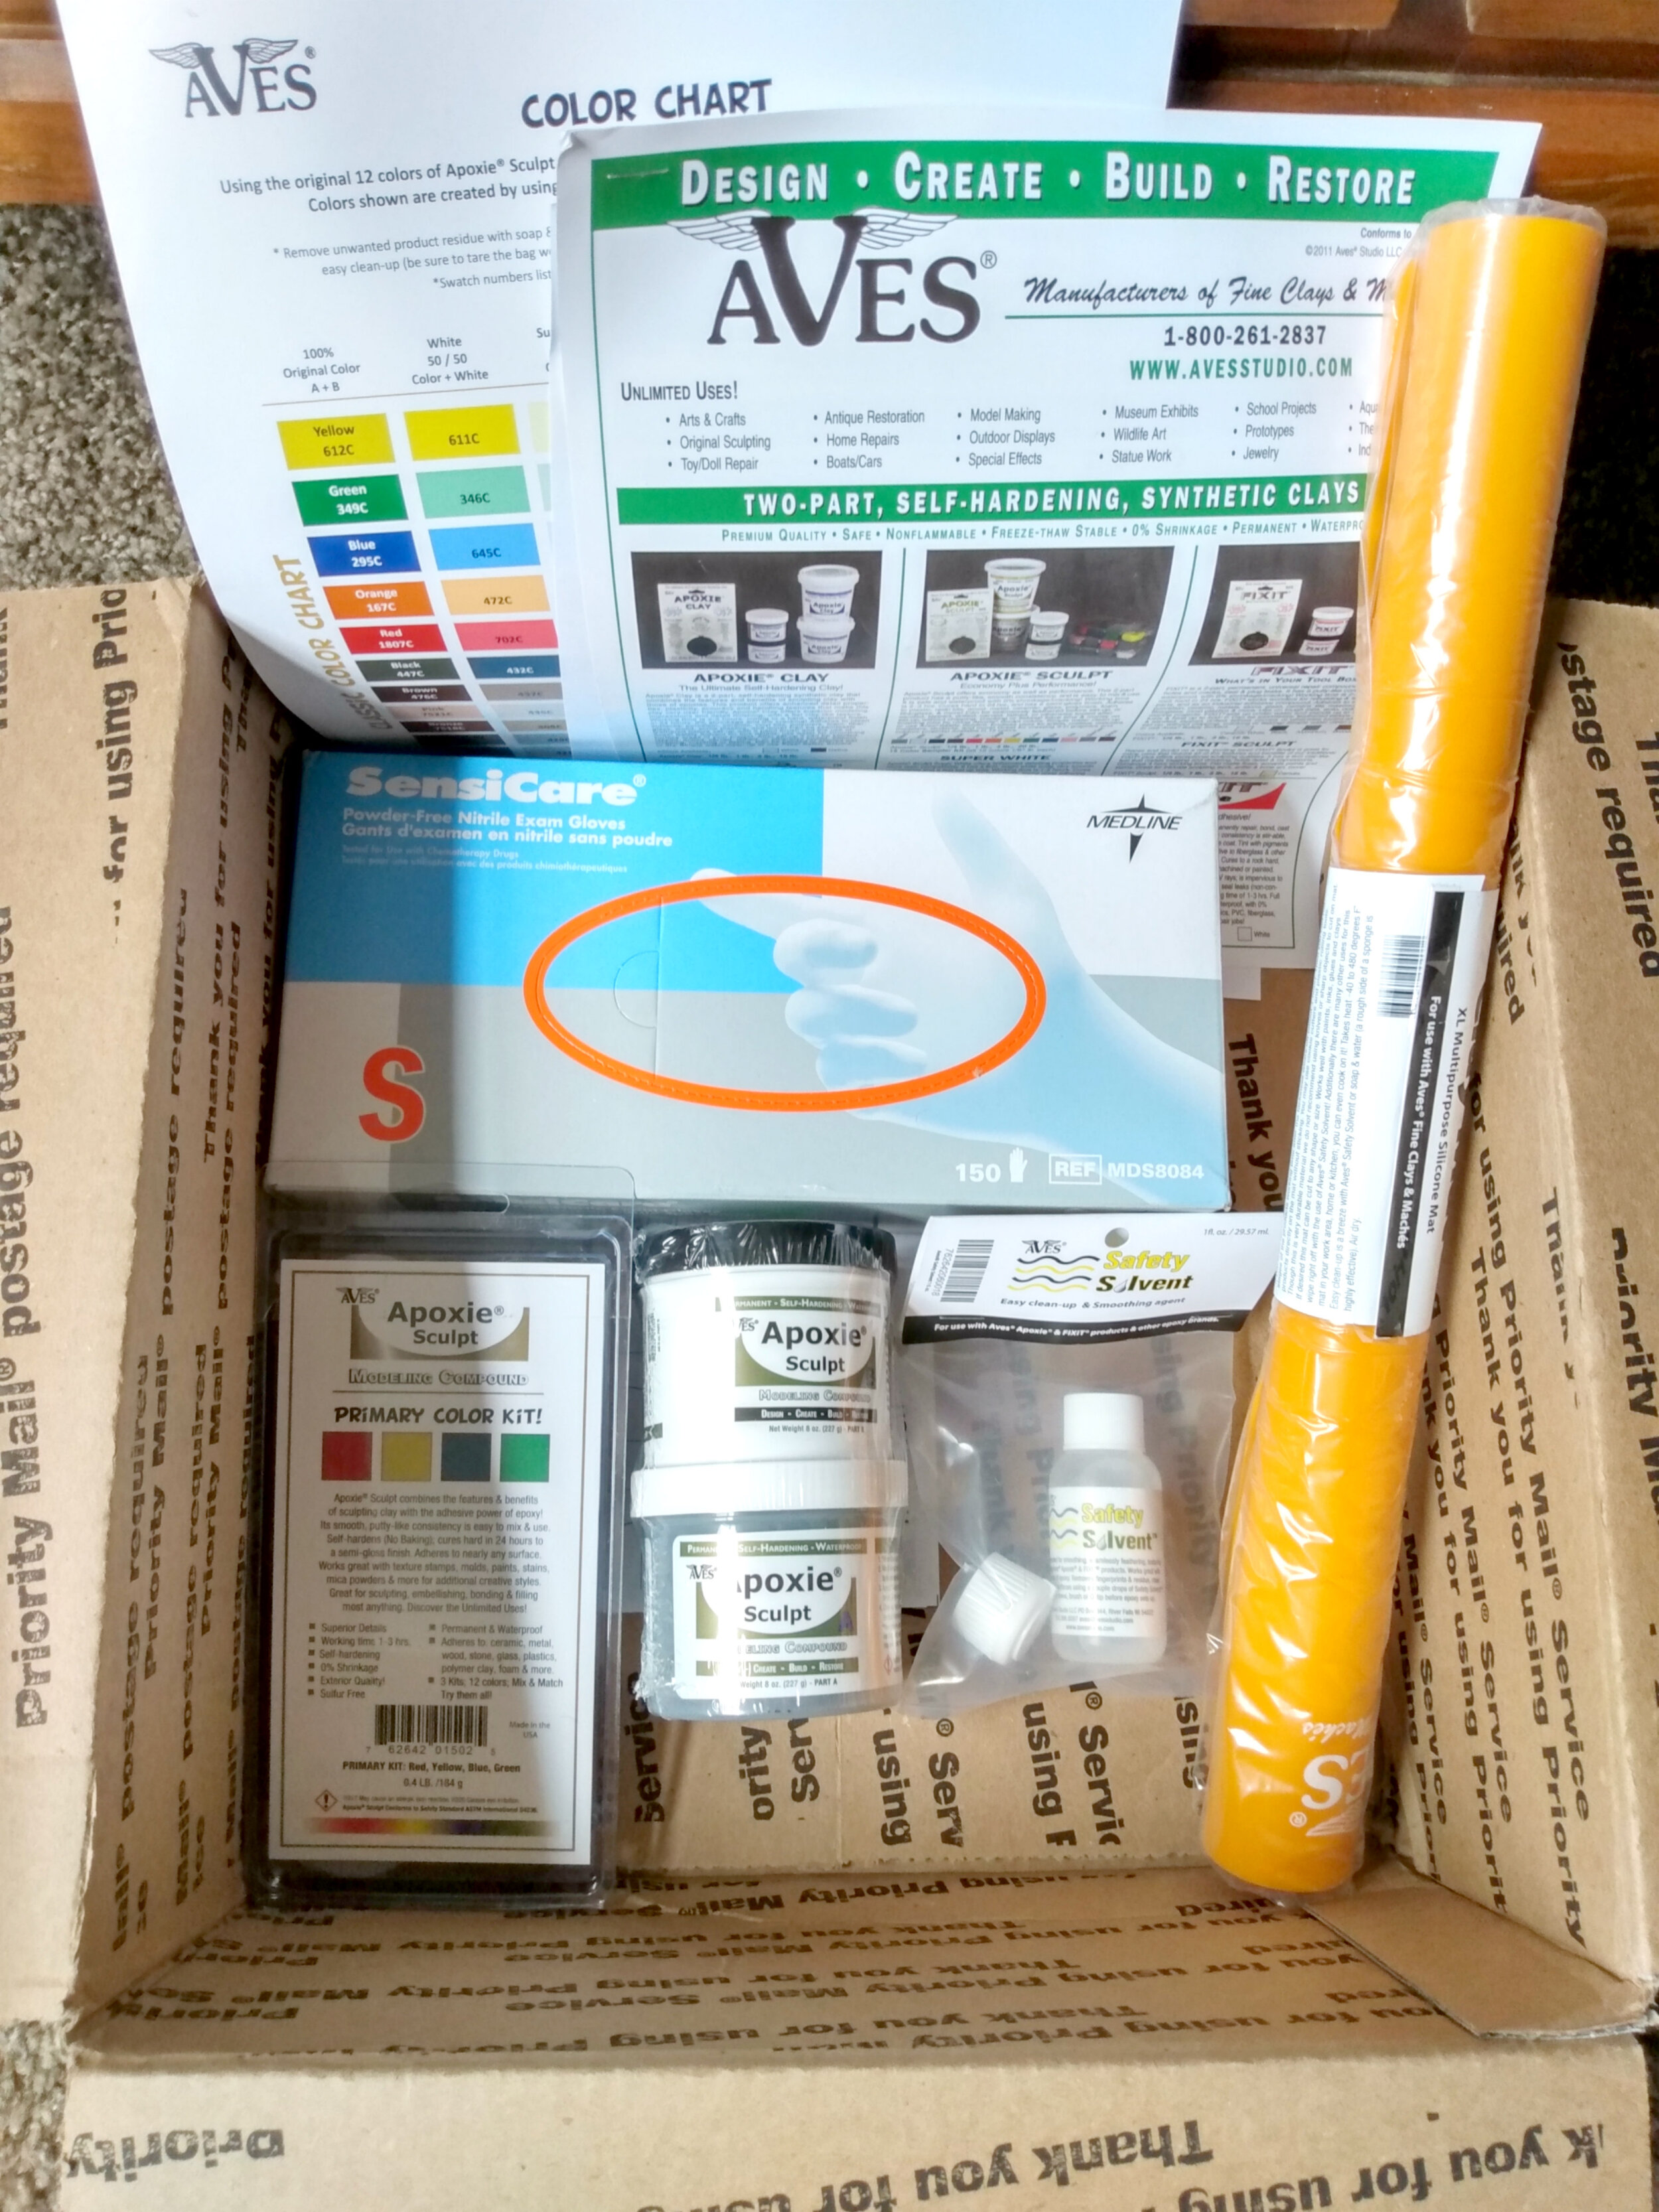
This post is sponsored by Ave’s Studio, they provided me with some of the products used in this tutorial; including 1lb. 2-Part Apoxie Sculpt in Natural, Aves Clay Mat, disposable gloves, Apoxie Sculpt Primary Colors Kit, and 4oz. Aves Safety Solvent. You’ve probably heard me talk about them as I’ve been recommending their 2-part Apoxie Sculpt for years on this blog.
There are so many shapes and designs you can create with Apoxie Sculpt to use in your copper electroformed jewelry designs. I’m going to walk you through how to use this product to create a crescent moon pendant with an amethyst cabochon (or a stone of your choice).
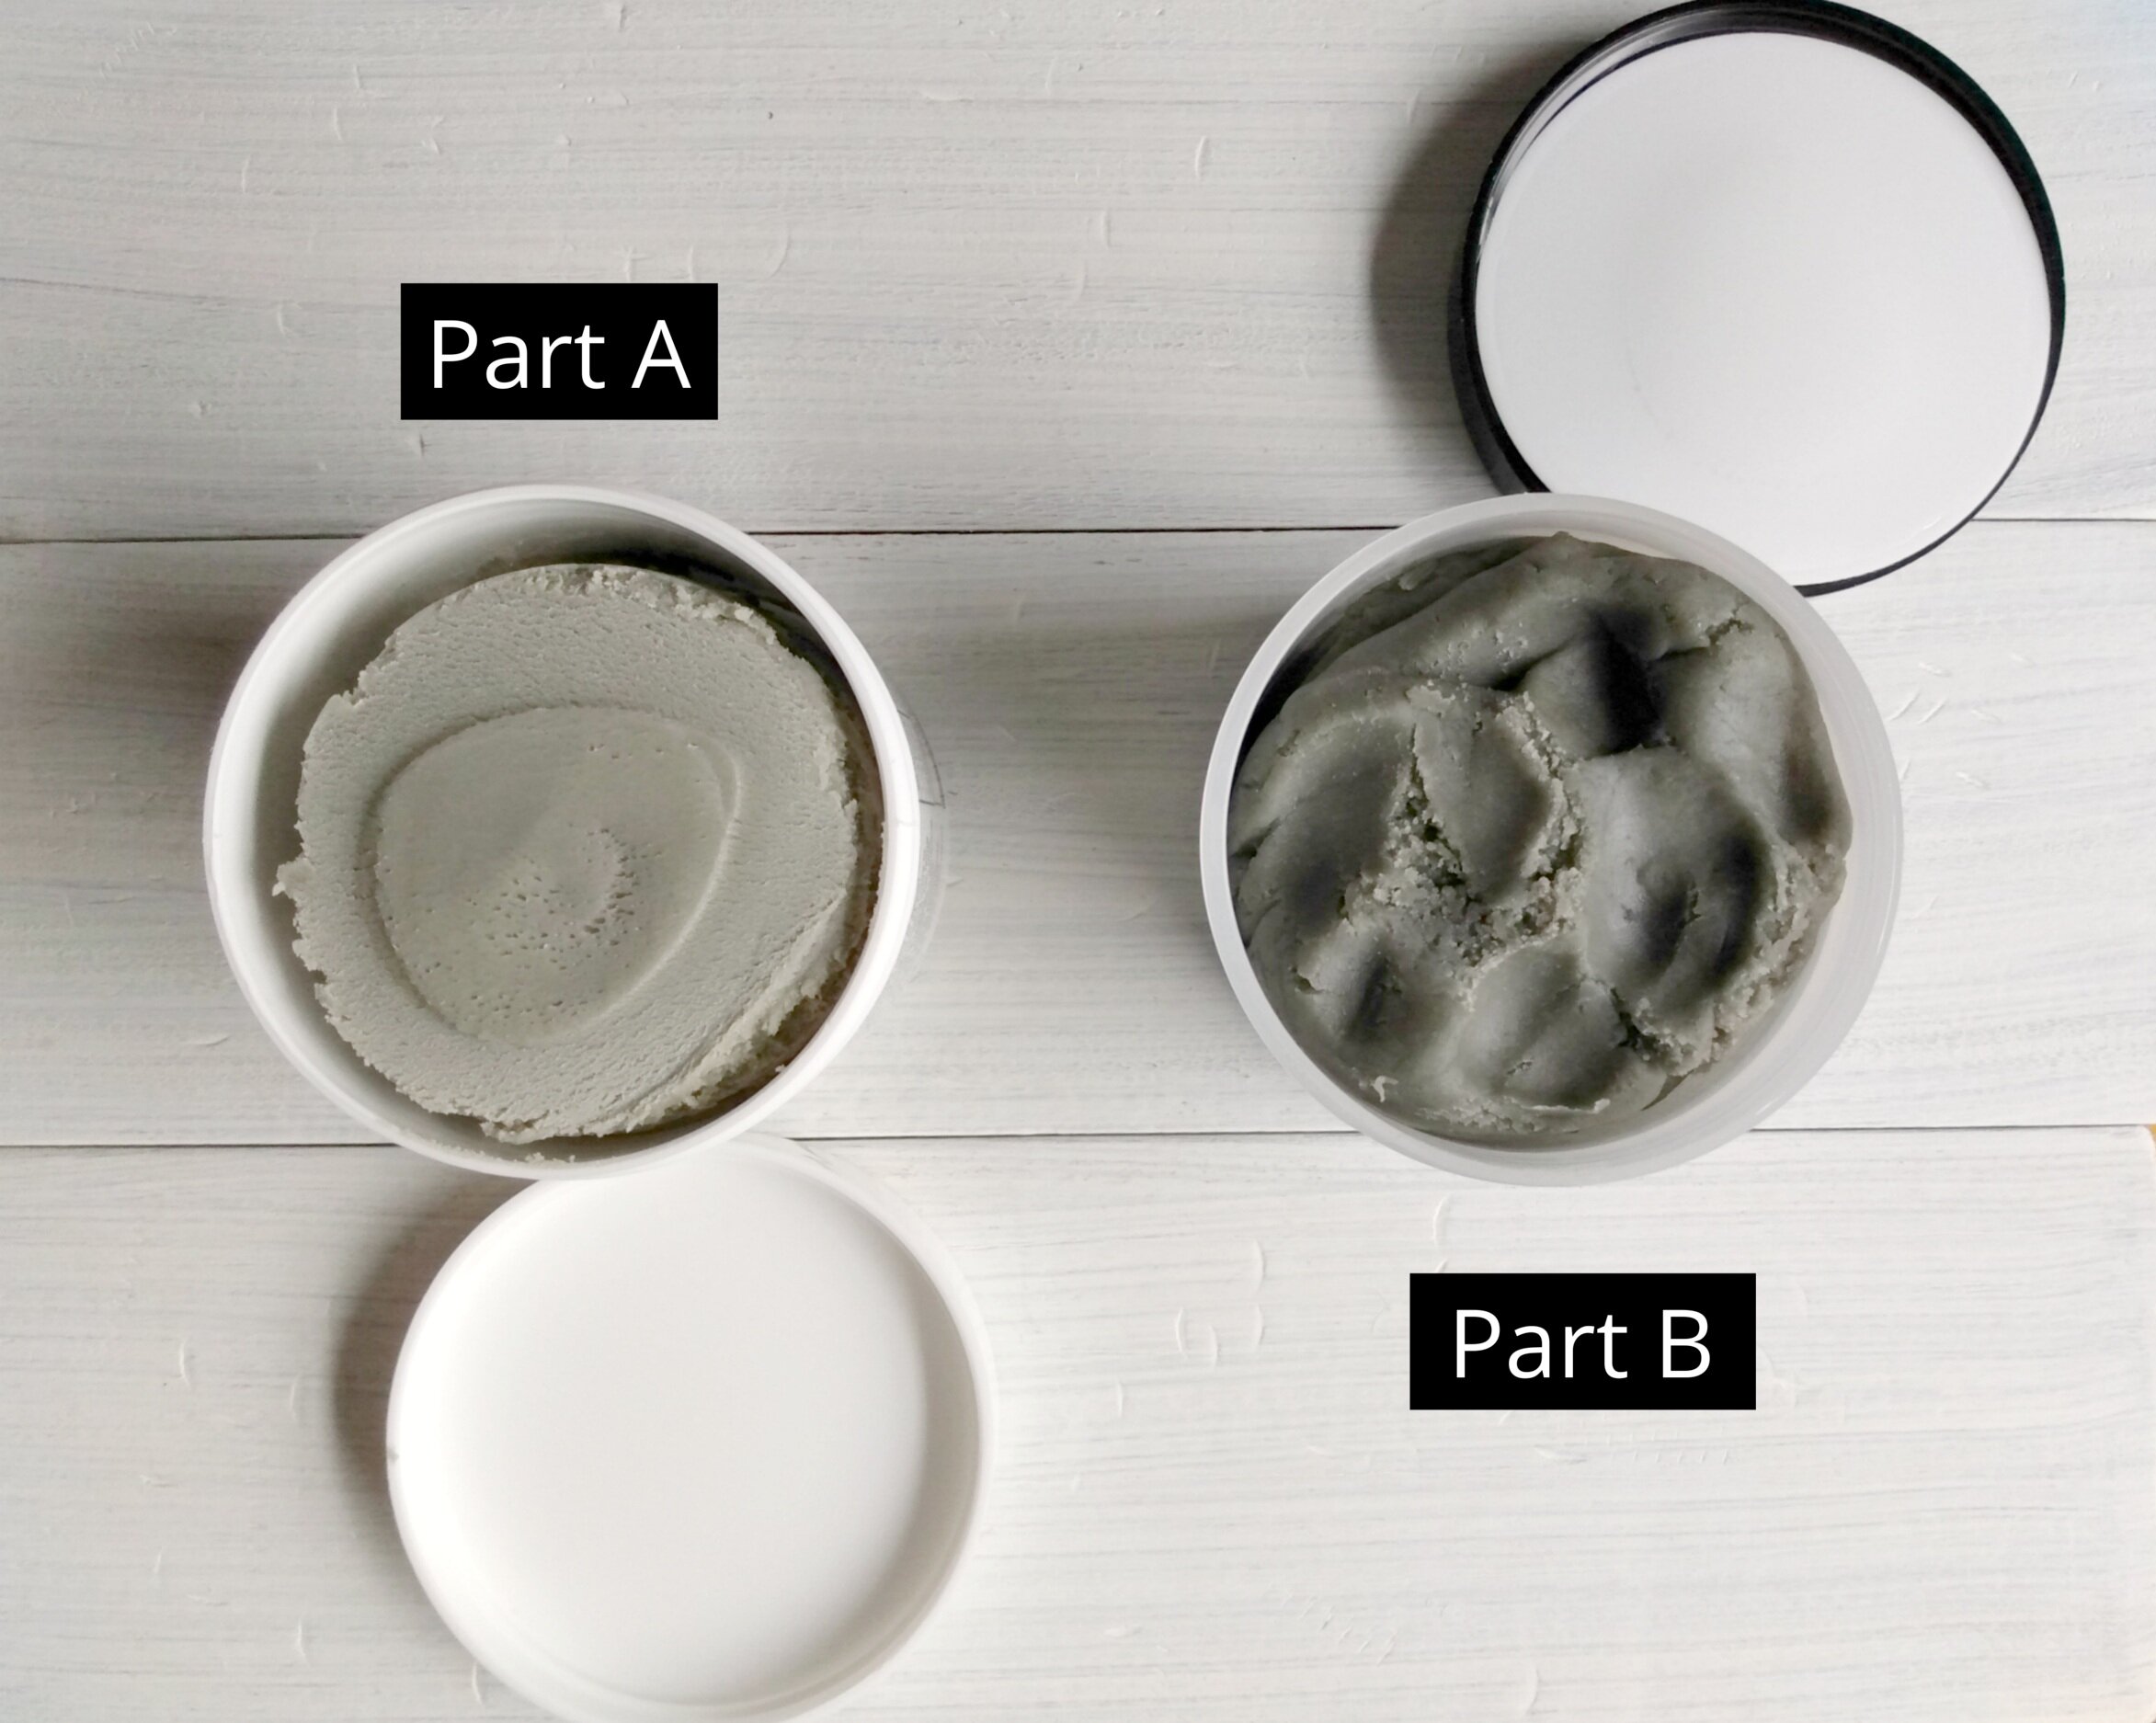
Materials You’ll Need
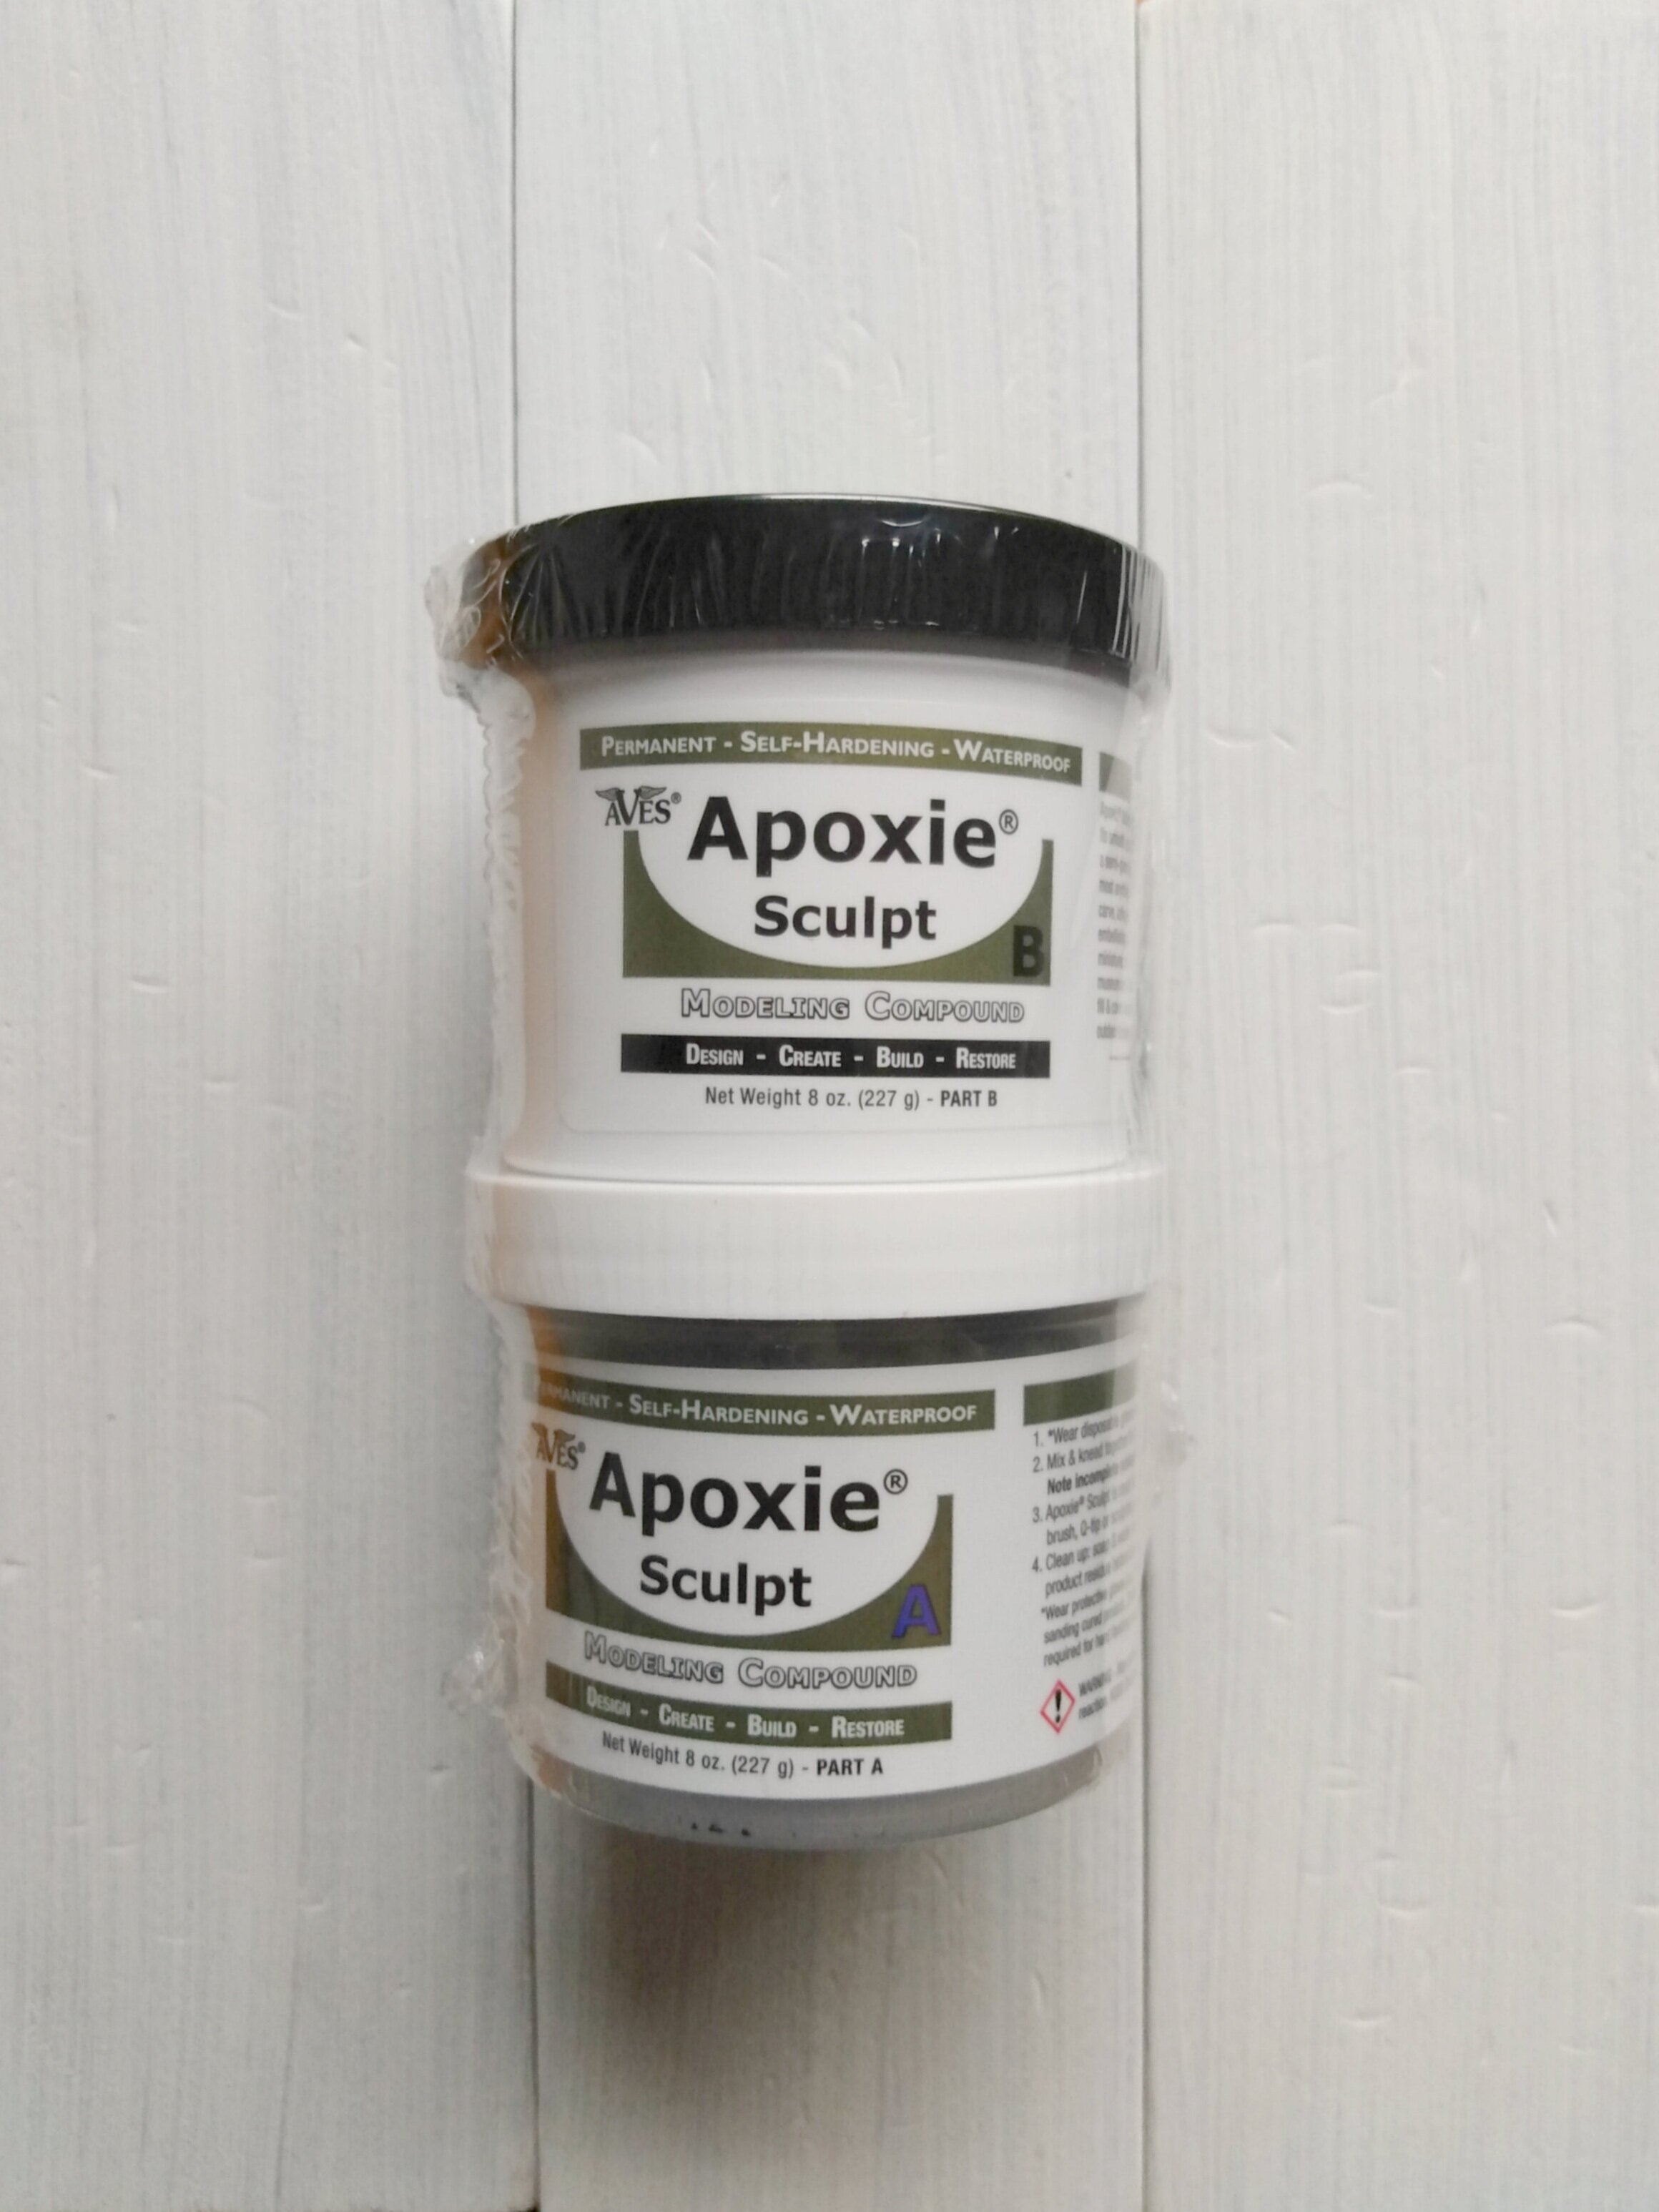
Aves Studio 2-Part Apoxie Sculpt self hardens in 24 hours so there’s no need to bake in the oven. It’s great for embedding with gemstones which makes this stuff perfect to use for copper electroforming. Aves Studios says “Apoxie Sculpt combines the features and benefits of sculpting clay with the adhesive power of epoxy.”
Step 1 | Mix Up The Apoxie Sculpt
Take a small, pea-sized amount from part A and part B and mix them together. Be sure to wear your gloves and use your clay mat so that the epoxy doesn’t stick to anything it shouldn’t stick to.
Go ahead and mix both parts together until you see one uniform color in the clay.

Step 2 | Start Shaping Your Design
One of the great things with Aves Studio Apoxie Sculpt is that you have plenty of time to work with it and get your design just right before it begins to harden, 1-3 hours to be exact. So you’re not in a rush when working with it. Unlike other 2-part epoxies that have fast working times and will begin to harden within minutes.
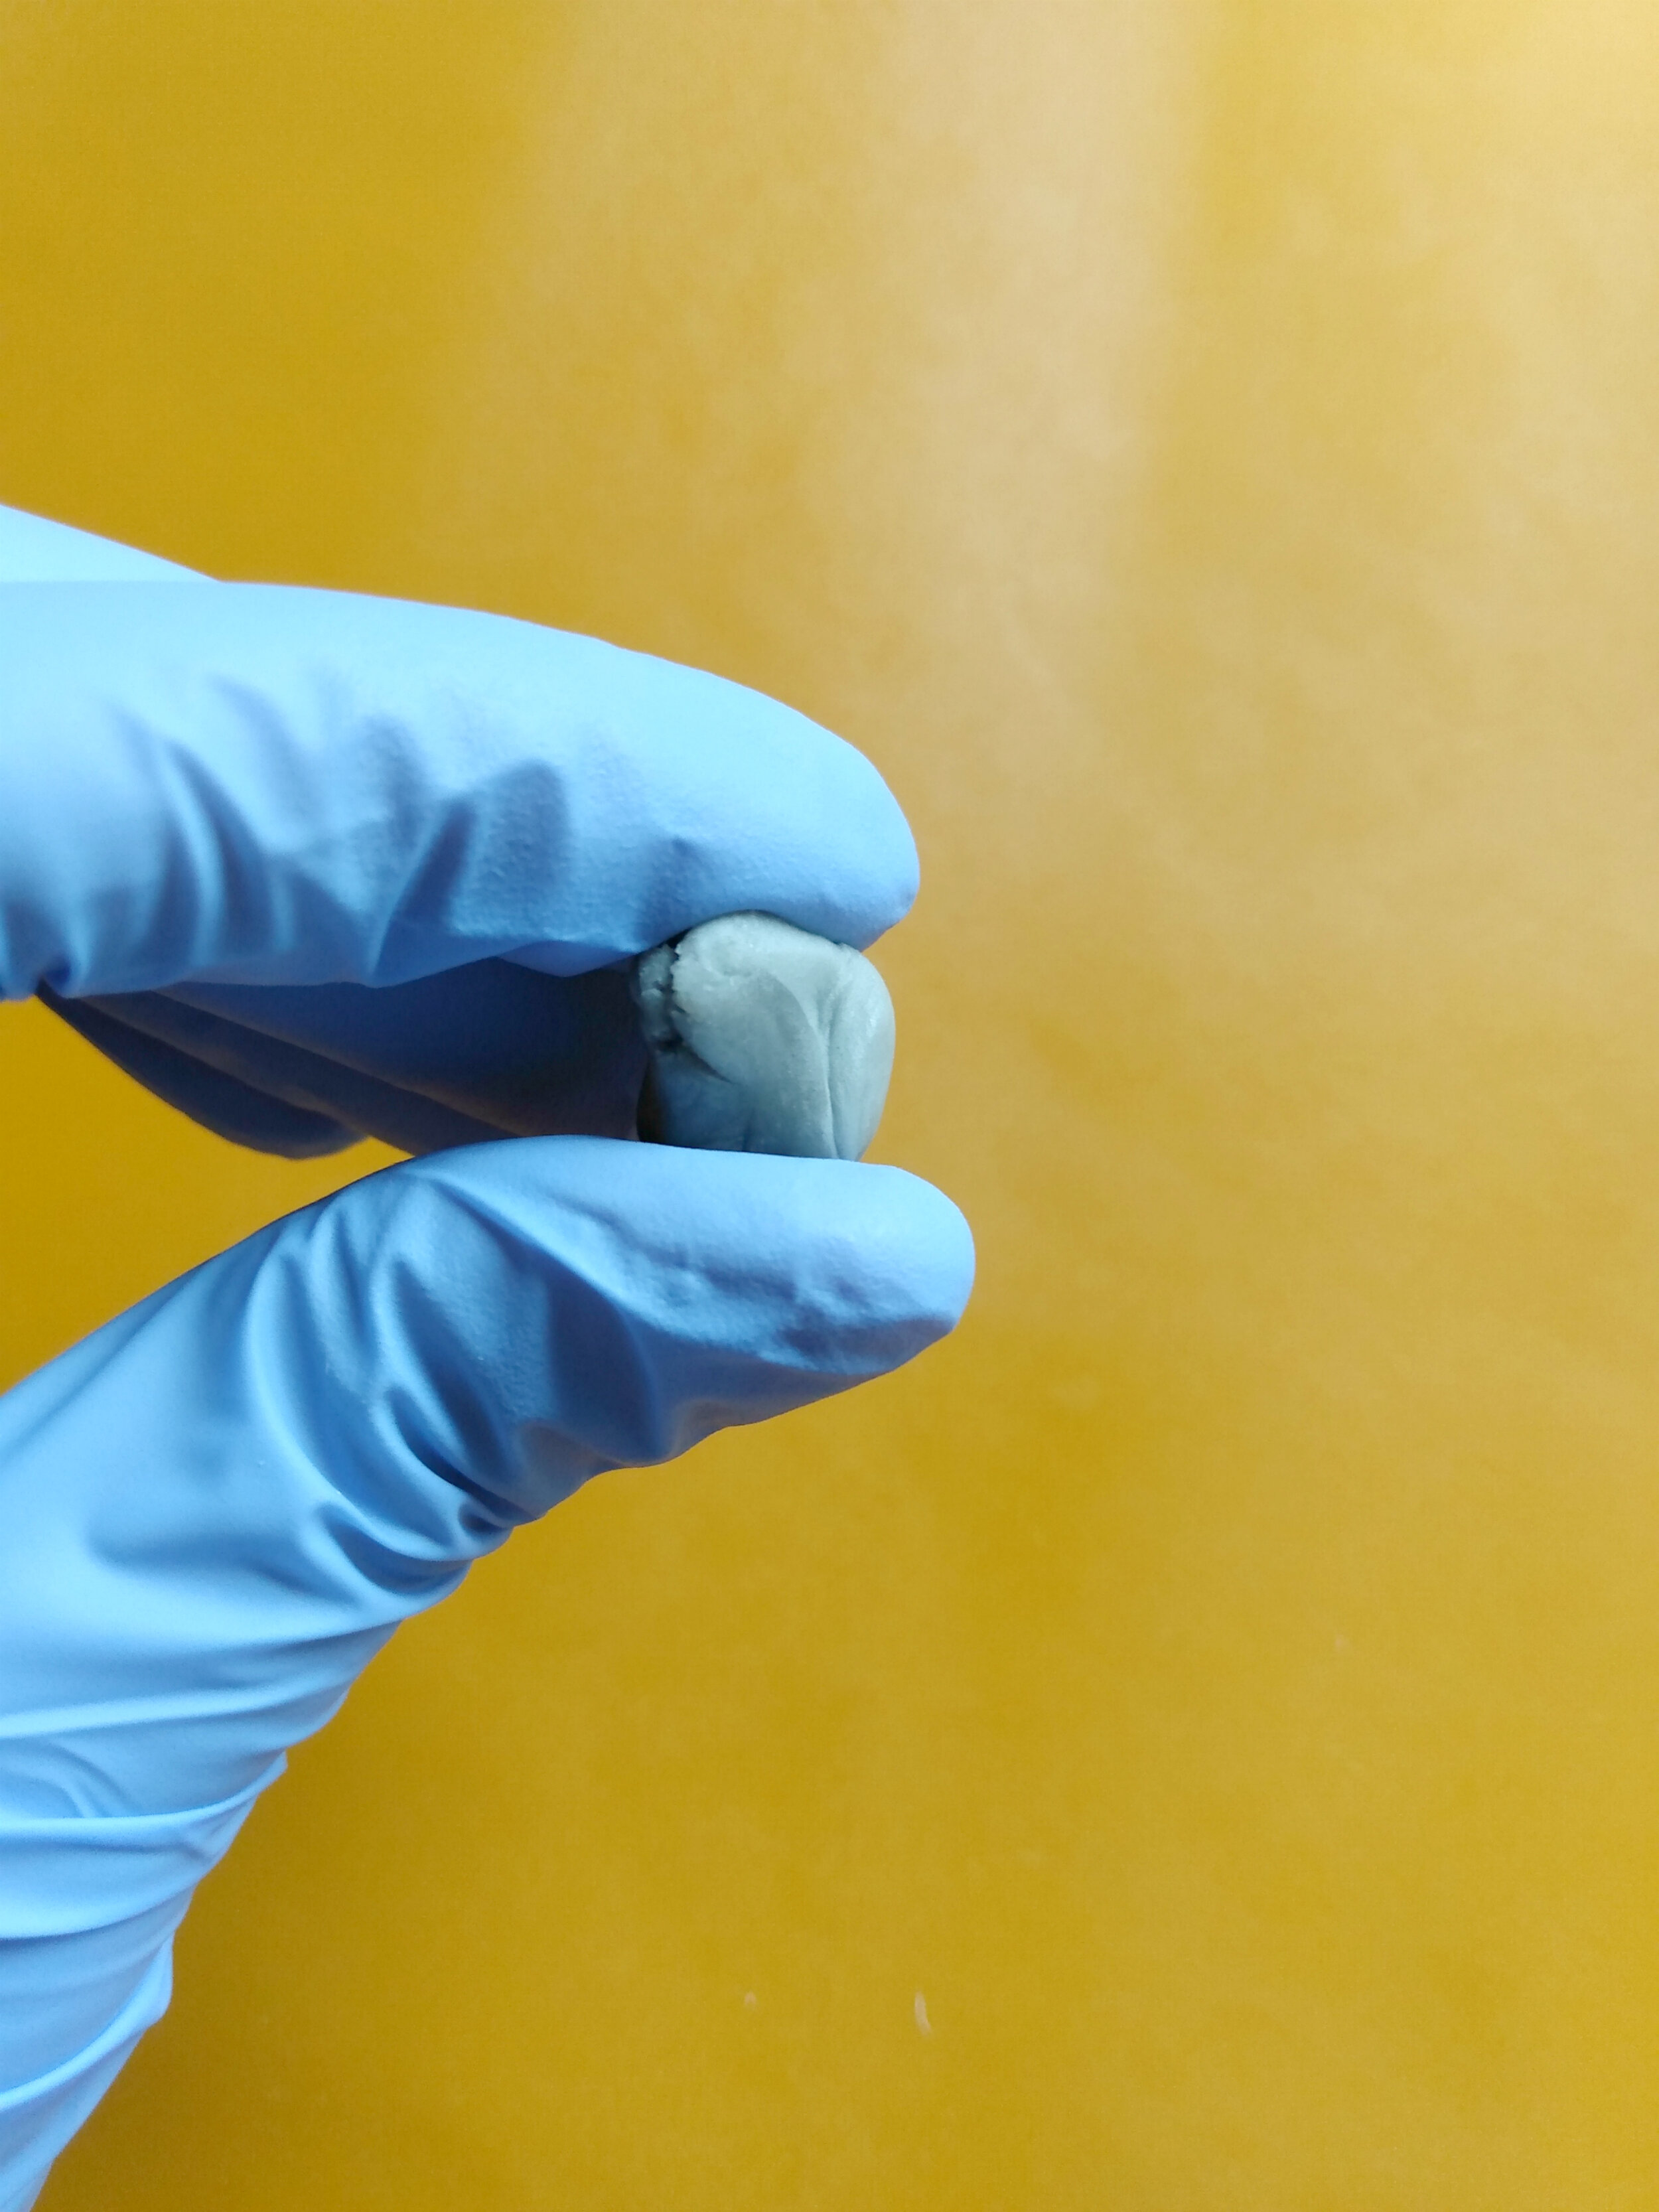
Once I have my 2 parts mixed really well, I create a sphere. Then I take the palm of my hand and turn that sphere into a flat circle on my clay mat.


Once I’m happy with the size of my circle I take my amethyst cabochon (6x8mm) and place it so that it will sit inside the crevasse of the crescent moon.

Step 3 | Cutting Away Excess Clay
Next, you want to start cutting away any excess clay and begin the finer shaping of your design. I used a box cutter to cut away pieces of clay and to begin shaping the crescent moon.

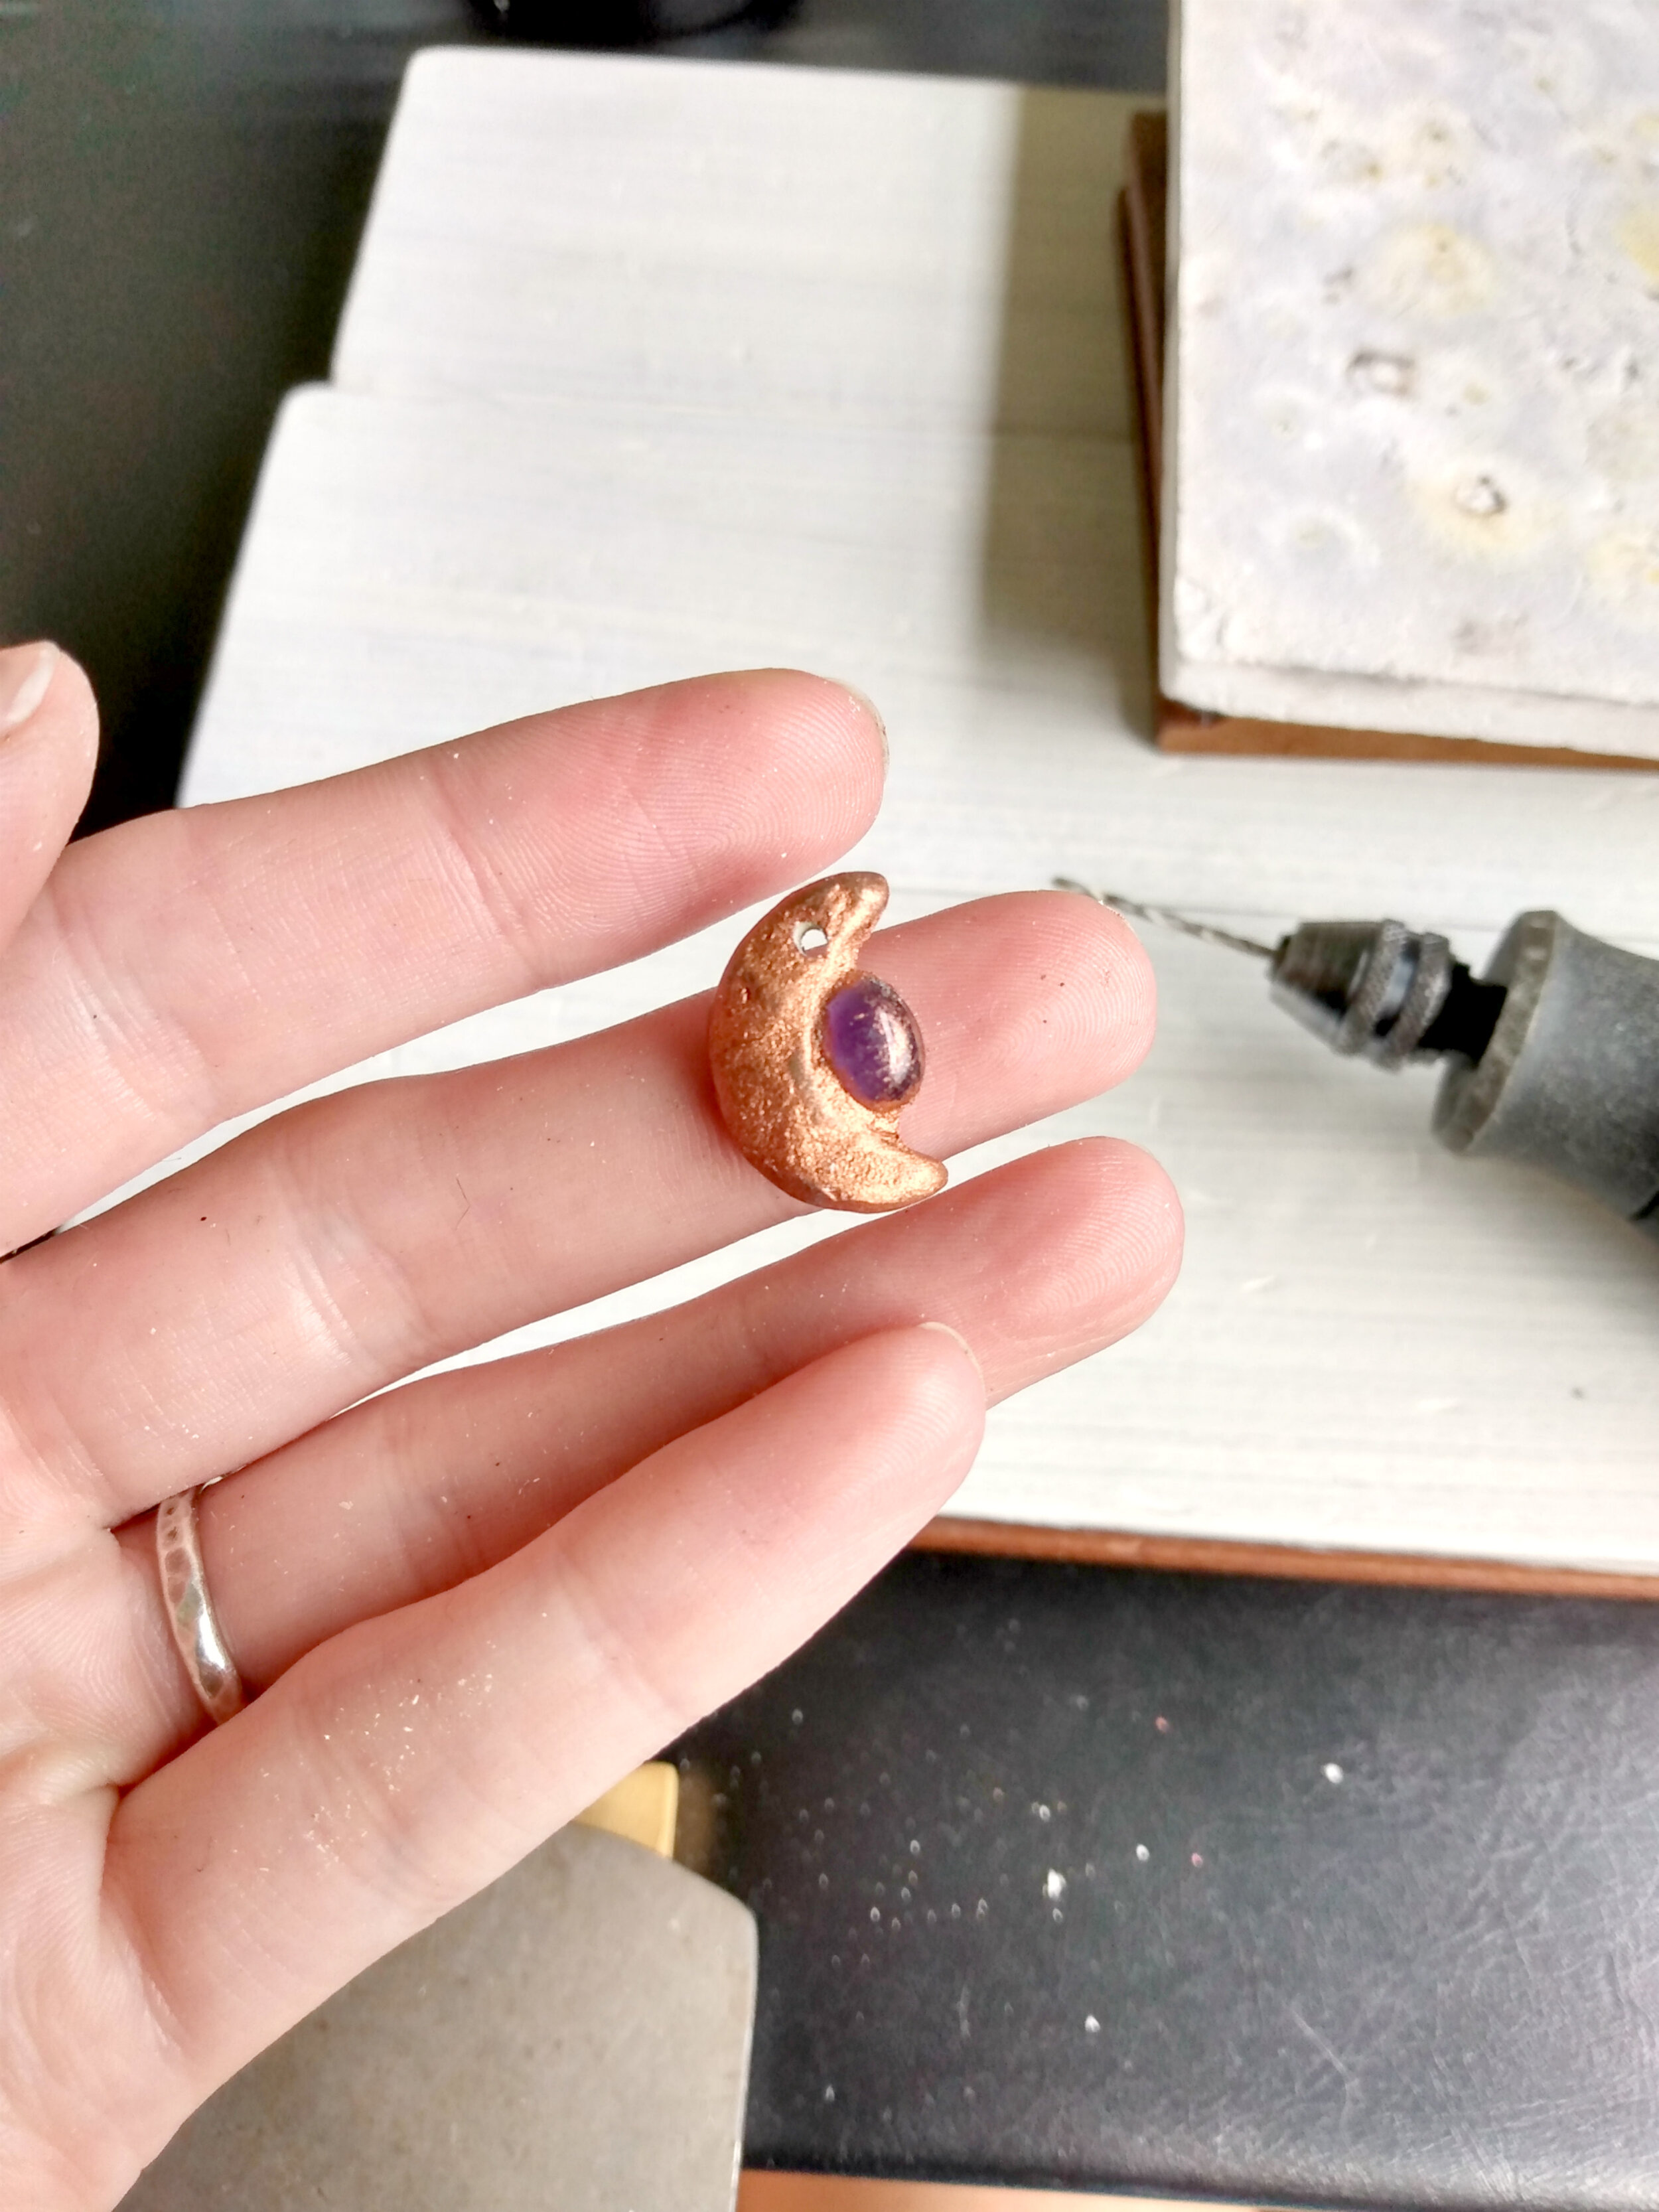
At this point, I would also make a hole for your bail. I completely forgot to do this so I had to drill a hole after it had cured, which you’ll see later in this tutorial.
I also used my finger to help shape my crescent moon.
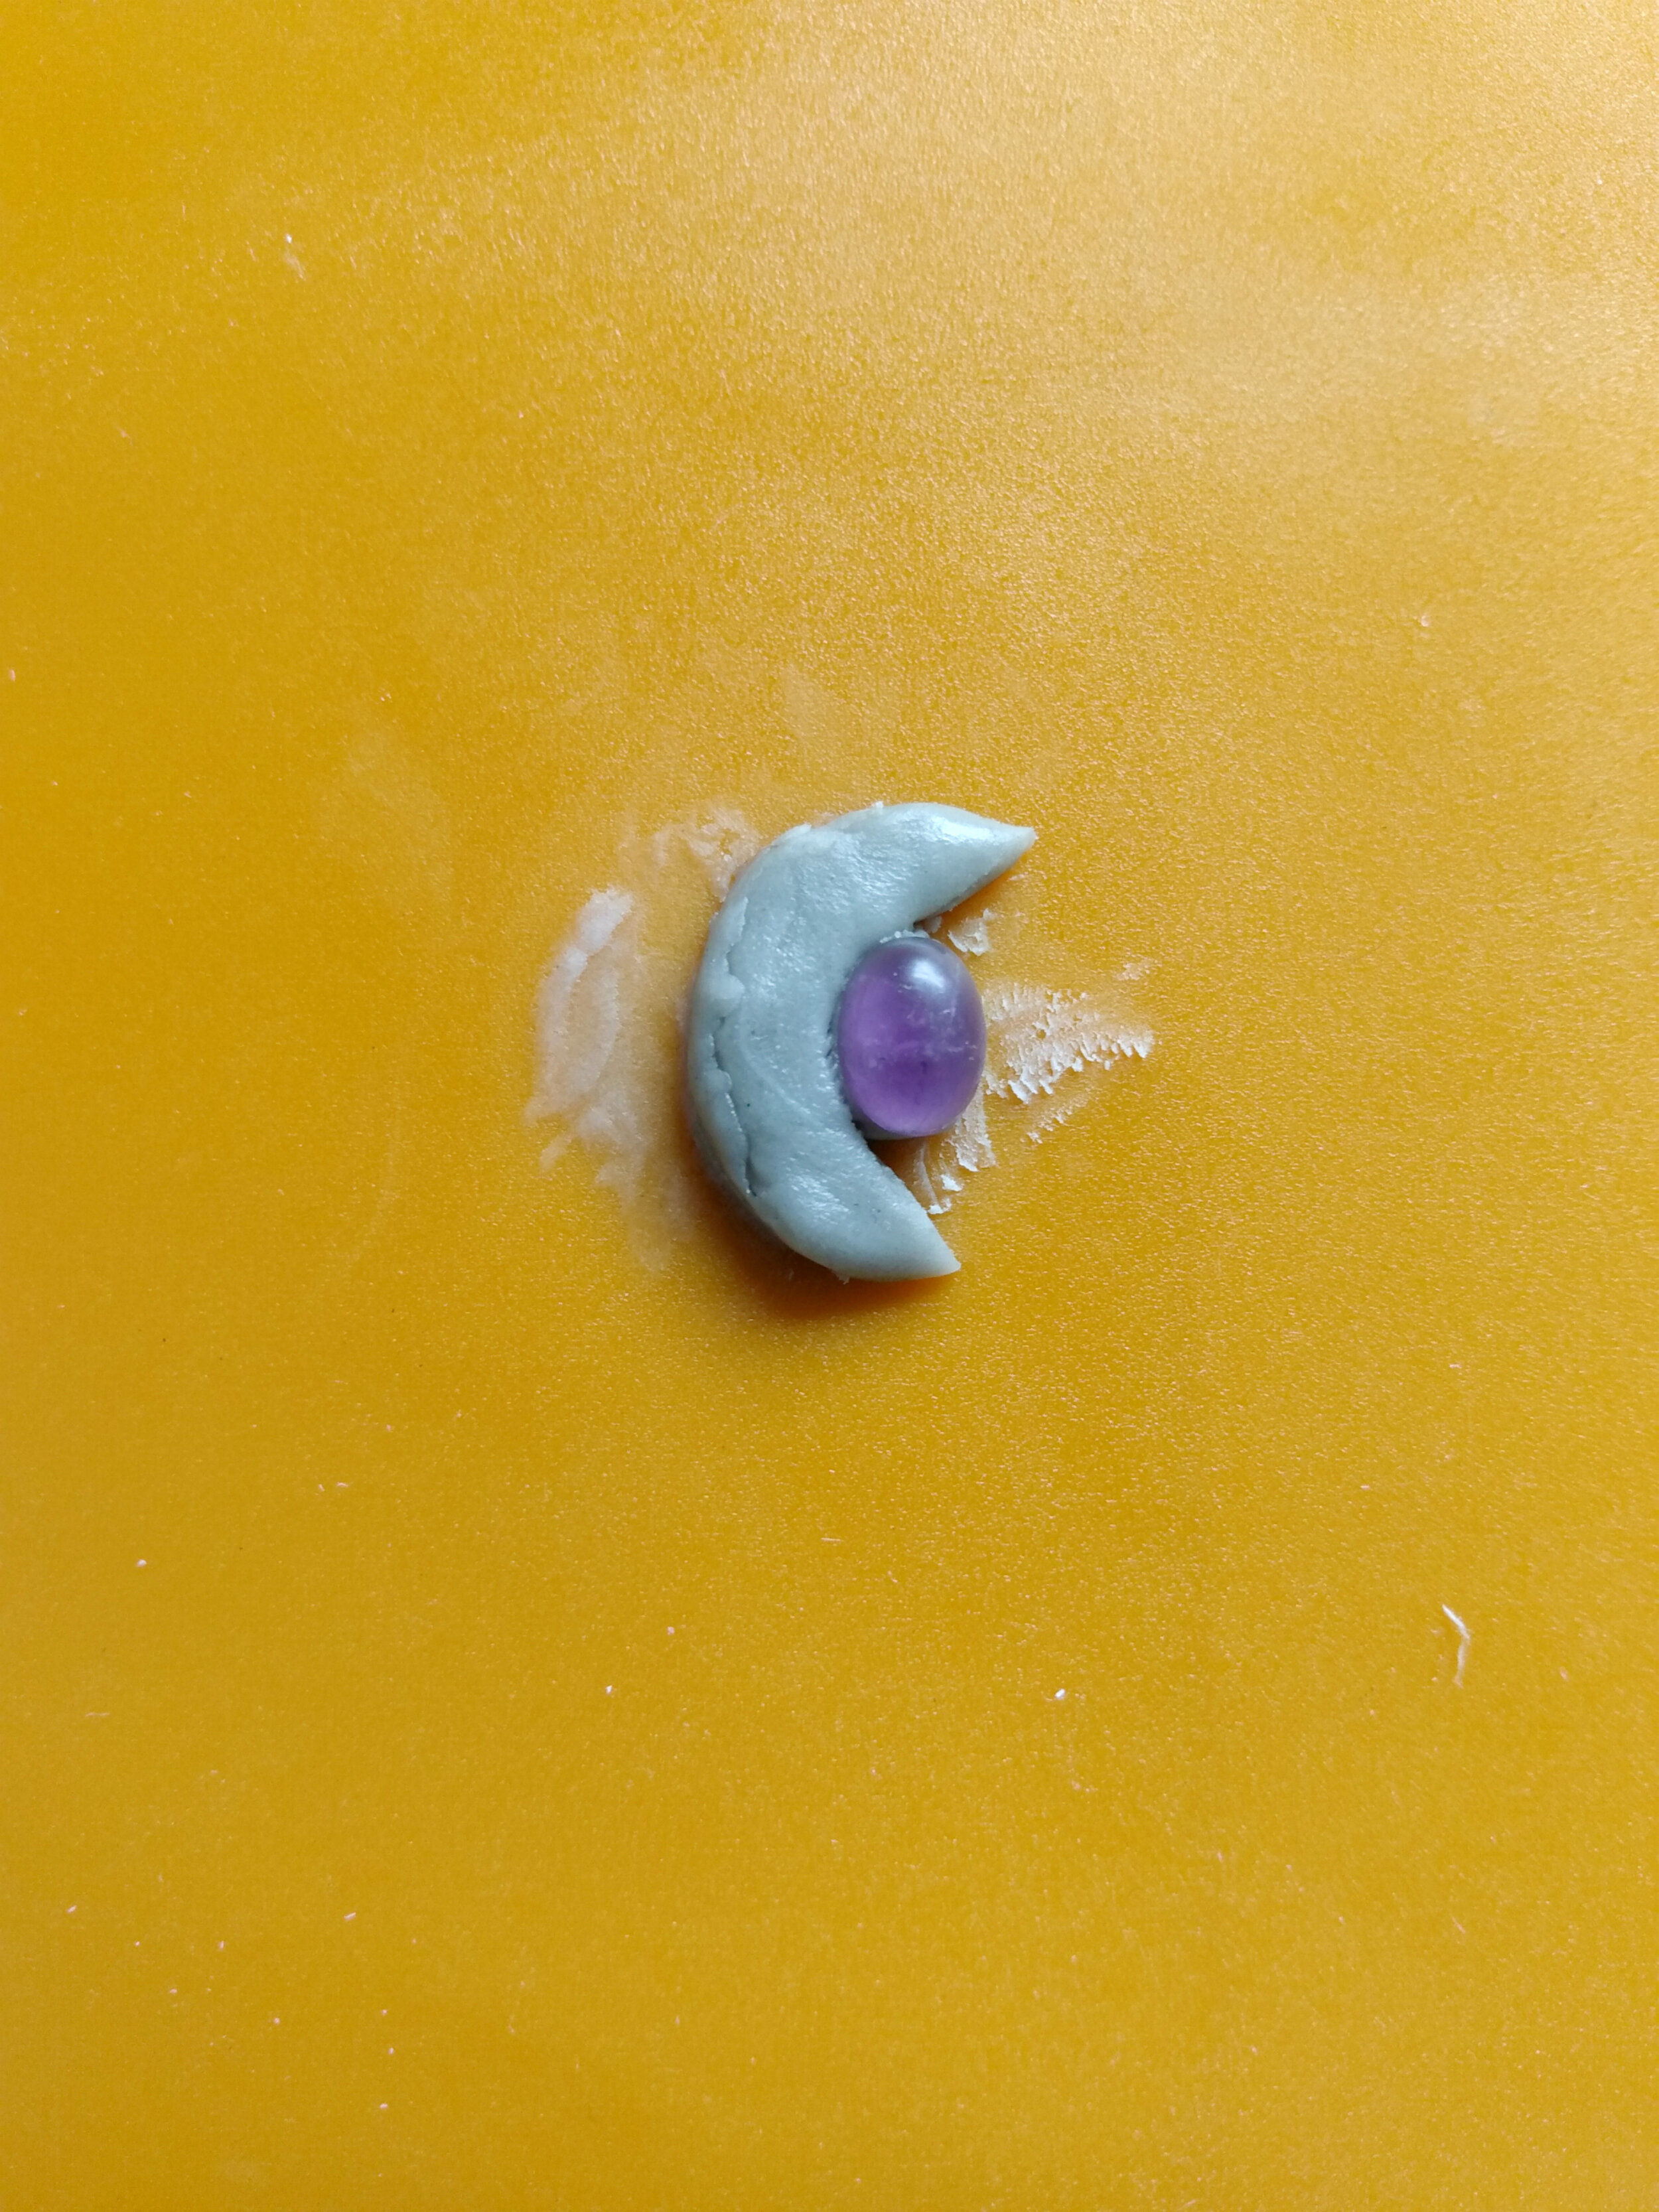

Step 4 | Adding Details to your Design
I went through some of my drawers in my studio and just found some random things I could use to make divets and craters in my moon shape.


A tip I learned from the Aves Studio tutorials was to apply some oil to the clay tool so the tool doesn’t stick to the clay. So I just used some hemp oil I had on hand. I’m sure you could also use coconut oil or even cooking oil.
Once you’re happy with how your design looks you can just leave it on your clay mat until the next day and just peel it off once it’s completely cured.
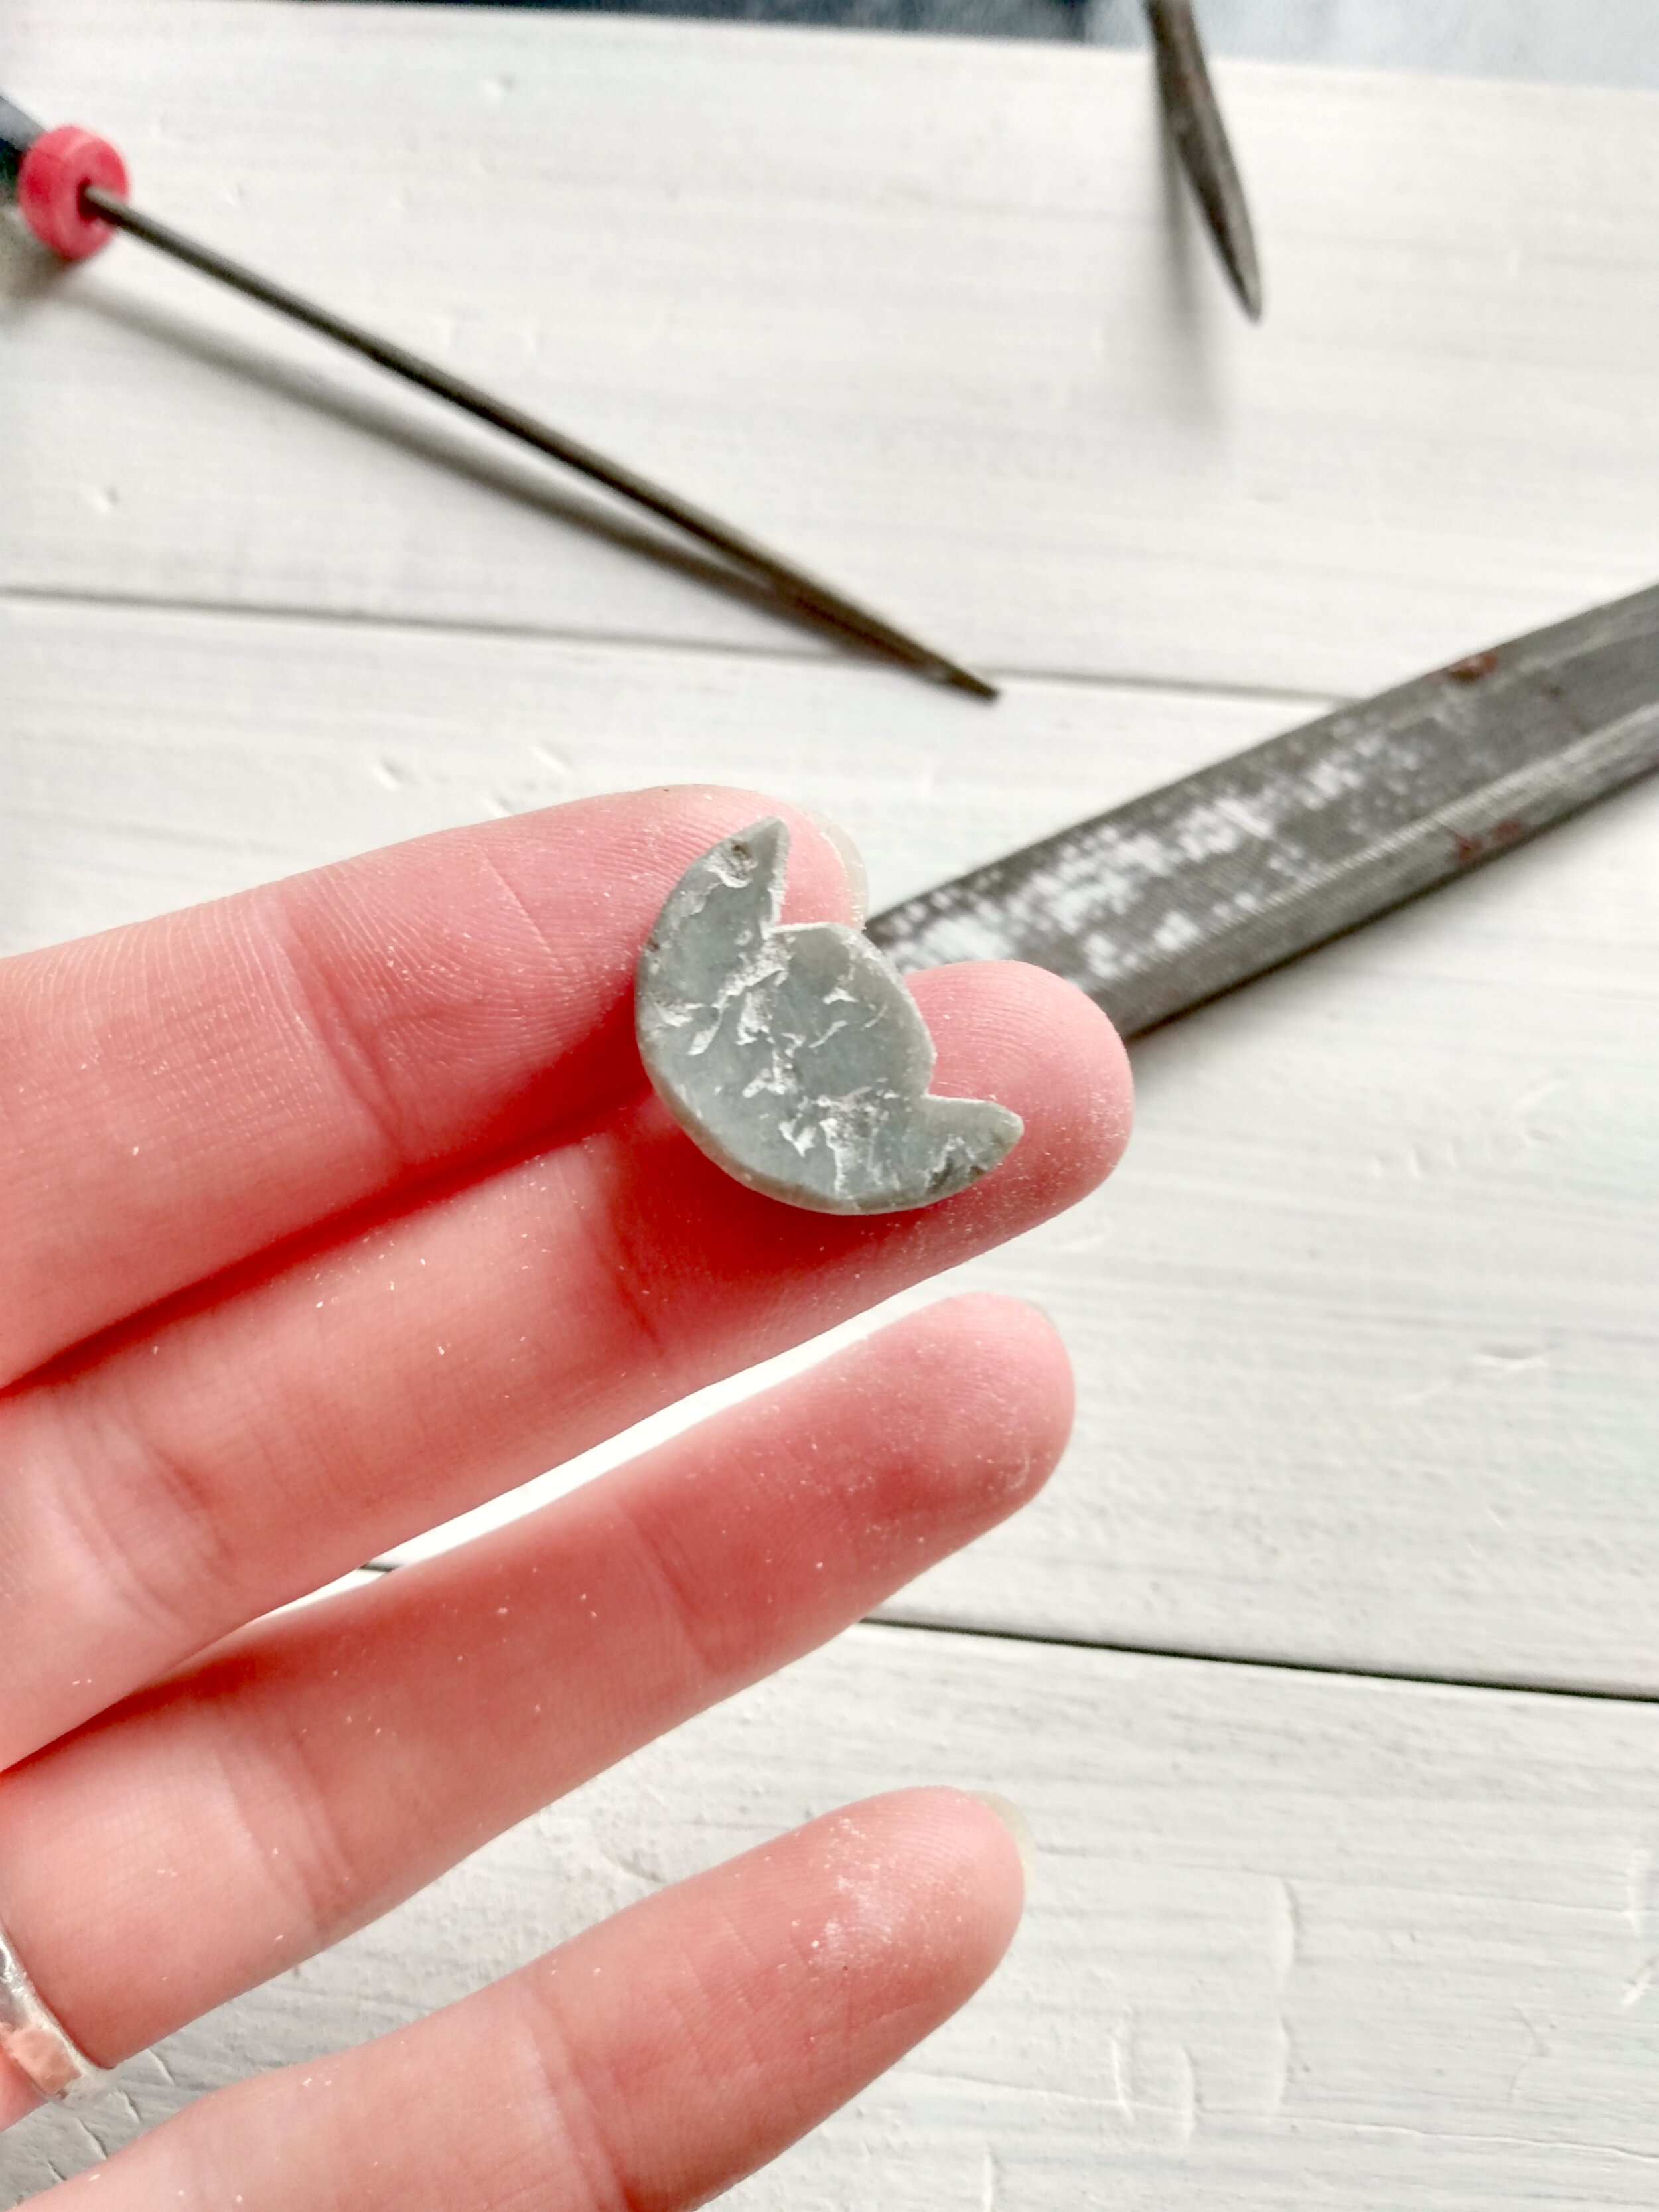
Ste 5 | File Clay Once It’s Cured
After the clay has fully cured and hardened I took my file to just shape up the moon a bit more. I filed the back flat and filed around the stone.
I used needle files for the more detailed filing, like between the points of the moon and I used my larger metal half-round file to file the back flat.

Step 6 | Paint Your Design with Conductive Paint
Whether you use graphite or copper conductive paint you want to go ahead and completely paint your piece, except for the stone. Just paint a bezel around the stone.

A tip is to paint one side, let dry completely, then turn it over and paint the other side and let completely dry. Or, if you made your hole in step 3 (like I should have done) you can use a piece of 24g copper hanging wire and hang your pendant on something. Then you can paint your entire piece in one go.
As you can see this is the point where I remembered I needed to drill a hole for the bail and in order to hang my piece in the solution. So I went ahead and used my rotary tool and a drill bit to drill a hole, then applied more conductive paint inside the hole.

Step 7 | Electroform Your Design
Place your copper anode into your jar or whatever container you will be using to electroform in. Create a bus bar from copper. A bus bar is just a copper wire that sits across the top of your bath that you will use to suspend your piece. Create your cathode/hanging wire.

Pour your copper electroforming solution into your container and submerge your piece into the bath. Connect your red positive lead to your anode and your black negative to your cathode (I attach mine to my copper bus bar).
Flip on your power supply and start on the lowest setting, For me and this design I’m setting my amp to .4 and I will go up or down depending on the progress of the electroforming.

Step 8 | Polish Your Piece
Once your piece is finished and you like the amount of copper that’s been plated onto your piece it’s time to polish it.


You can use the polishing method that you prefer. I personally use the radial polishing discs, it just eliminates the use of compounds which can get kinda messy.
You can also give your piece a patina at this time, I decided to keep mine as is.
Now you have a cool pendant and you know how to use Aves Studios 2-part Apoxie Sculpt to create just about anything you want for use in copper electroforming. I would love to see what you make using Apoxie Sculpt! Feel free to post your photos in the comments below! Also, check out this fun video by Aves Studio on how to use their Apoxie Sculpt to make fun bangles!