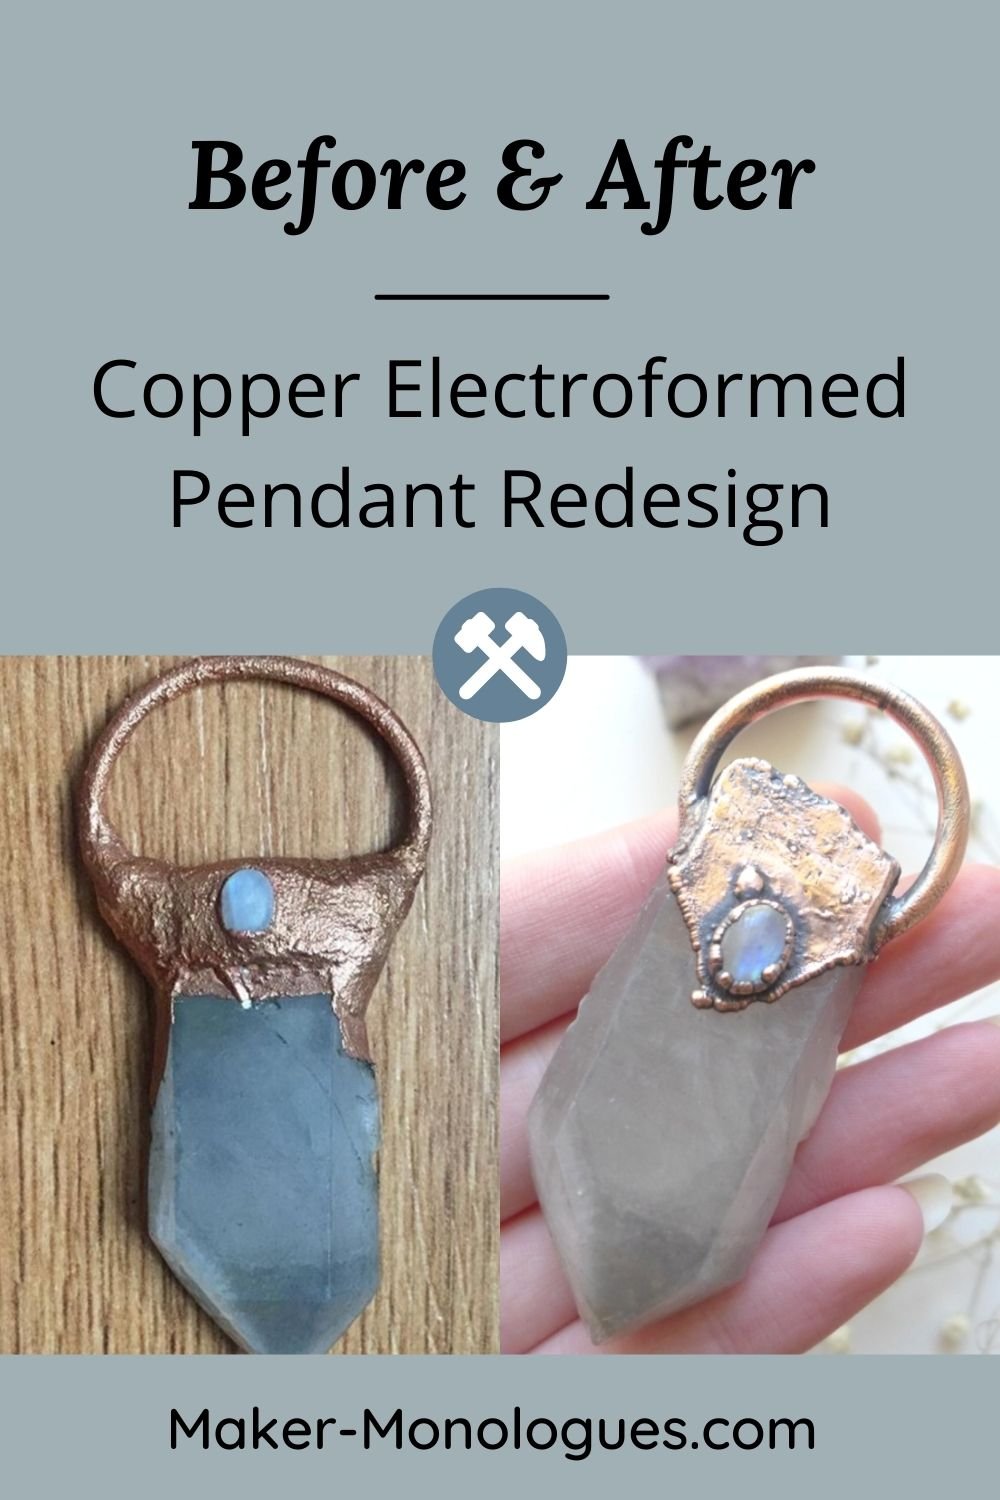
Copper Electroformed Pendant Redesign
/

For those of us that are still hoarding our old copper electroformed jewelry projects that didn’t make the cut, there’s still hope for saving those gorgeous crystals we can’t seem to let go of. This simple copper electroformed pendant redesign tutorial will ensure you’re able to fix any of your electroformed mistakes.
This pendant, in particular, is a piece my friend sent me to fix for her and, let me tell you, it was a lot of work to fix! This stone was very sentimental for my friend. So she sent it to a jeweler to have made into this pendant. Therefore, when she got it back and wasn’t very happy with the result I can imagine how she felt thinking there’s no way she can fix it. This friend and I go way back to my macrame jewelry days, so I was determined to help her out!
*This post contains affiliate links. I earn a small commission if you purchase any recommended products at no extra cost to you. Affiliate sales help me to keep this blog going so I can continue bringing you free content. Thanks for your support!
The stone is a smokey quartz point with a tiny rainbow moonstone cabochon in the center.
Here’s what my friend wanted:
A less bulky look of the copper
A more circular bail (cause the original bail on this pendant looked bent out of shape)
She also wanted to add a little bit of a geometric design to match the point of the stone.
I was up for the challenge, that’s what friends are for!
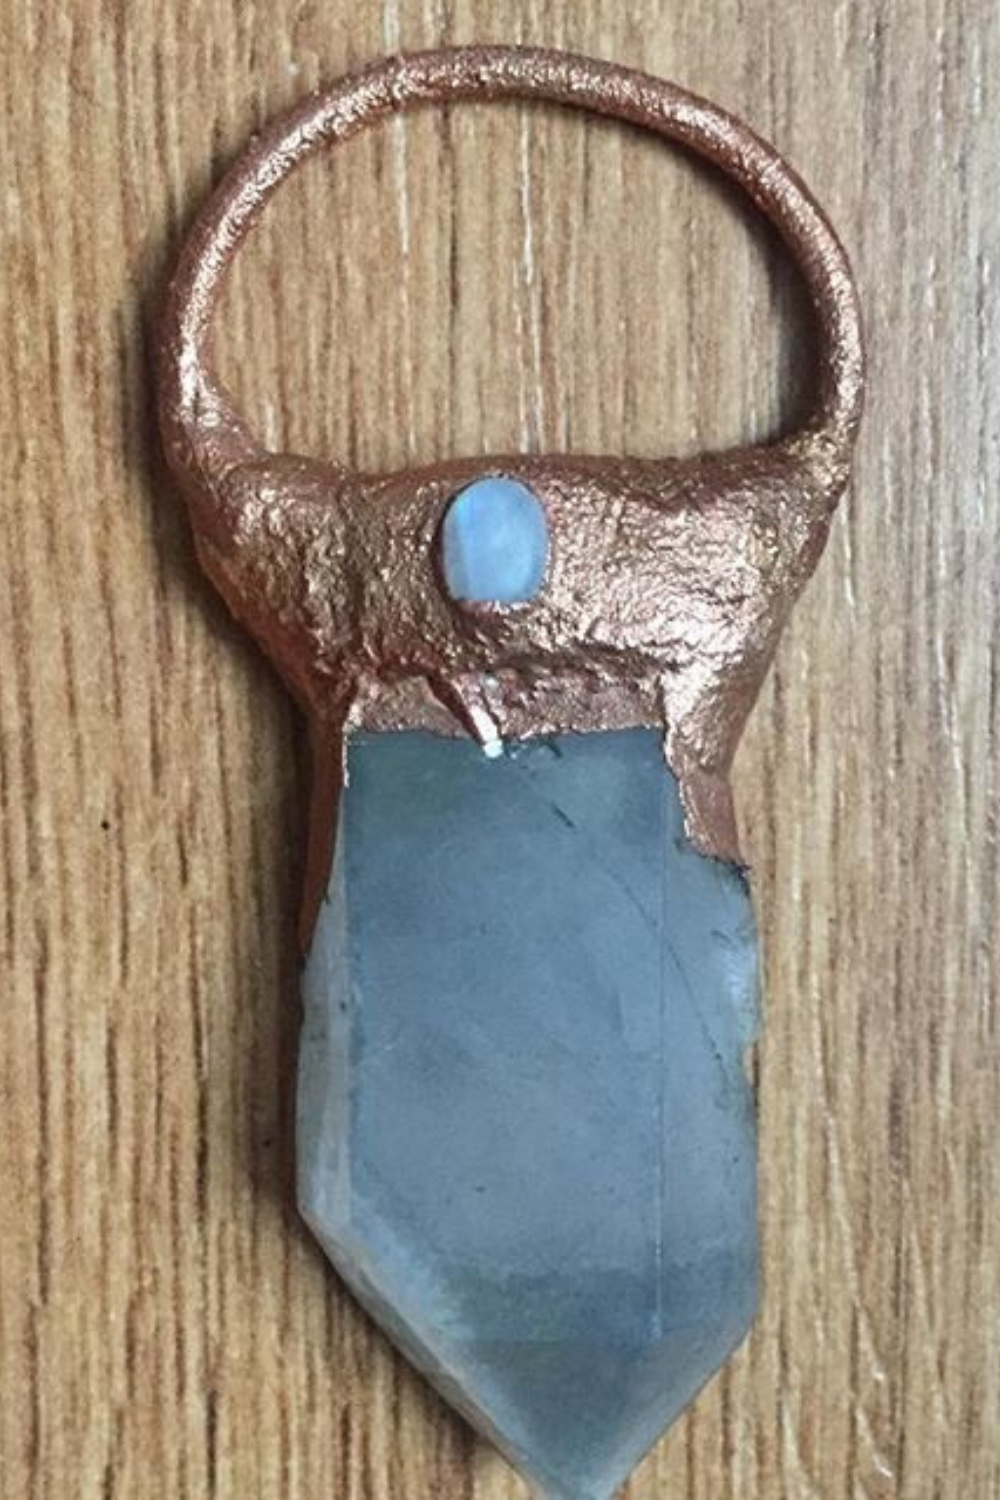
The first image shows the piece before. You can see that whoever made it, in my opinion, used too much epoxy, which is why it was looking so bulky.

The second image shows me grinding the metal off (what a difficult process!). I should also note here that whoever made this only electroformed a thin layer of copper, which made my job easy, but typically you want a thicker layer.
The bit I used to grind off the metal and the bulk of the epoxy was an aluminum oxide grinding stone (the tan-looking one, typically comes with your Dremel bit kit).

This literally took about two hours to completely grind down. I took breaks every 30 minutes to give my hands and rotary tool a rest. I also had to go slowly toward the edges as to not scratch the stone itself.
Then I used one of those cutting wheel bits to get the bail and the cabochon off because of the super glue.

Next, I glued a new bail and the moonstone back onto the quartz after cleaning it up and polishing the stone really well. I only applied epoxy around the two points where the bail connects to the quartz. I didn't find it necessary to apply epoxy around the moonstone because I used super glue, the stone already sits flush on the quartz (and the main reason you use epoxy is to fill gaps), plus the copper layer will secure it to the piece.

Next, I applied the copper conductive paint, creating that geometric design element she wanted. You can see that I didn’t add any epoxy on the back of the stone to fill that void. I didn’t think this piece needed it and my friend agreed. (That bump you see above the cabochon on the left is part of the quartz.)


Next, I put it in the electroforming bath and you can see the layer of copper that I electroformed over the piece. A nice thick layer of copper. =) I kinda like that velvety look of the copper straight from the bath.


Finally, I polished the copper to a high shine. I, then, did a liver of sulfur patina. My friend was really happy with the result and I was thrilled to be able to do this for her as this quartz was very special to her and held a lot of meaning.


What are some crazy things you’ve done to your copper electroformed jewelry to save gemstones from the dreaded art mistakes bin?