Friday Favorites // Best Copper Electroforming Supplies
/
You may remember a little post from back in the day called ‘Copper Electroforming + What You Need To Get Started’. That post is still my most popular post and so many of you guys have started your copper electroforming journey based on that one post.
In that post, I share multiple options for each tool, product, and material, because what works for one person may not work for another.
Well, I’ve been doing this for a while now and have come across some best performers that I wouldn’t trade for anything when it comes to electroforming supplies. So I wanted to edit that list way down to the products that are my tried and true and have held up over the years I’ve been doing this.
I’m not going to include things like power supplies because I honestly haven’t tried them all, so I couldn’t give my honest opinion on which one is the best. But for other things, as you’ll see below, I am 99% sure they are the best on the market!
I’ll also let you guys know which brands I have tried in order to come up with my conclusion of the best one.
*This post contains affiliate links. I earn a small commission if you purchase any recommended products at no extra cost to you. Affiliate sales help me to keep this blog going so I can continue bringing you free content. Thanks for your support!
SUPER GLUE
I’ve used E6000, gel, and liquid super glues from Loctite. My husband turned me onto Loctite super glue a long time ago, which is his favorite brand for working in the electrical field.
The E6000 is great for many applications, but not for use in copper electroforming. It’s too thick and takes way too long to dry.
I have always recommended my favorite Loctite brand liquid super glue. It must be the liquid, the gel again takes way too long to dry. I want to be able to hold the ring shank to my stone for a maximum of 30 seconds so I can put it down and move onto other pieces.
Winner: Loctite Liquid Super Glue
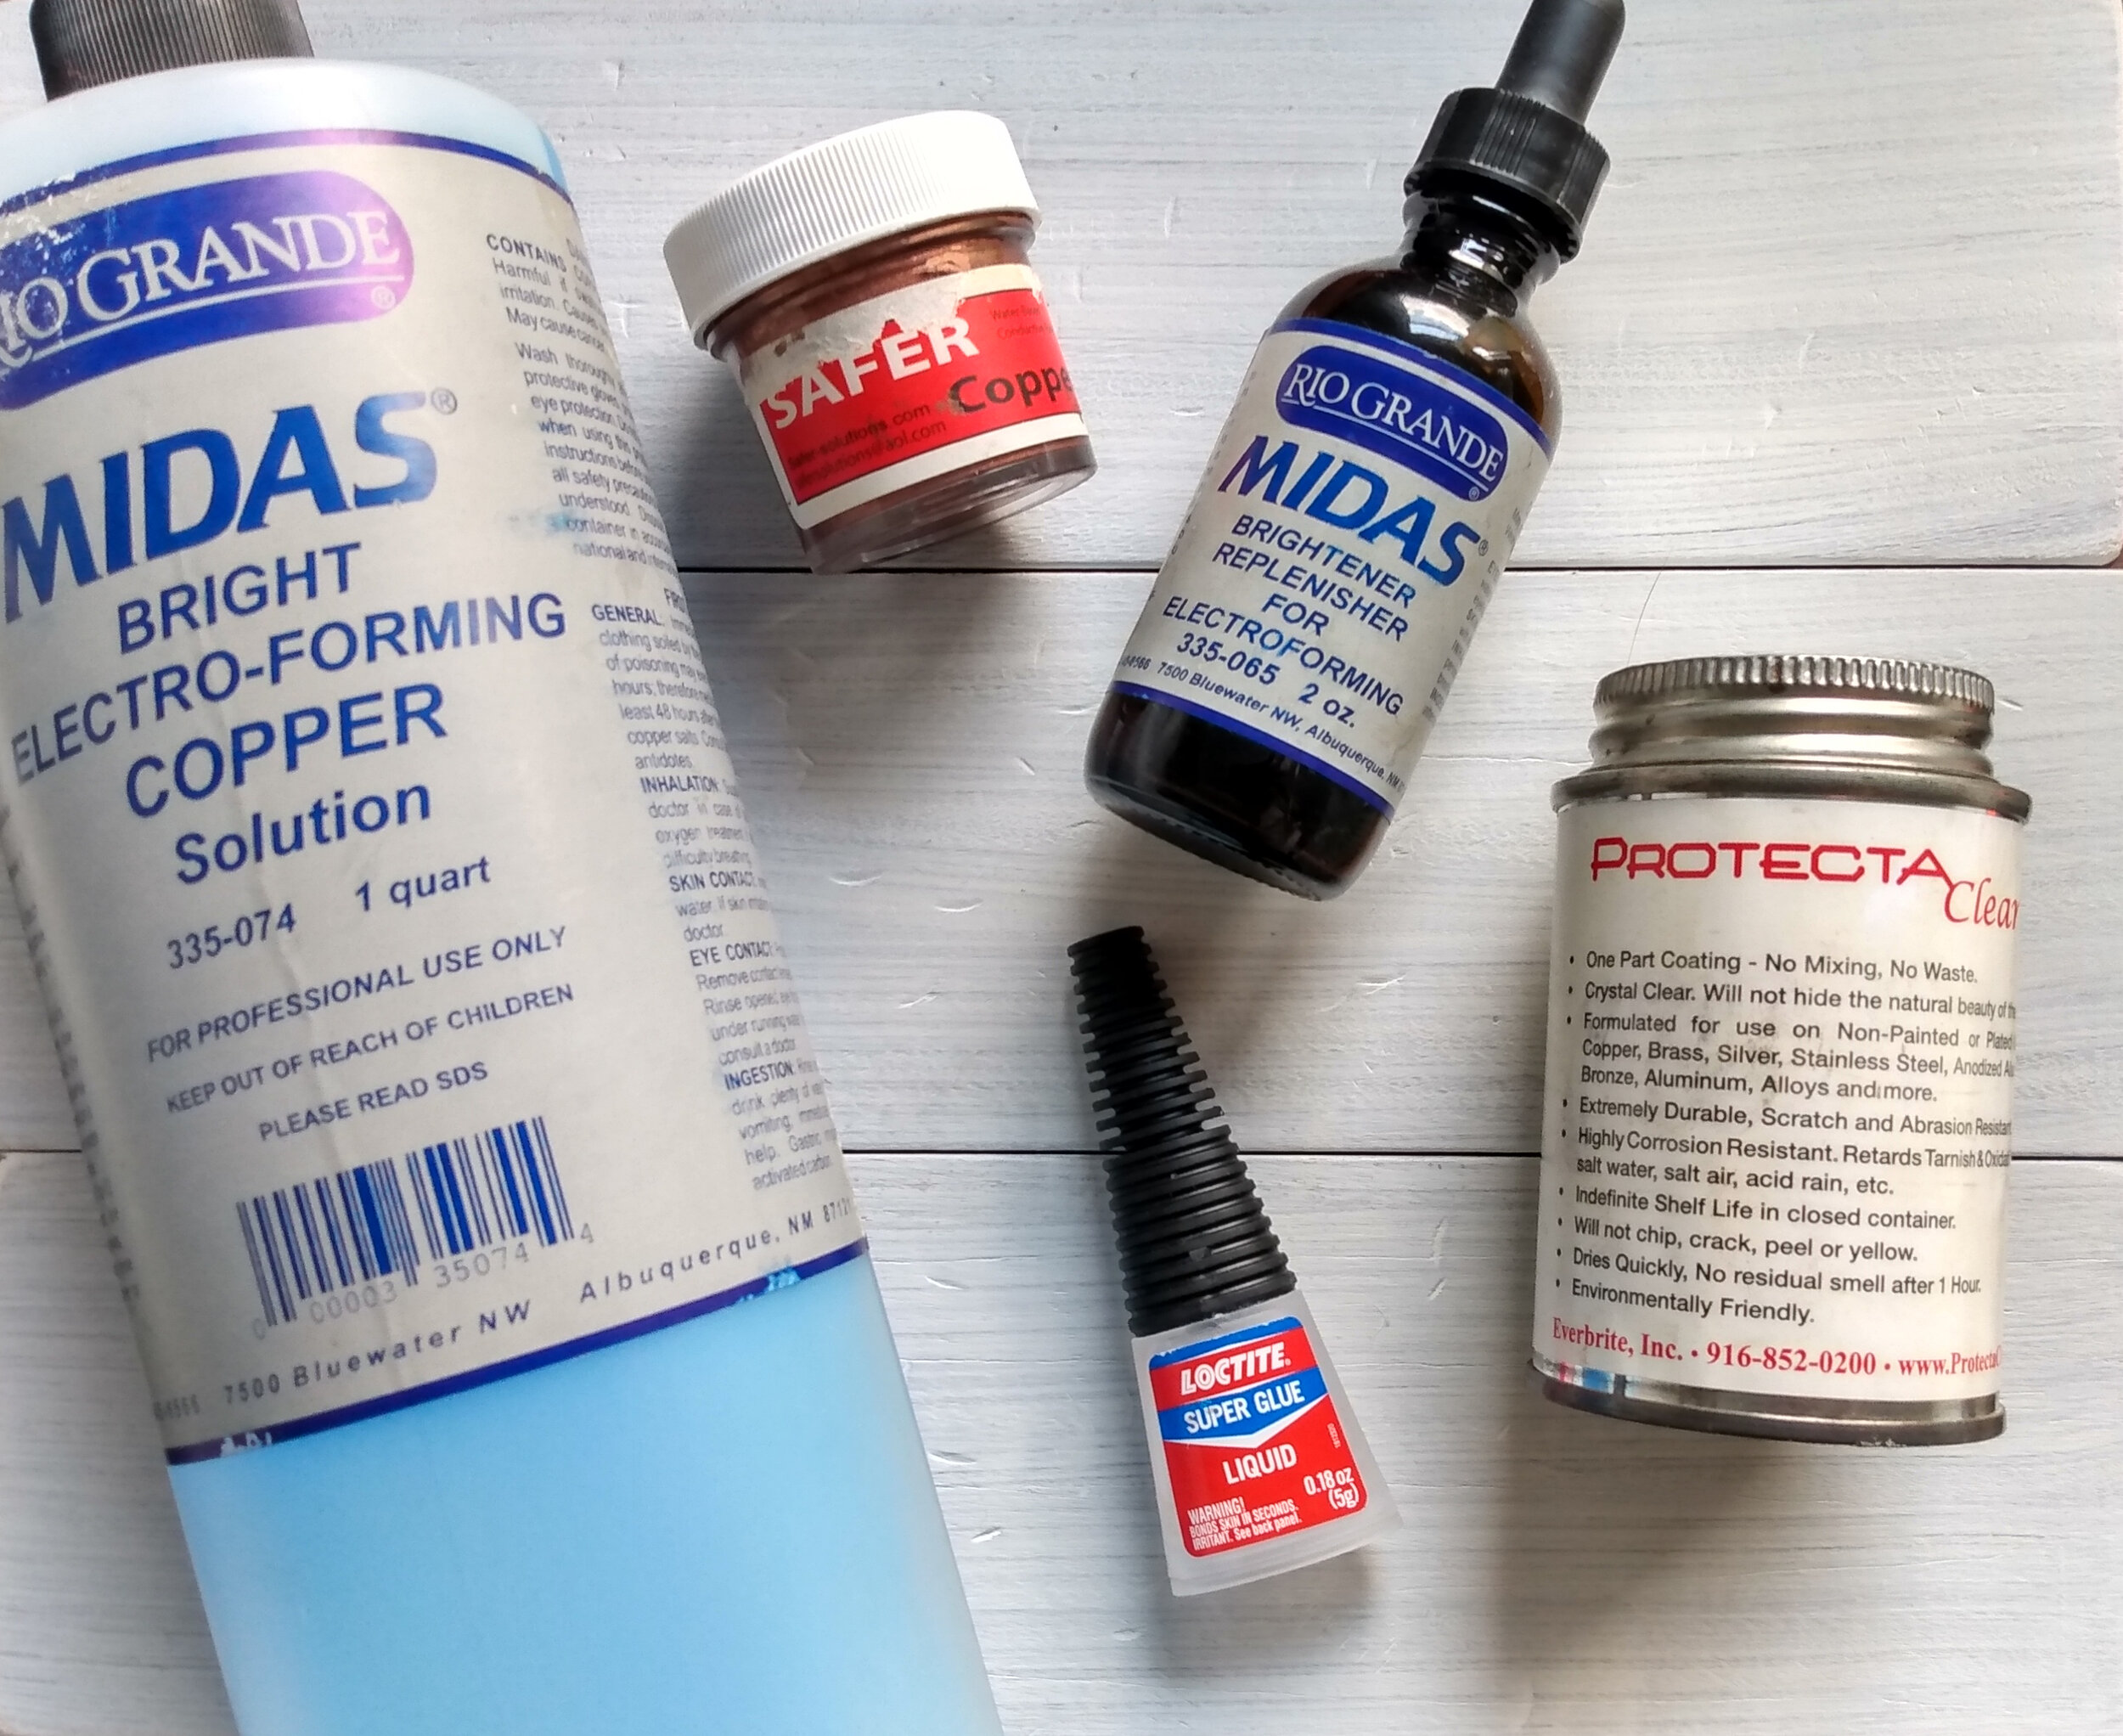
COPPER ELECTROFORMING SOLUTION
I have tried the Khron brand and Rio Grande’s Midas Bright copper electroforming solution.
The Khron brand wasn’t able to give me consistent results after the first batch run. After that, my pieces just came out really bumpy, no matter what I tried to do to fix it.
Once I switched to the Midas Bright I rarely get any issues with my pieces in the bath. And anytime I do get a weird result, my go-to solution that always works is to top off my bath with a splash of distilled water, then add a couple of drops of the Midas Bright copper brightener. That always works to bring shine and smoothness back to my pieces.
Winner: Midas Bright Copper Electroforming Solution from Rio Grande
COPPER CONDUCTIVE PAINT
I have tried the Casewell copper conductive paint and I’ve tried Safer Solutions conductive paint.
The Casewell brand seemed to do ok in the beginning, but after a while, the paint started becoming ineffective. My copper would crumble off my pieces after being electroformed, the paint would start to dry up in the bottle and become clumpy before I was even a quarter of the way through with using it.
I honestly think they are packaging the paint in too big a bottle, maybe they need to use a more rigid plastic for packaging to keep the air from getting in, I don’t know. Or maybe it will work for you if you’re doing really large pieces and can use up the paint quicker.
You can see the difference in the paint below (Caswell on the left, Safer Solutions on the right).
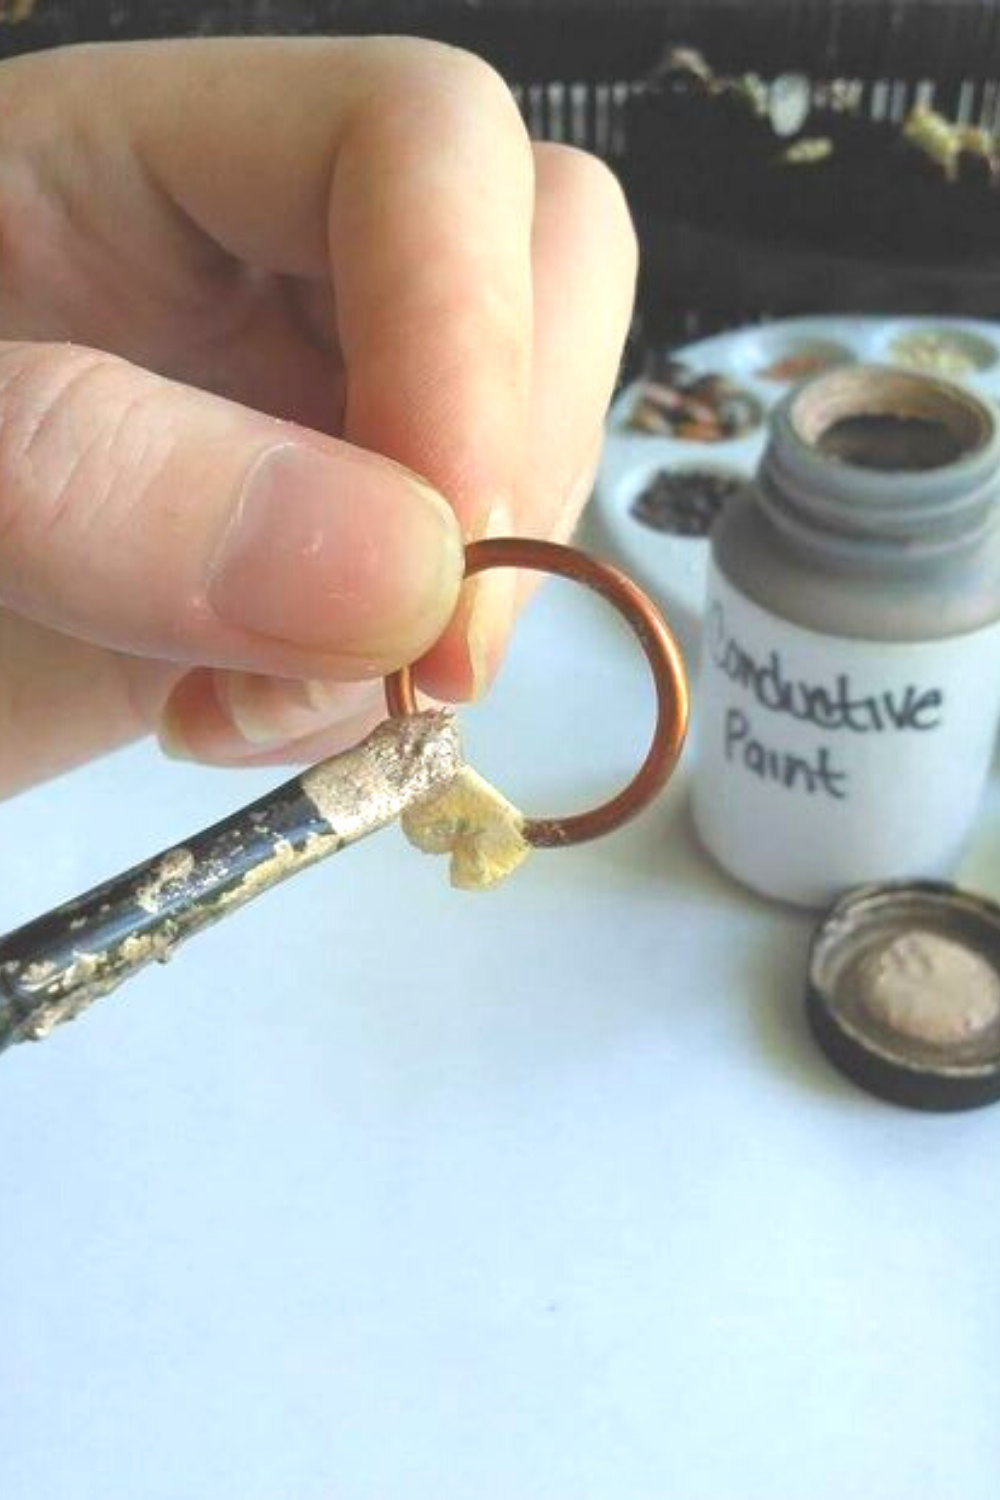

I kept hearing about the brand Safer Solutions, so I decided to give it a try and I was blown away at the results of both the product and my pieces! Their paint is very smooth, it seems to be more conductive, it looks more metallic and maybe that’s why it’s more conductive.
Also, the packaging is great. It comes in a small jar (depending on the size you get) the plastic is very rigid and they include one of those paint roller balls so you can shake it up to mix up the paint.
Winner: Safer Solutions Copper Conductive Paint
EPOXY
As you all know, I started out using wood filler as my epoxy, lol, which totally worked great and I recommend it if that’s something you currently have on hand. Then I grew up and got the 2-part epoxy from Apoxie Sculpt.
So, the Elmers wood filler honestly isn’t a bad product to use as your epoxy. It did the job perfectly, and I had no complaints… until I got the 2-part epoxy.
When I switched to the Apoxie Sculpt brand, it was one of those moments where you just don’t know better until you know better. The 2-part epoxy system creates a much stronger bond, it dries harder and it stores for longer since it’s separated into the 2 parts. It was also easier to mold certain shapes, unlike with the wood filler which was more spongy and seemed to want to expand.
Winner: Apoxie Sculpt 2-Part Epoxy
GEMSTONE SEALER
I’ve tried quite a few different techniques for sealing my crystals before putting them in the electroforming bath. I’ve tried clear nail polish alone, Sherri Haab varnish, I’ve tried the clear nail polish + Sherri Haab varnish together, I’ve also tried liquid latex and lastly, Mod Podge clear acrylic sealer.
The clear nail polish and the Sherri Haab varnish are both great sealers to use, for most gemstones. I had success using both for almost every gemstone I’ve needed to seal, except for opal. They just didn’t seem to work with opal, but that’s almost expected since opal is such a difficult stone to seal.
The Mod Podge and liquid latex are almost the same when it comes to sealing. I had success sealing opals with both of these products. However, I found the mod podge to be quite difficult to remove afterward and would sometimes leave a gap between the copper and stone.
The liquid latex worked great. I just do 2-3 thin layers right up to where I applied my conductive paint and it works like a charm every time! However, with opals, I still apply clear nail polish around the entire stone, then glue, then epoxy, then paint, lastly latex.
Here are my tips for sealing seashells, bones, leaves, and other porous or delicate items.
Winner: Liquid Latex (tip: I use colored latex so it’s easier to see gaps in case I missed a spot when painting it on.)
SEALING COPPER
For sealing my copper jewelry after it’s finished to protect it from tarnishing I’ve tried Rennaissance wax, as well, as ProtectaClear.
The ren wax did not do anything. I have tried applying it with my hands, applying it with a cloth, letting it sit for a couple of hours before wiping the excess. I feel I tried everything but my copper would still tarnish after a couple of days, it would also still turn my finger green the next day and I just couldn’t get it to work.
I switched to ProtectaClear and it was honestly a game-changer. I tested it on a copper ring that I wore for 14 days straight; in the shower, cleaning house/sweating, washing my hands multiple times a day, etc., and it took exactly 14 days for the ProtectaClear to even begin wearing off.
Now imagine how long that seal would last if you took your jewelry off before you do any of these things (as is what is recommended you do with any jewelry).
Winner: Everbright ProtectaClear Acrylic Varnish
LIVER OF SULPHER SOLUTIONS
I’ve tried my fair share of patina solutions, such as Cool Tools Patina Gel, hard-boiled eggs (let’s just nix that option right now, lol, there are so many better options, ha!) as well as the hard chunk LOS. I’m also only talking about getting a blackened look, not that green patina known as verdigris or the rainbow effect.
To be quite honest, patina gels and dried chunk LOS equally worked great for me. You mix them both in warm water, stick your piece in and get similar results. I personally have been loving Rio Grande’s dried chunk liver of sulfur, though, because it seems to last forever and it hasn’t lost any potency.
Winner: Rio Grande’s Midas Bright Dried Liver of Sulfur
SAFETY MASK
Wearing a mask is very important in our craft. We’re messing with chemicals and lots of particulate from polishing/sanding. I started out wearing those disposable face masks with ear loops, which was better than nothing back then. But I then learned just how important it is to be fully protected from fumes and particulate.
I made the switch to the 3M respirator mask with particulate filters and it’s been one of the best investments for my health. I’ve tested it with my liver of sulfur and I couldn’t smell a thing! I feel very protected with this mask on.
Winner: 3M Respirator + Particulate Filter Mask
I know that, as makers, we are very brand loyal. So when we find something that works it’s hard to try something else. Like with me using the wood filler, sure it worked, but I just didn’t know anything better. So leave your favorite brands and products below, because maybe I need to change up my own toolbox.