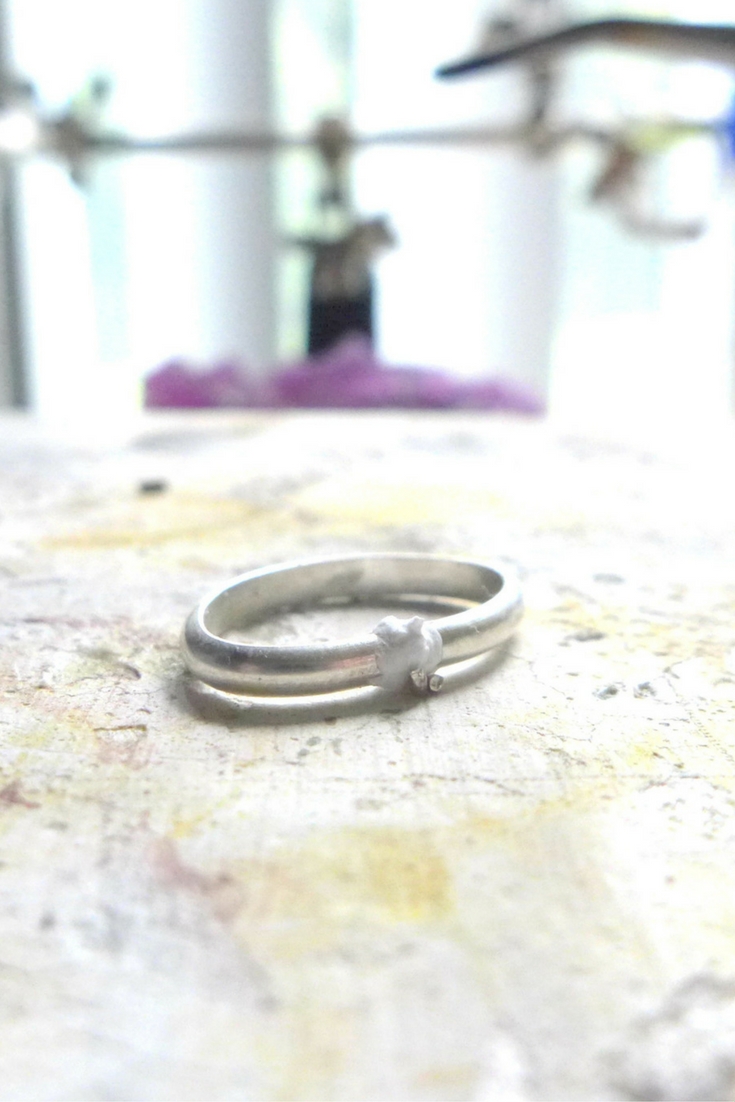
Basic Silversmithing: How To Make A Silver Ring Band
/Last week I wrote a supplies guide leading up to this basic silversmithing tutorial ‘How To Make A Silver Ring Band.’ In my opinion, if you’re wanting to get into silversmithing then the easiest thing to learn is how to make a simple ring band. So if you haven’t yet seen that then go check that out first. But, if you already have your supplies then let’s get into the tutorial!

Basic Silversmithing: How To Make A Silver Ring Band
*This post contains affiliate links. I earn a small commission if you purchase any recommended products at no extra cost to you. Affiliate sales help me to keep this blog going so I can continue bringing you free content. Thanks for your support!
Tools You Will Need:
Steel Ruler (you can also use a caliper)
Flush Cutters
Steel Ring Mandrel
Rawhide Mallet
Half Round Metal File
Bench Pin (optional)
Parallel Jaw Pliers (optional)
Torch
Soldering Pick
Jewelry Tweezers
Crockpot
Copper Tongs
Tumbler (you can use a rotary tool or simply use polishing cloths)
Materials You Will Need:
10g Half Round Dead Soft Sterling Silver Wire (you can choose whatever you like)
Fine Tip Sharpie (for marking your metal)
Flux
Solder (I’m using hard)
Soldering Board
Glass of Water
Pickling Solution (Recipe: 1 cup of white vinegar per 1 generous tbs of salt.)
Polishing Compound (either liquid for your tumbler or dry for your rotary - or a polishing cloth)
Step 1 | Choose Your Wire

Like I mentioned in the supplies guide, there are a few different options to create a simple ring band. The most popular being the half round wire or the round wire. For this tutorial I’m going to use my half round. I’m using 10g dead soft half round sterling silver wire.
Step 2 | Measure Your Wire


I’m going for a size 5 ring band so I’m going to take my sharpie and mark it at 2”. I also like to add a bit of length to account for filing. If your wire has slight waves/bumps in it, take your parallel jaw pliers and feed it through while clamping down to straighten it. Then take your flush cutters and with the flat end facing the end of your wire cut it. You’ll notice that the flat edge of your flush cutters make the flush cut, the other end creates a taper that just makes for more filing.
There are many ways you can cut your wire, you can first create your round ring, then where the wire overlaps, take your saw, and saw it to create a nice flush cut with minimal to no filing needed. This is just how I do it.
Step 3 | Round Your Wire


Take your steel ring mandrel and start to wrap your piece of wire around it. I like to start smaller than the size I’m going for because once you wrap it and let go of the wire it’s going to poof out into a bigger size. So, although I’m making a size 5, I’m wrapping my mandrel at a size 4 so it evens out if that makes sense.
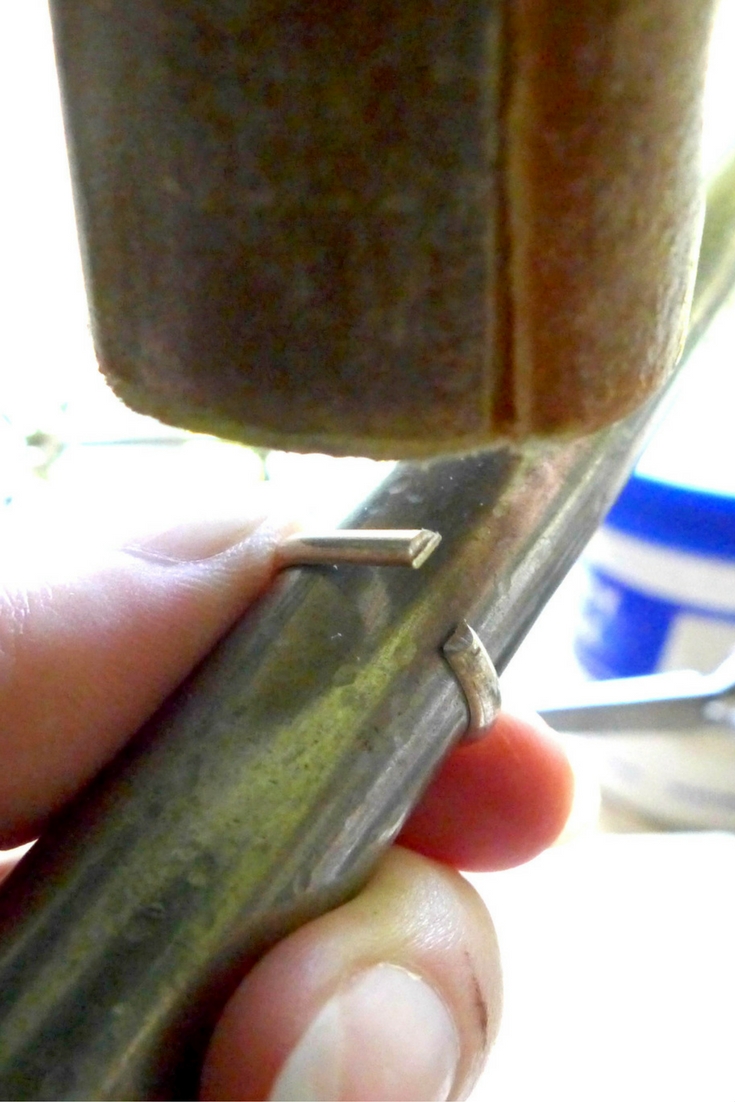
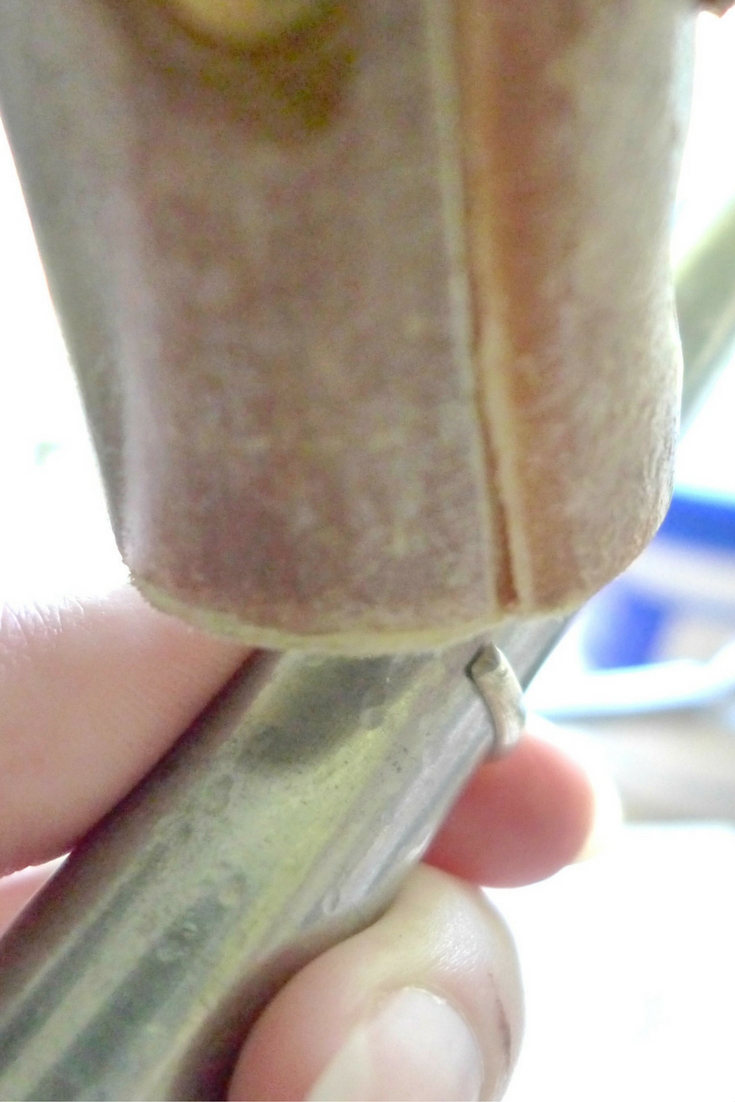
Once you get just about all of the wire rounded the ends will be kinda hard to push down. This is where your rawhide mallet comes into play. It won’t damage your metal because it’s soft, but it’s hard enough to manipulate your metal. Hammer down each end to complete the circle.

Step 4 | Flatten Your Ring


Next, you want to flatten your ring to a point where the two ends meet parallel. This makes it easier to file the ends flat then solder using the most contact of the ends. Just hold your ring up on your anvil and hammer it down until it’s got a flat edge.

Then you want to pull the ends apart so you can get in there with your file for step 5.
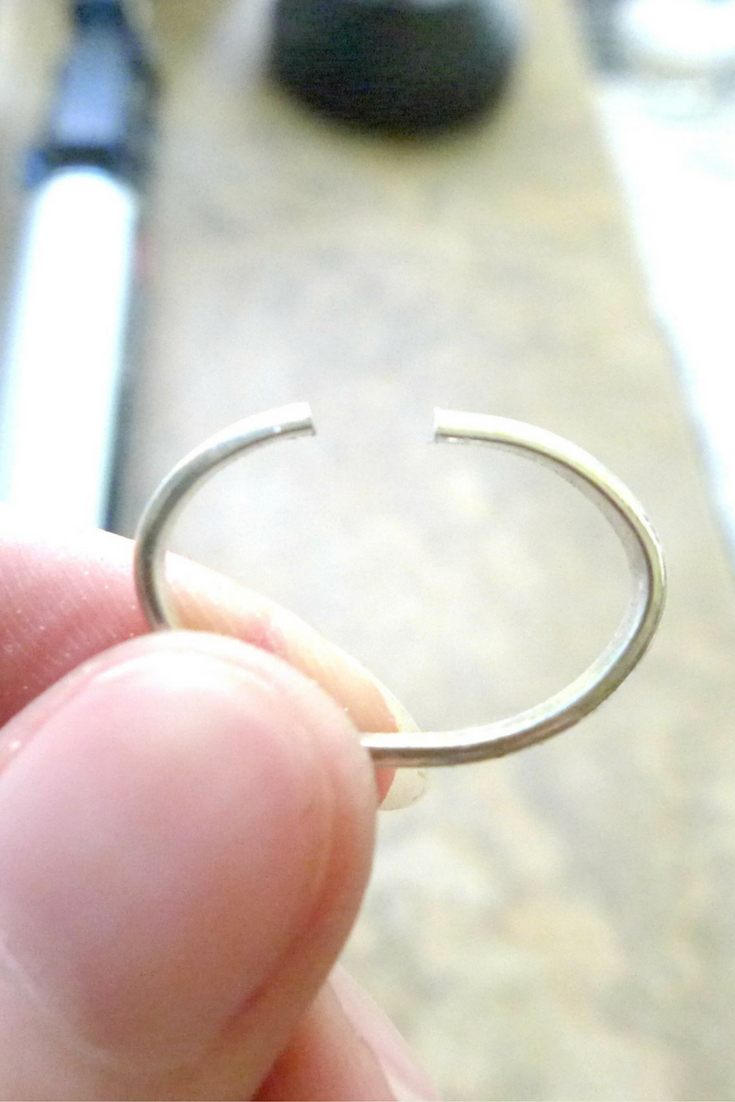
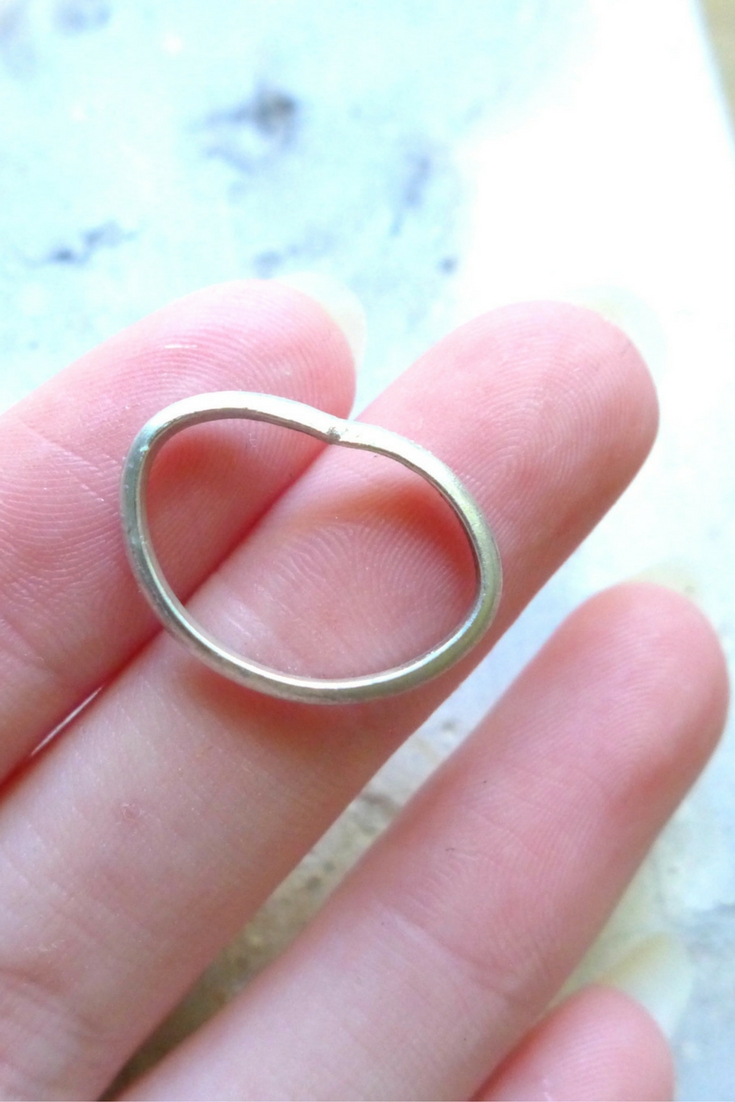
Step 5 | File Your Ends Flat

This, in my opinion, is the hardest part of the entire process. Making sure each end is perfectly flat so when you go to push the ends together there is no gap at all. Solder will not fill any gap so if you have a gap it will create a weak bond and eventually break.

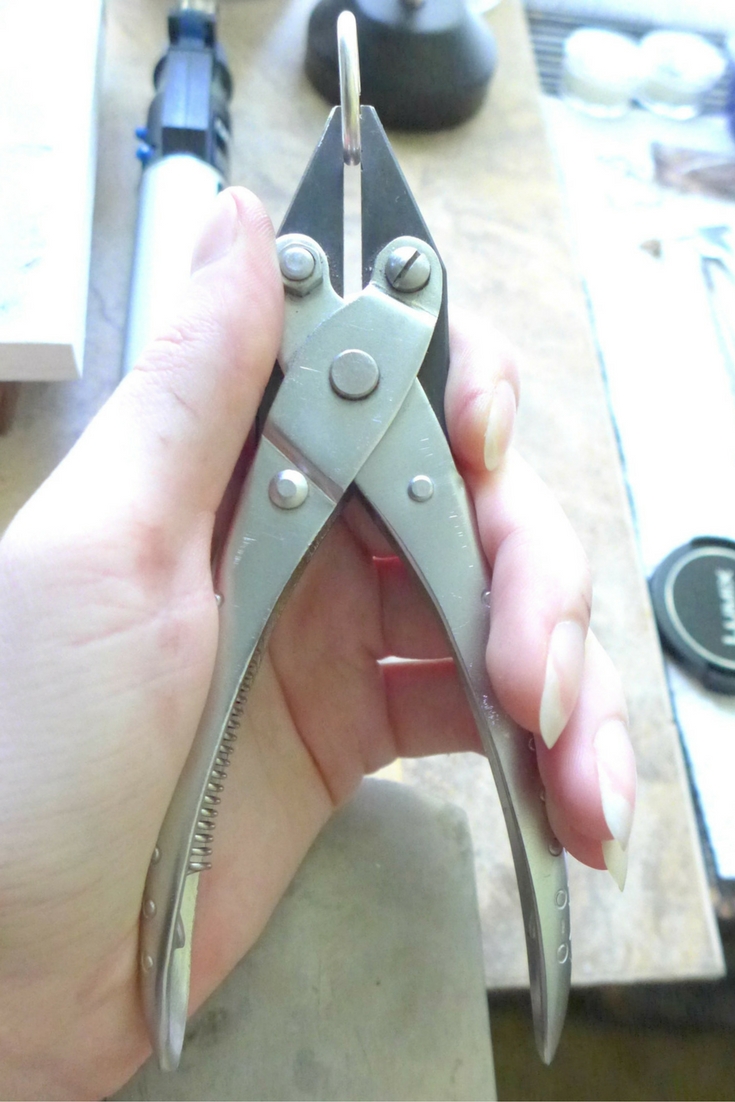
There are many ways to file your ends but this is how I like to do it. Clamp the end of your ring in your parallel jaw pliers just a tad, remember how I over measured my ring in step 2 to account for filing, don’t go over that extra length, you have to do this for both ends. Make sure your end is perpendicular to your pliers. Hold your pliers up against your bench pin (so you have a steady hand) and just file until there’s no more metal sticking up further than your pliers, then look at your file line, then file some more if needed, then look again, so you make sure your filing flat and not at an angle. Side note, these are the best parallel jaw pliers I've ever used, they’re around $18 but so worth it!
Once you think you have both ends perfectly flat, start to twist and turn each end into each other so that your ring stays closed using tension. Then hold it up to a light, if you see light coming through then you need to open it back up and file again. You can usually see which end needs filing by holding it up to the light.


Another trick, you can twist your ring shut then take your saw and saw down the center of both ends. Make sure you’re filing in a super straight line, though. Do this a couple of times until both sit flat against each other.
Don’t get frustrated, practice makes perfect here. One thing I keep in mind during this step is a quote Michelle Fernandez from MeShe Designs said when she had her YouTube videos up is “File with intent.” Meaning, don’t just go filing willy nilly, take your time, be precise.

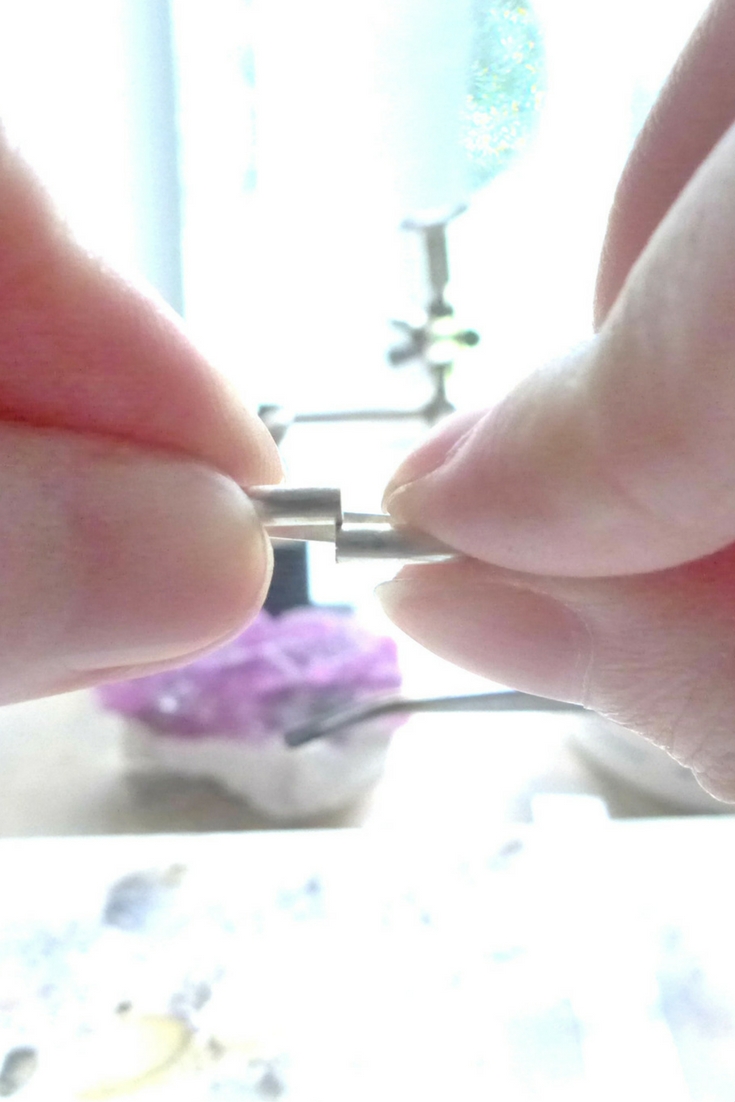

Next, once your ends are perfectly flat, you’re going to take each end, either with your hands or with the help of tools (I’m using my left hand with my parallel jaw pliers in the right) to help me twist teach end of my ring into the other side until they cross over, then twist into the opposite side to create tension, do this a few times then line up each end so they match up and let go. Your ring will be held shut by tension.
Step 6 | Solder Your Ring Shut
Ok, back to the easy stuff, whew!
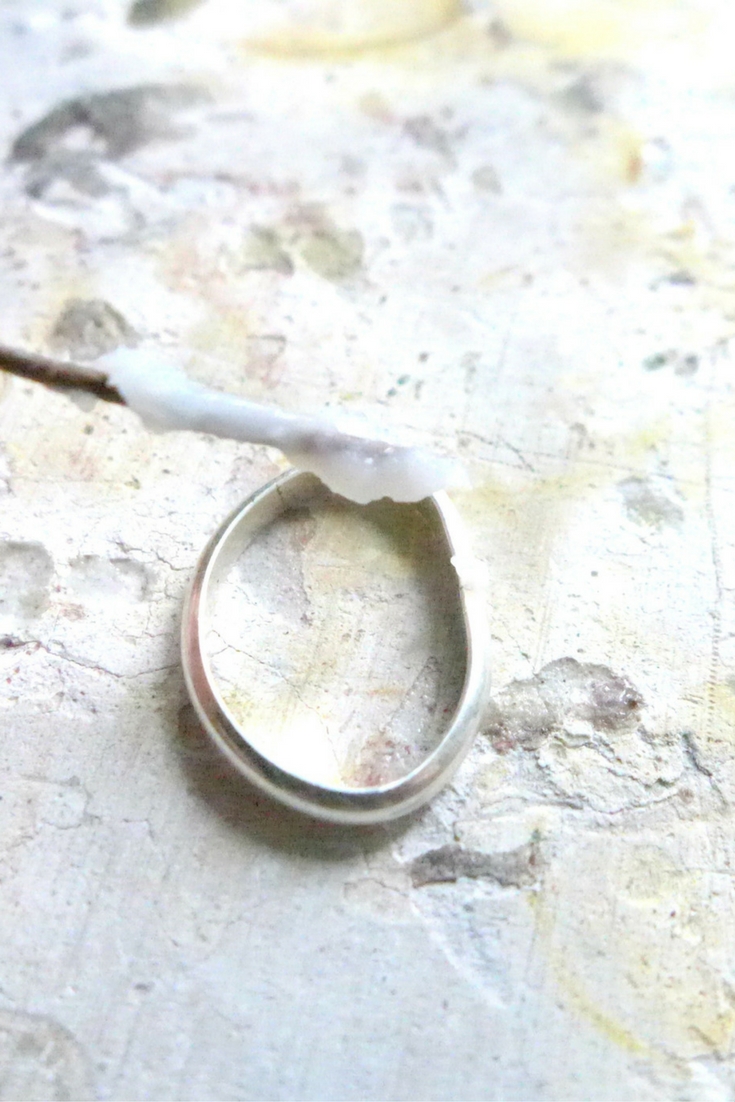

Next, take your flux, sometimes, with the Handy Flux, you need to add some water to it (distilled) to moisten it because it drys out for some reason, even with the lid on. So stir it up, I like to use a piece of scrap copper wire to apply the flux to my seam, but you can use a toothpick, or they even have brushes specifically for applying flux, called a flux brush. I haven’t had a need for one, but who knows, it may apply better. Gotta get one and see.

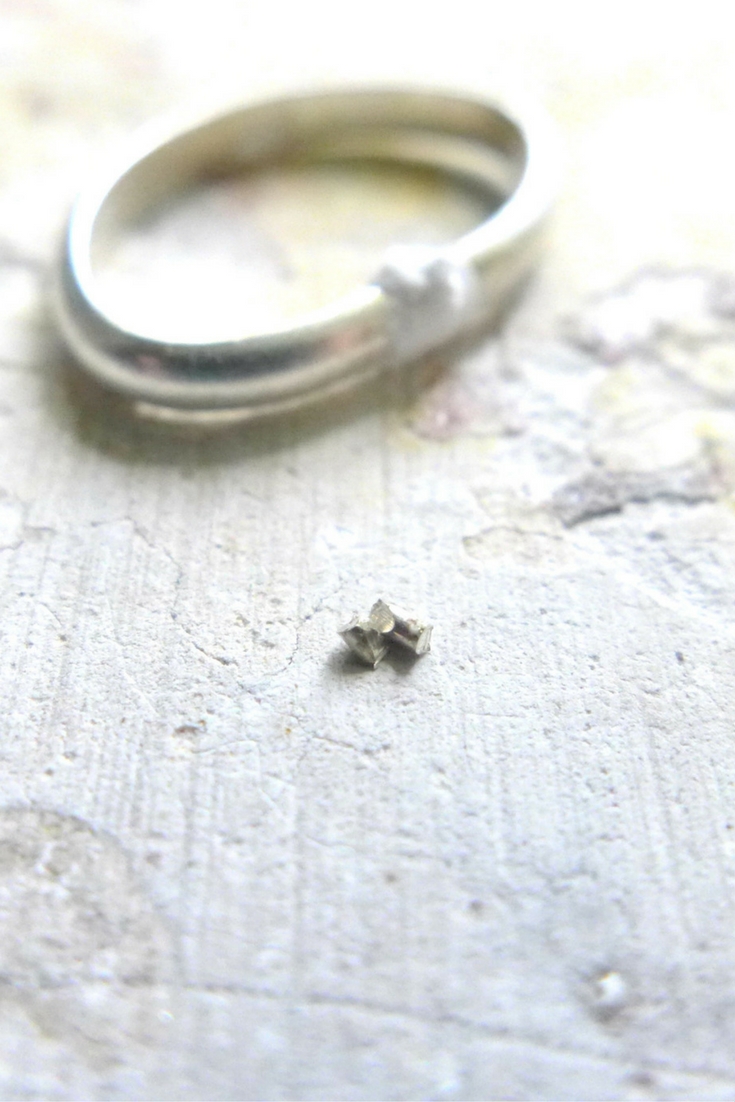
Make sure you flux all the way around the seam. Then cut a tiny pallion of solder, I like to use hard solder.
*Quick solder lesson: The reason there are different densities of solder is that they melt at different temperatures. So using different solder densities is perfect for projects that need more than one soldered join to be completed. Hard solder needs the most heat to melt and easy solder needs the least. So when you use hard solder for your first join then go to medium for your second join, the medium solder won’t need as much heat to melt so it won’t melt your hard solder join in the process of soldering your second join. And then you do your last solder join using easy so it’ll melt the quickest before melting your medium or hard solder joins. That was a bit all over the place but I hope I got the lesson across.


I apply my solder in a couple of different ways depending on the project. But for a simple ring band, I just take my solder and place it right under my ring seam. Solder flows in the direction of heat so I heat the ring up a bit by going in a circular motion, once you see your flux has turned to a more clear color I focus more on the top of the seam, and soon after you’ll see the solder flow up to the top of the sem from being beneath it.
This is also a great way to solder because the tiny solder pieces will raise your ring up once places underneath, then you see the ring plop down to your soldering board once the solder has flowed.
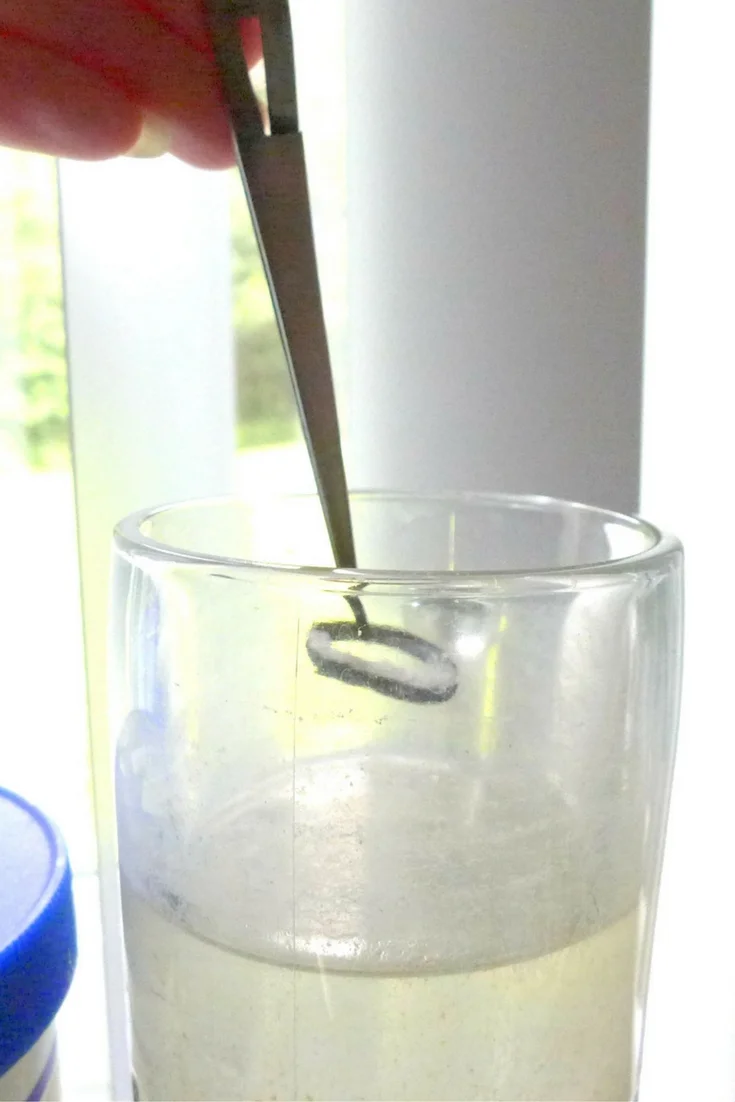

Once finished, pick up your ring using your jewelers tweezer, quench it in your glass of water, then test your join by pulling on it to make sure it’s a good solder joint. Then onto the next step.
Step 7 | Pickle Your Ring


Mix up your pickle solution (Recipe: 1 cup of white vinegar per 1 generous tbs of salt.) pour it into your crockpot, up to just about an inch will do. Turn on your crockpot to high (or 180°F) and let it warm up.
Once you see some condensation under your lid, plop your ring in. Let sit for about 5 minutes, give or take. Only use copper, bamboo, or plastic tong to fish out your ring when it’s finished. If you use steel in the pickle pot it has copper molecules in it and will create an electrical current that plates all surrounding metal with copper.
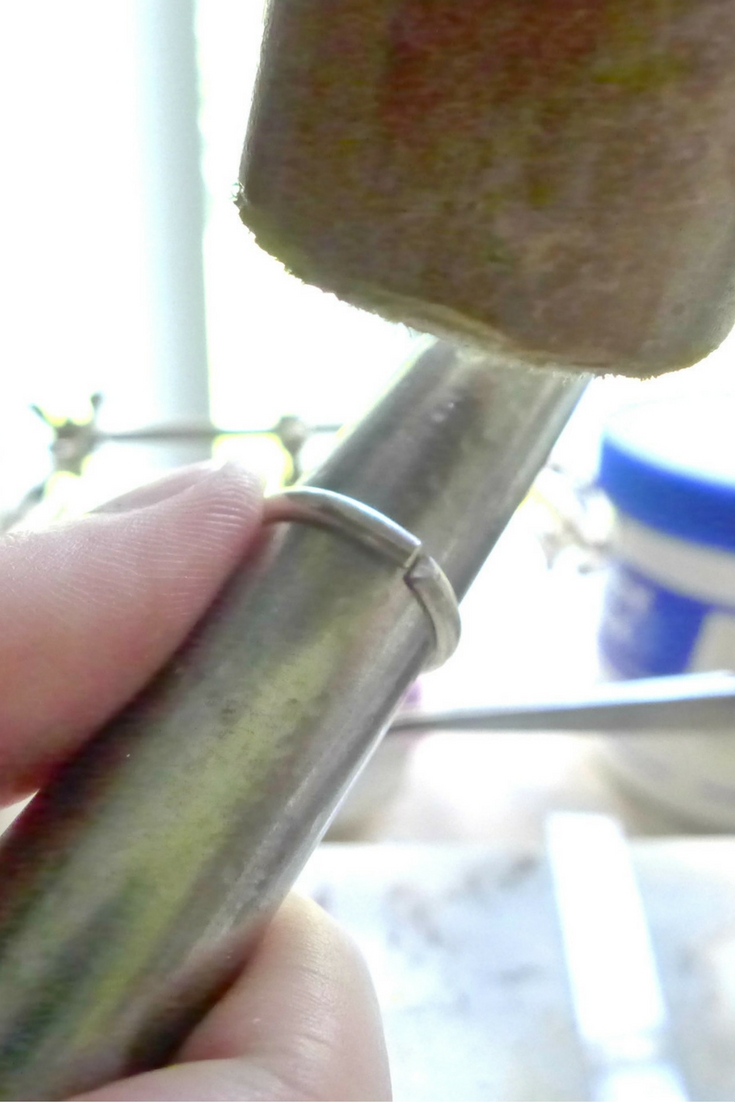
Step 8 | Form Your Ring


For this step, you’re going to need your ring mandrel and a rawhide mallet. Slide your ring over your mandrel and pull it down as far as you can. Then take your mallet and start hammering out the lumps and bumps. Slid it down with your other hand as you hammer. Once you get out all the bumps, take the ring off, flip it over and hammer again, this is so that the ring isn’t tapered slightly.


Step 9 | Polish Your Ring

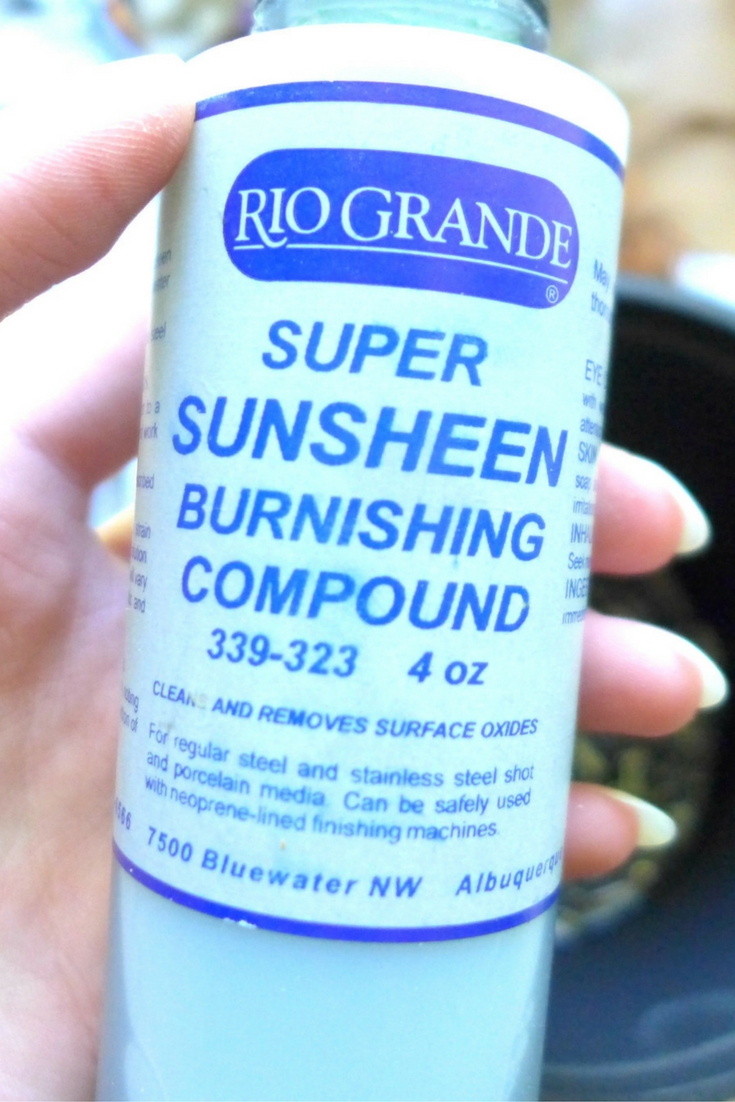
For this tutorial, I’m using my tumbler. Take 1lb of stainless steel shot (I like the mixed shapes) and pour it in your barrel. Then, fill it with water, just about ¼” above the shot. Next, pour in a couple of drops of your burnishing compound. I’m using the Super Sunsheen from Rio Grande. You can also use the blue Dawn dish soap instead of the burnishing compound.
Put your lid on and let it tumble for about 30mins-1hour. Take it out and you’re done!


Congratulations! You just made a silver ring band! I wanna see it so post a photo of your finished piece on Instagram or Facebook with #MakerMonologuesProject! (Tag me if sharing on Facebook @Maker Monologues so I get notified!)
If you have any questions at all just leave them below and I’ll help you the best I can.