Your Complete Guide to Soldering Silver Jewelry
/Silversmithing can become very technical and involve math and science but once you get started soldering it can become like second nature. I ran a poll to see what you all wanted to learn and “soldering basics” was on that list.
I began writing a “basics” post and realized there was no way I could write about just the basics. So this is your complete guide to soldering silver jewelry. Plus there’s a fun soldering cheatsheet you can pin to your studio wall!
*This post contains affiliate links. Affiliate sales help me to keep this blog going so I can continue bringing you free content. Thanks for your support!
Solder
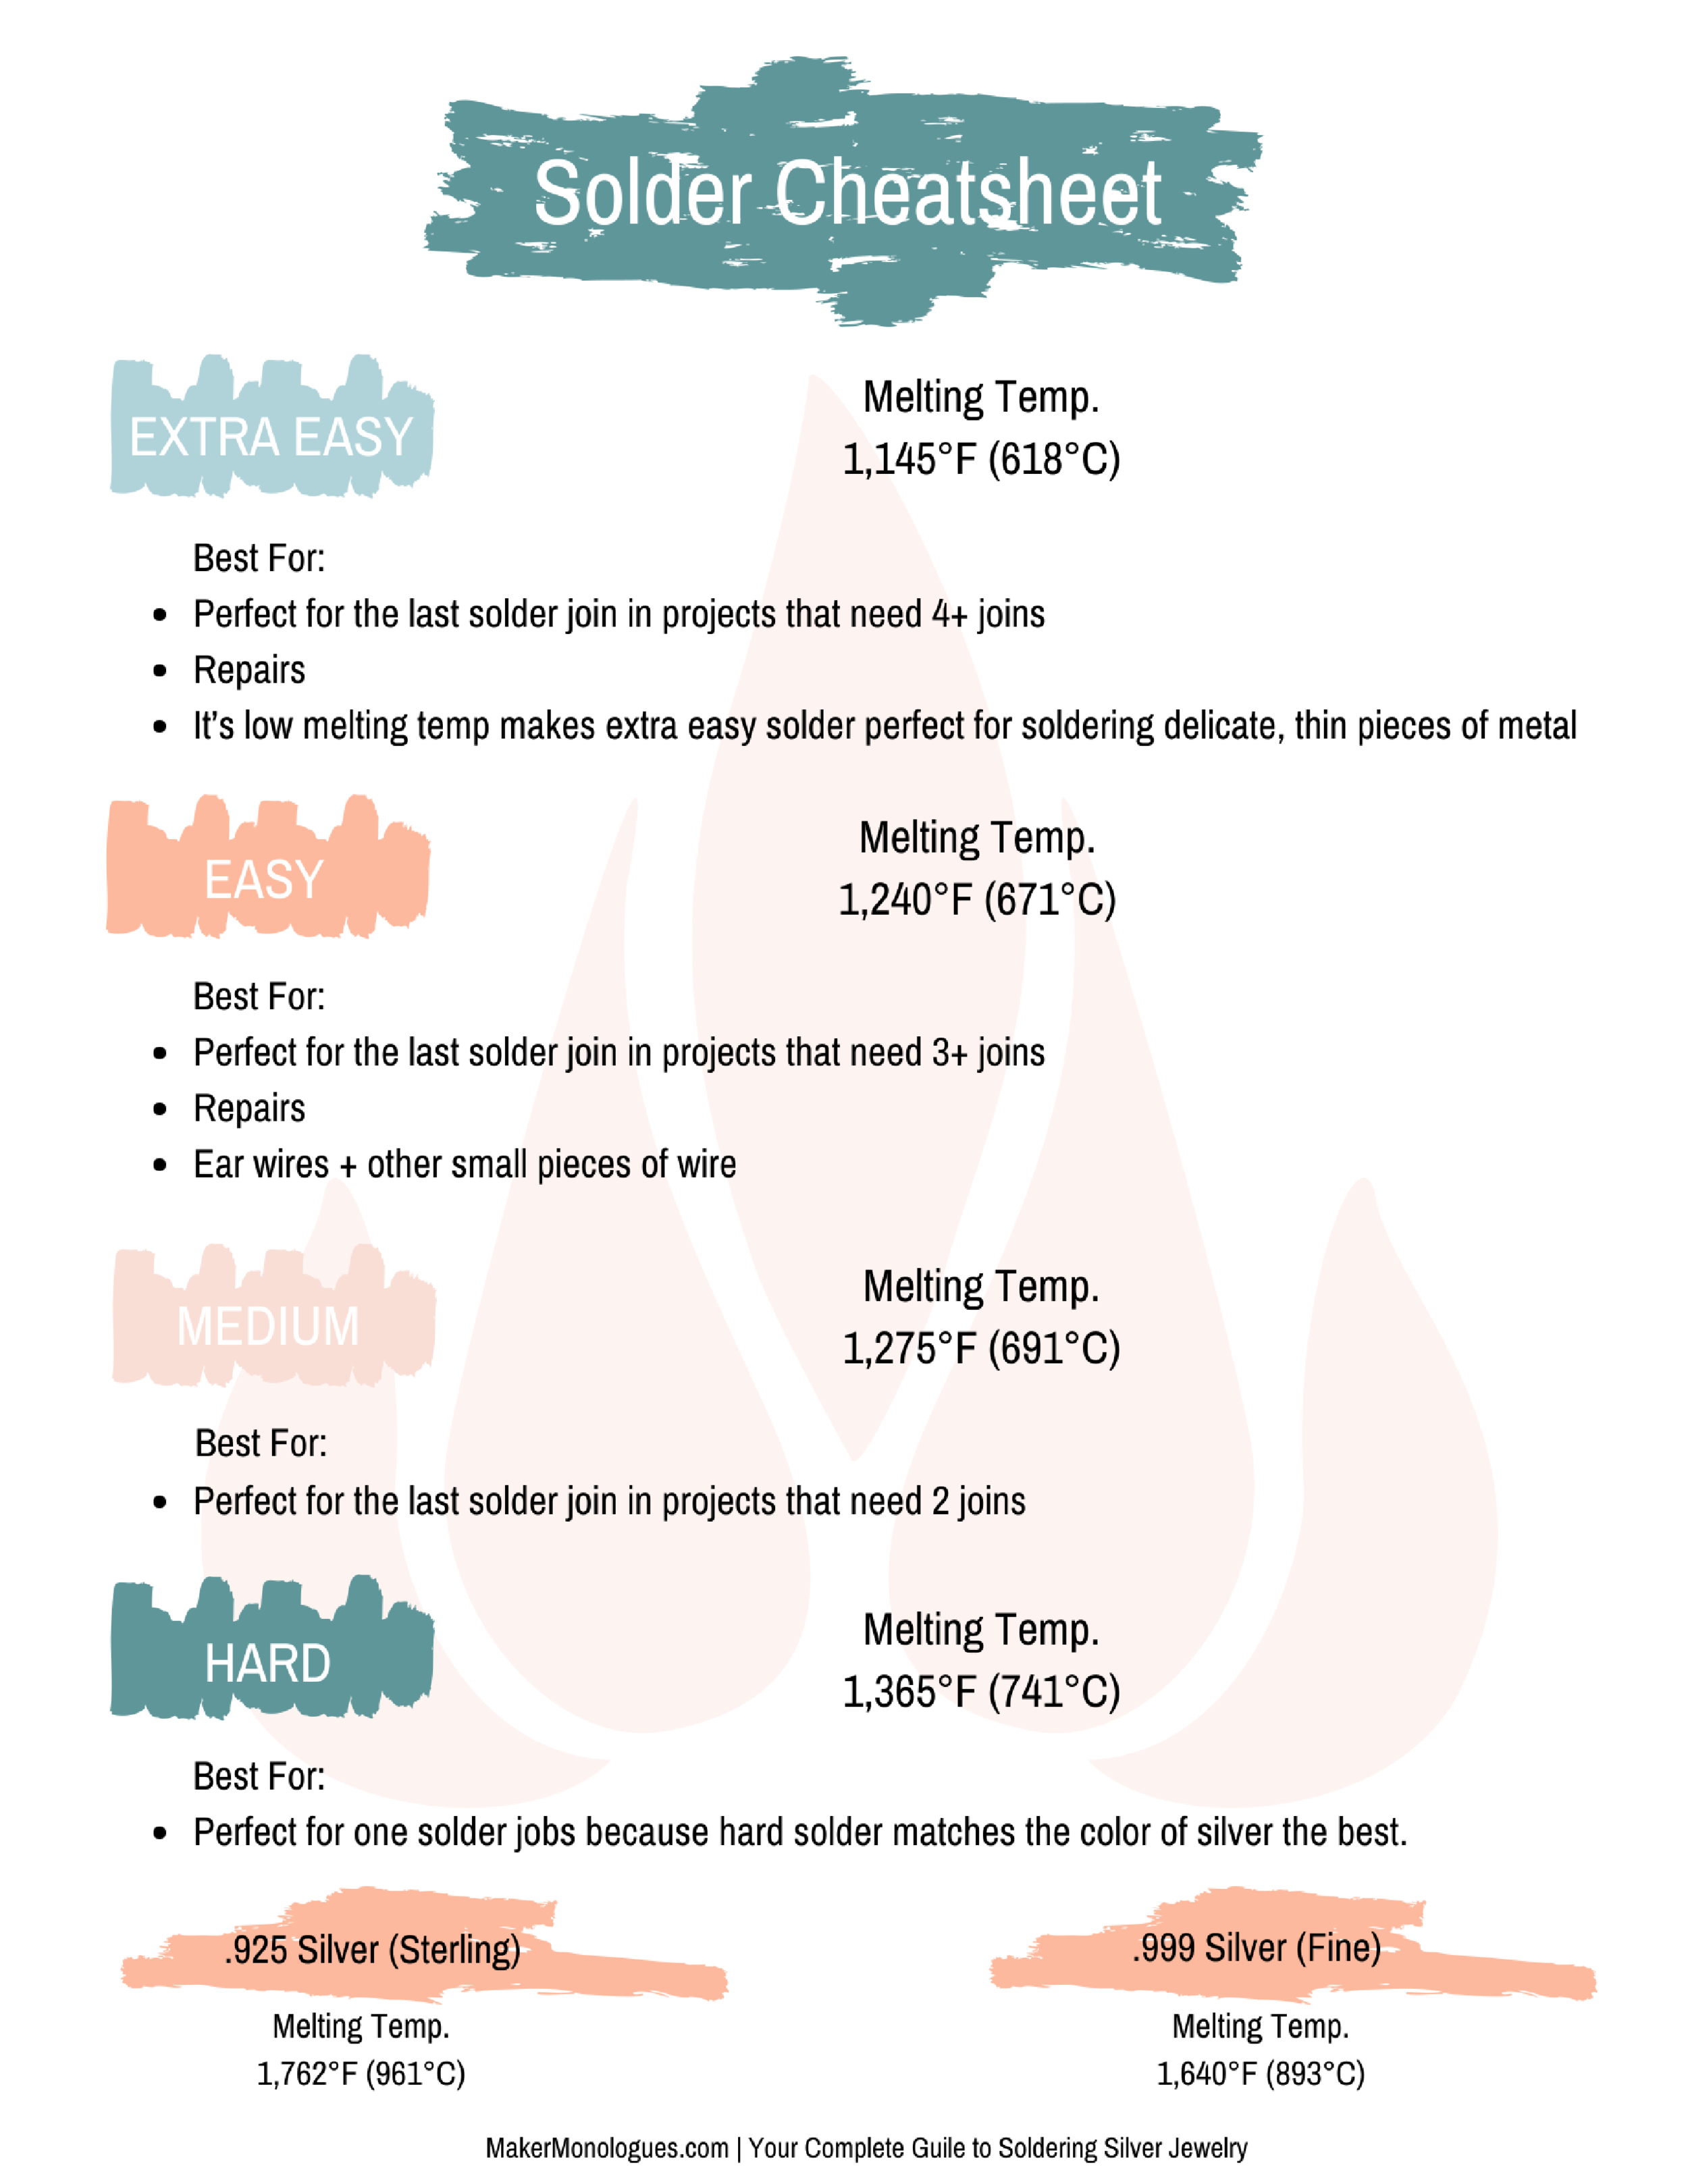
Solder Densities + Melting Temps.
There are 4 different solder densities and they all have different melting temperatures and each has its own job to do.
Extra Easy - Melting Temp: 1,145°F (618°C)
Easy - Melting Temp: 1,240°F (671°C)
Medium - Melting Temp: 1,275°F (691°C)
Hard - melting Temp:1,365°F (741°C)
If you're starting from scratch you can get an assortment pack of silver solder. Really you're probably only going to need easy, medium, and hard. I've never used extra easy and I mostly use medium and hard solder.
Types of Solder
There are 4 different types of solder:
Sheet solder (you have to cut your own chips of solder)
Wire solder (which is what I like to use)
Chip solder (it’s already in tiny chips)
Paste solder (a flux + solder mixture)
It doesn't matter what gauge of wire, sheet, or chip solder you get, you just cut the amount you need for the join you're soldering closed.
I personally like sheet and wire solder over chip solder because you can cut exactly the size of solder piece you need for the job rather than have a predetermined size already cut for you with the chip solder, although it is convenient.
I’ve never used paste solder but it’s also pretty convenient. It comes in a syringe and you just squirt out how much you need. The thing about this is you can easily add too much and then you’ll have a big solder clean up job afterward
Which Solder to Use for the Job
You always want to make your first solder join using hard solder since it has the highest melting temperature. Then you make the second solder join with medium and the last solder join with easy which has the lowest melting temp. This way you never re-melt your previous solder joins.
For example, when you’re making a piece of jewelry, let’s say you’re making a ring with a bezel. You want to use hard solder to solder your bezel wall closed. You’ll also use hard solder to solder your ring band closed. Then use medium solder when you solder the bezel wall to the backplate. And finally you’ll use easy solder to solder the bezel cup to the ring band.
Often times you can use hard solder (or any solder density) twice in a row if the second solder join isn’t too close to the first solder join where it could possibly remelt the first join. This is how you get around soldering larger projects with lots of joins.
If you have a piece that only requires one solder join and you’re wondering which solder density you should you, go with hard solder. Hard solder has the highest content of silver therefore it matches the color of silver the best so it’s always best to go with that. But, if you do a really good clean up then you really shouldn’t be able to see where the solder line is, I’ve never seen any solder discoloration on my pieces.
How Much Solder Should You Use
The amount of solder you want to use per join is the least amount you can get away with. Once you get started soldering you’ll start to gauge how much solder you need for each join.
I typically use 0.5mm to 2mm long piece of wire per join but that’s because I mostly make tiny pieces. For a longer join you’ll need to use more solder bits.
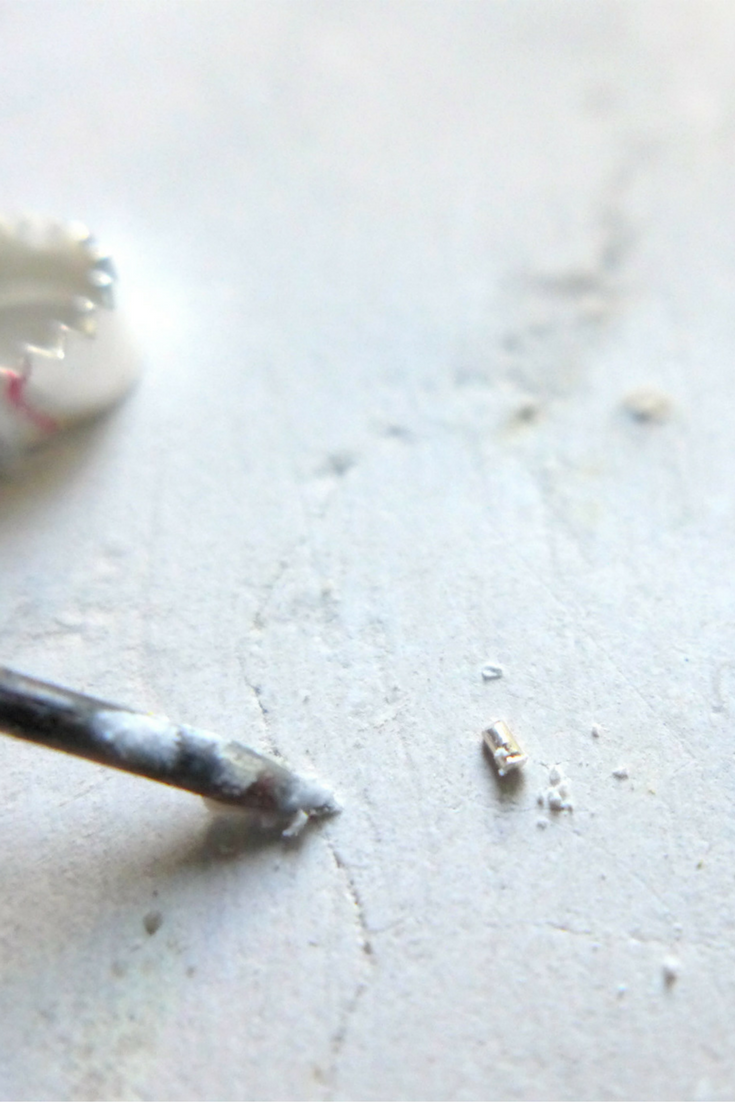
This is a tiny 2mm piece of solder which is what I'll use to solder a tiny bezel (Seen in the next image). (Image from How To Make A Bezel Setting)
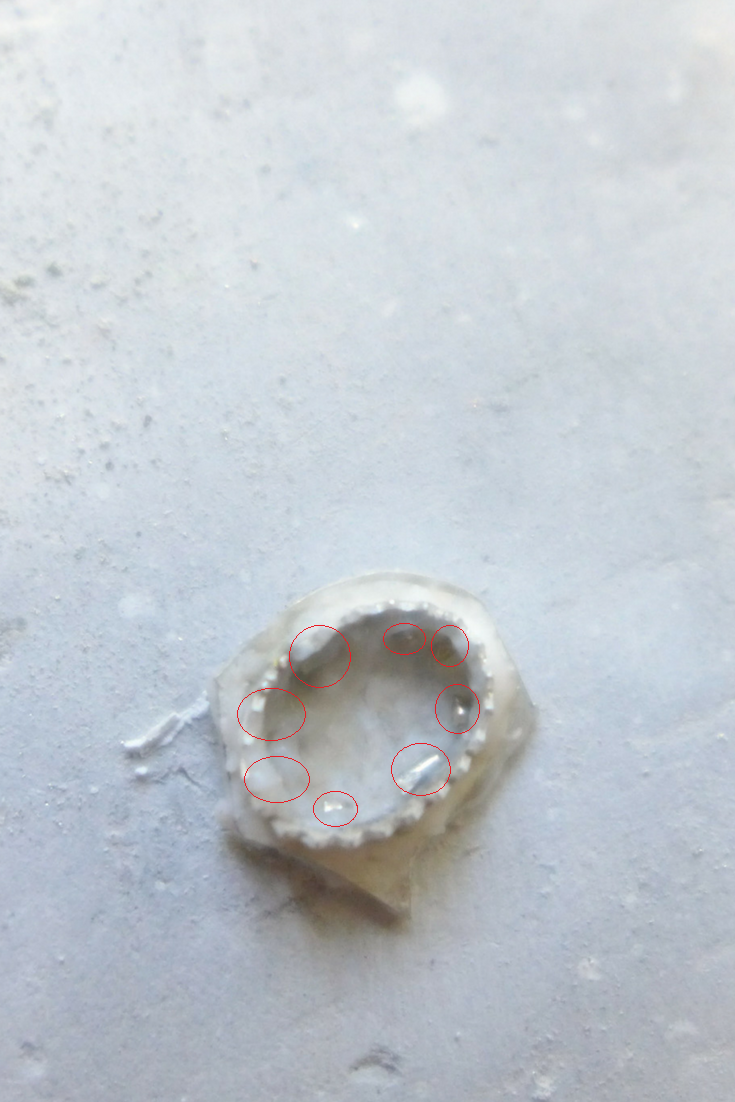
This is a 6x4mm bezel cup I'm making and each red circle indicates a 1mm piece of solder. You want a piece of solder, gap, piece of solder, gap, etc. (Image from How To Make A Bezel Setting)
Soldering Tools
Torch Options
There are a plethora of torches and gases you can use. I’m not going to go too in-depth here because I only use a butane torch but I’ve done hours of research on every type of torch and gas on the market. But there are two main torch options:
The butane torch is great for everything I do, I use the Dremel VersaTip Butane Torch and I’ve been able to make some big one-inch bezels with it. But you are limited to how big of a project you can make because butane just isn’t a hot enough gas to heat your metal to melt the solder.
And that’s a big tip: when you’re soldering you’re not targeting the solder with the flame in order to melt it and make it flow, you need to heat your metal and the metal melts that solder and makes it flow.
If you want to do big pieces then you’ll need to get a gas tank + torch handle setup and there are so many options that I’m just going to send you over to Nancy L. T. Hamilton’s post on What Torch to Buy so you can weigh your options.
Solder Picks
You’re going to obviously need a solder pick. A solder pick is used to help move the solder around while you're soldering.
There are lots of options but I recommend getting one with a non-stock tip made of titanium so your solder don’t melt to or stick on the tip of your pick.
Third Hands + Jewelers Tweezers
Often you’ll need a third hand to help hold components in place while you solder pieces together. For example, soldering an earring post onto a stud design.
Get one with a base and removable tweezers so you can choose to have it act as a third hand or tweezers. But it’s more convenient to get a couple of tweezers so you can keep one in the base and have one on hand when you need it. They are perfect for picking up your piece after soldering and dipping it into your quench bowl.
Also, look for cross-locking tweezers, rather than regular tweezers. That way you can just leave your piece in the tweezers and it'll hold closed, subsequently freeing your hand.
There are also these super handy tweezers that clamp a whole ring down so you can easily solder a bezel cup to a ring band, and these odd tweezers that I'm sure you'll find a use for.
Flux + Flux Brush
Flux is used to keep your metal clean while soldering because solder does not like dirty metal and once you begin putting heat to the metal it’ll start to oxidize. You’ll notice where you put flux because that part will be clean and the surrounding metal will be dirty.
I use Handy Flux and a little flux brush to brush it onto my joins. With Handy Flux you have to keep it moist, almost soupy-like so I just keep a small amount in a re-purposed jam jar and add water to that so I don’t have to keep adding distilled water to the whole jar of flux. I also keep my flux brush in the jar as well so the flux doesn't get all crusty.
If you’re using the paste solder that I mentioned earlier then you don’t need to pre-flux as the paste has flux in it.
You can also get an unglazed ceramic dish and a borax cone with a bit of distilled water. You grind the cone against the ceramic with a bit of water and it’ll create a paste and that’s your flux. This will be my next flux method when I run out of my Handy Flux.
Soldering Board
There are a few different soldering boards you can use:
Solderite (which is what I use)
- Harder to burn your work
- Won’t crack or crumble
- Easy to drill and shape to hold workCharcoal (what most jewelers use)
- Creates heat under your piece
- The soft charcoal block crumble easy but you can get hard charcoal blocks
- Each to shape so it can hold your work in certain positionsHoneycomb
- The small holes help to keep the heat down (perfect if you’re using a high heat gas)Vermiculite
- Heat reflective so harder to burn your work
- Doesn’t break or crumbleAnd whatever else they’ve come up with
You’ll need to have your solder block on top of a fire-resistance surface. I personally just have a 12x12 ceramic tile and that’s my soldering surface. You can use a metal table as well.
There are also some helpful tools to make soldering better like turntables, tripods for getting underneath your piece, and even a rotating annealing pan with third hands attached.
Soldering Kits
If you're a kit person and you like to just get everything in one fell swoop then here's a good list of kits with different soldering tools and materials you'll need to get started:
I personally don't like kits because sometimes you're getting things you don't need or want and other times you still need to get things to complete your setup. So be sure to look through the list of items the kit has and make sure it has everything you're looking for and keep in mind you may need to get other things.
Fire Scale Prevention
Everyone is going to experience the dreaded fire scale. But there is some preventative measure you can use to stop it.
Products like Stop-OX II, Firescoff, Prip's Flux, and Cupronil which you spray on your entire piece, heat it with the torch, spray again until your piece develops a crusty white protective barrier. You can also do this with regular flux.
But to nip this issue in the bud, though, you simply don’t want to overheat your piece. It’s always best to get in, make the solder flow and get out as quickly as possible.
Soldering Tips
Prepping Your Metal for Soldering
Now we’re ready to prep our metal for solder. There are 2 things that’ll give you the perfect solder every time:
Having clean metal
You can take some fine-grit sandpaper and sand down your metal to clean it. Or toss it in your pickle to remove oils and oxides.Flush ends
You want your two ends to be super flush. Hold it up to a light source and if you can see light coming through your join them you need to keep filing, sanding, or sawing to make those ends meet up super flush (I show you how in this post). “Solder will not fill gaps!” how many times have you heard that?
Safety
Safety Gear
You don’t want to be breathing in the fumes from your torch or from your flux so a respirator with filters is a must.
Also, as I mentioned earlier, you want to make sure that your solder station is on top of a fire-resistant surface.
You always want to tie your hair up and wear an apron or jeans just in case a red hot piece goes flying and lands in your lap it won’t burn you. And cotton fabric, while not fire-resistant, is less likely to ignite.
If you’re soldering in an apartment or you have carpeted floors you can still solder safely. This is when having a butane torch is beneficial because you don’t need to have the fire department come out and green-light your operation, when you’re working with gases you oftentimes do need to do that.
If you have carpet you can lay down a fire-retardant plastic or a large sheet of metal that’ll cover your solder station and enough coverage in case something falls and bounces. And lastly, a fire-resistant mat to put underneath your desk and chair.
Ventilation
If you have the option you can set up a whole ventilation system, you can get just a ventilation fan or you can simply open a window.
I hope this guide answered all your questions about soldering silver jewelry. But if you have any questions, or if I missed something, just leave a comment below and I'll get right back to you asap!
Don't forget to download your free Soldering Cheatsheet guide!