Jewelry Tutorial: How To Make A Copper Electroformed Gemstone Open Ring
/Hey Makers! Today's jewelry tutorial is going to show you how copper electroform my ring style; the gemstone open ring. It's not much different from a single gemstone stacking ring so I'm not going to go too in depth but my skill and techniques have improved since I originally wrote that tutorial so I wanted to create a more updated version.
*This post contains some affiliate links, which means I may receive a small commission if you click on or purchase from certain links listed. This is how I'm able to run this blog, share my knowledge, at no cost to you. All products recommended in this post are products I personally use and love. Thanks for supporting Maker Monologues!
Also, since I'm taking my maker blogging more seriously now, I have created social media accounts (see the top left corner of the site)! So I want to share the projects you make from these tutorials! I have a hashtag in mind, #MakerMonologuesProject! I know, so creative, huh? So share the projects you make via Maker Monologues to social media using that hashtag so I can see what you make and share to my feeds! I don't have a following yet but that takes time, you get it, right?
Ok, on to electroforming!
The materials I'll be using for this tutorial:
18g copper wire (for my ring shank)
22g copper wire (to connect my ring to my bus bar)
10g copper wire (for my bus bar)
Safer Solutions copper conductive paint (I just switched to this from using the Caswell brand and the results are 1000x better! Highly recommend Safer Solutions.)
Loctite super glue (best glue I've used, any liquid Loctite will do the job)
Raw aquamarine gemstones (use whatever your heart desires)
The tools I'll be using for this tutorial:
Diamond grit metal files (these things may be small but they are powerful, and have multi uses)
10-amp DC power supply (similar 5-amp here which is plenty to electroform 20+ pieces at once.)
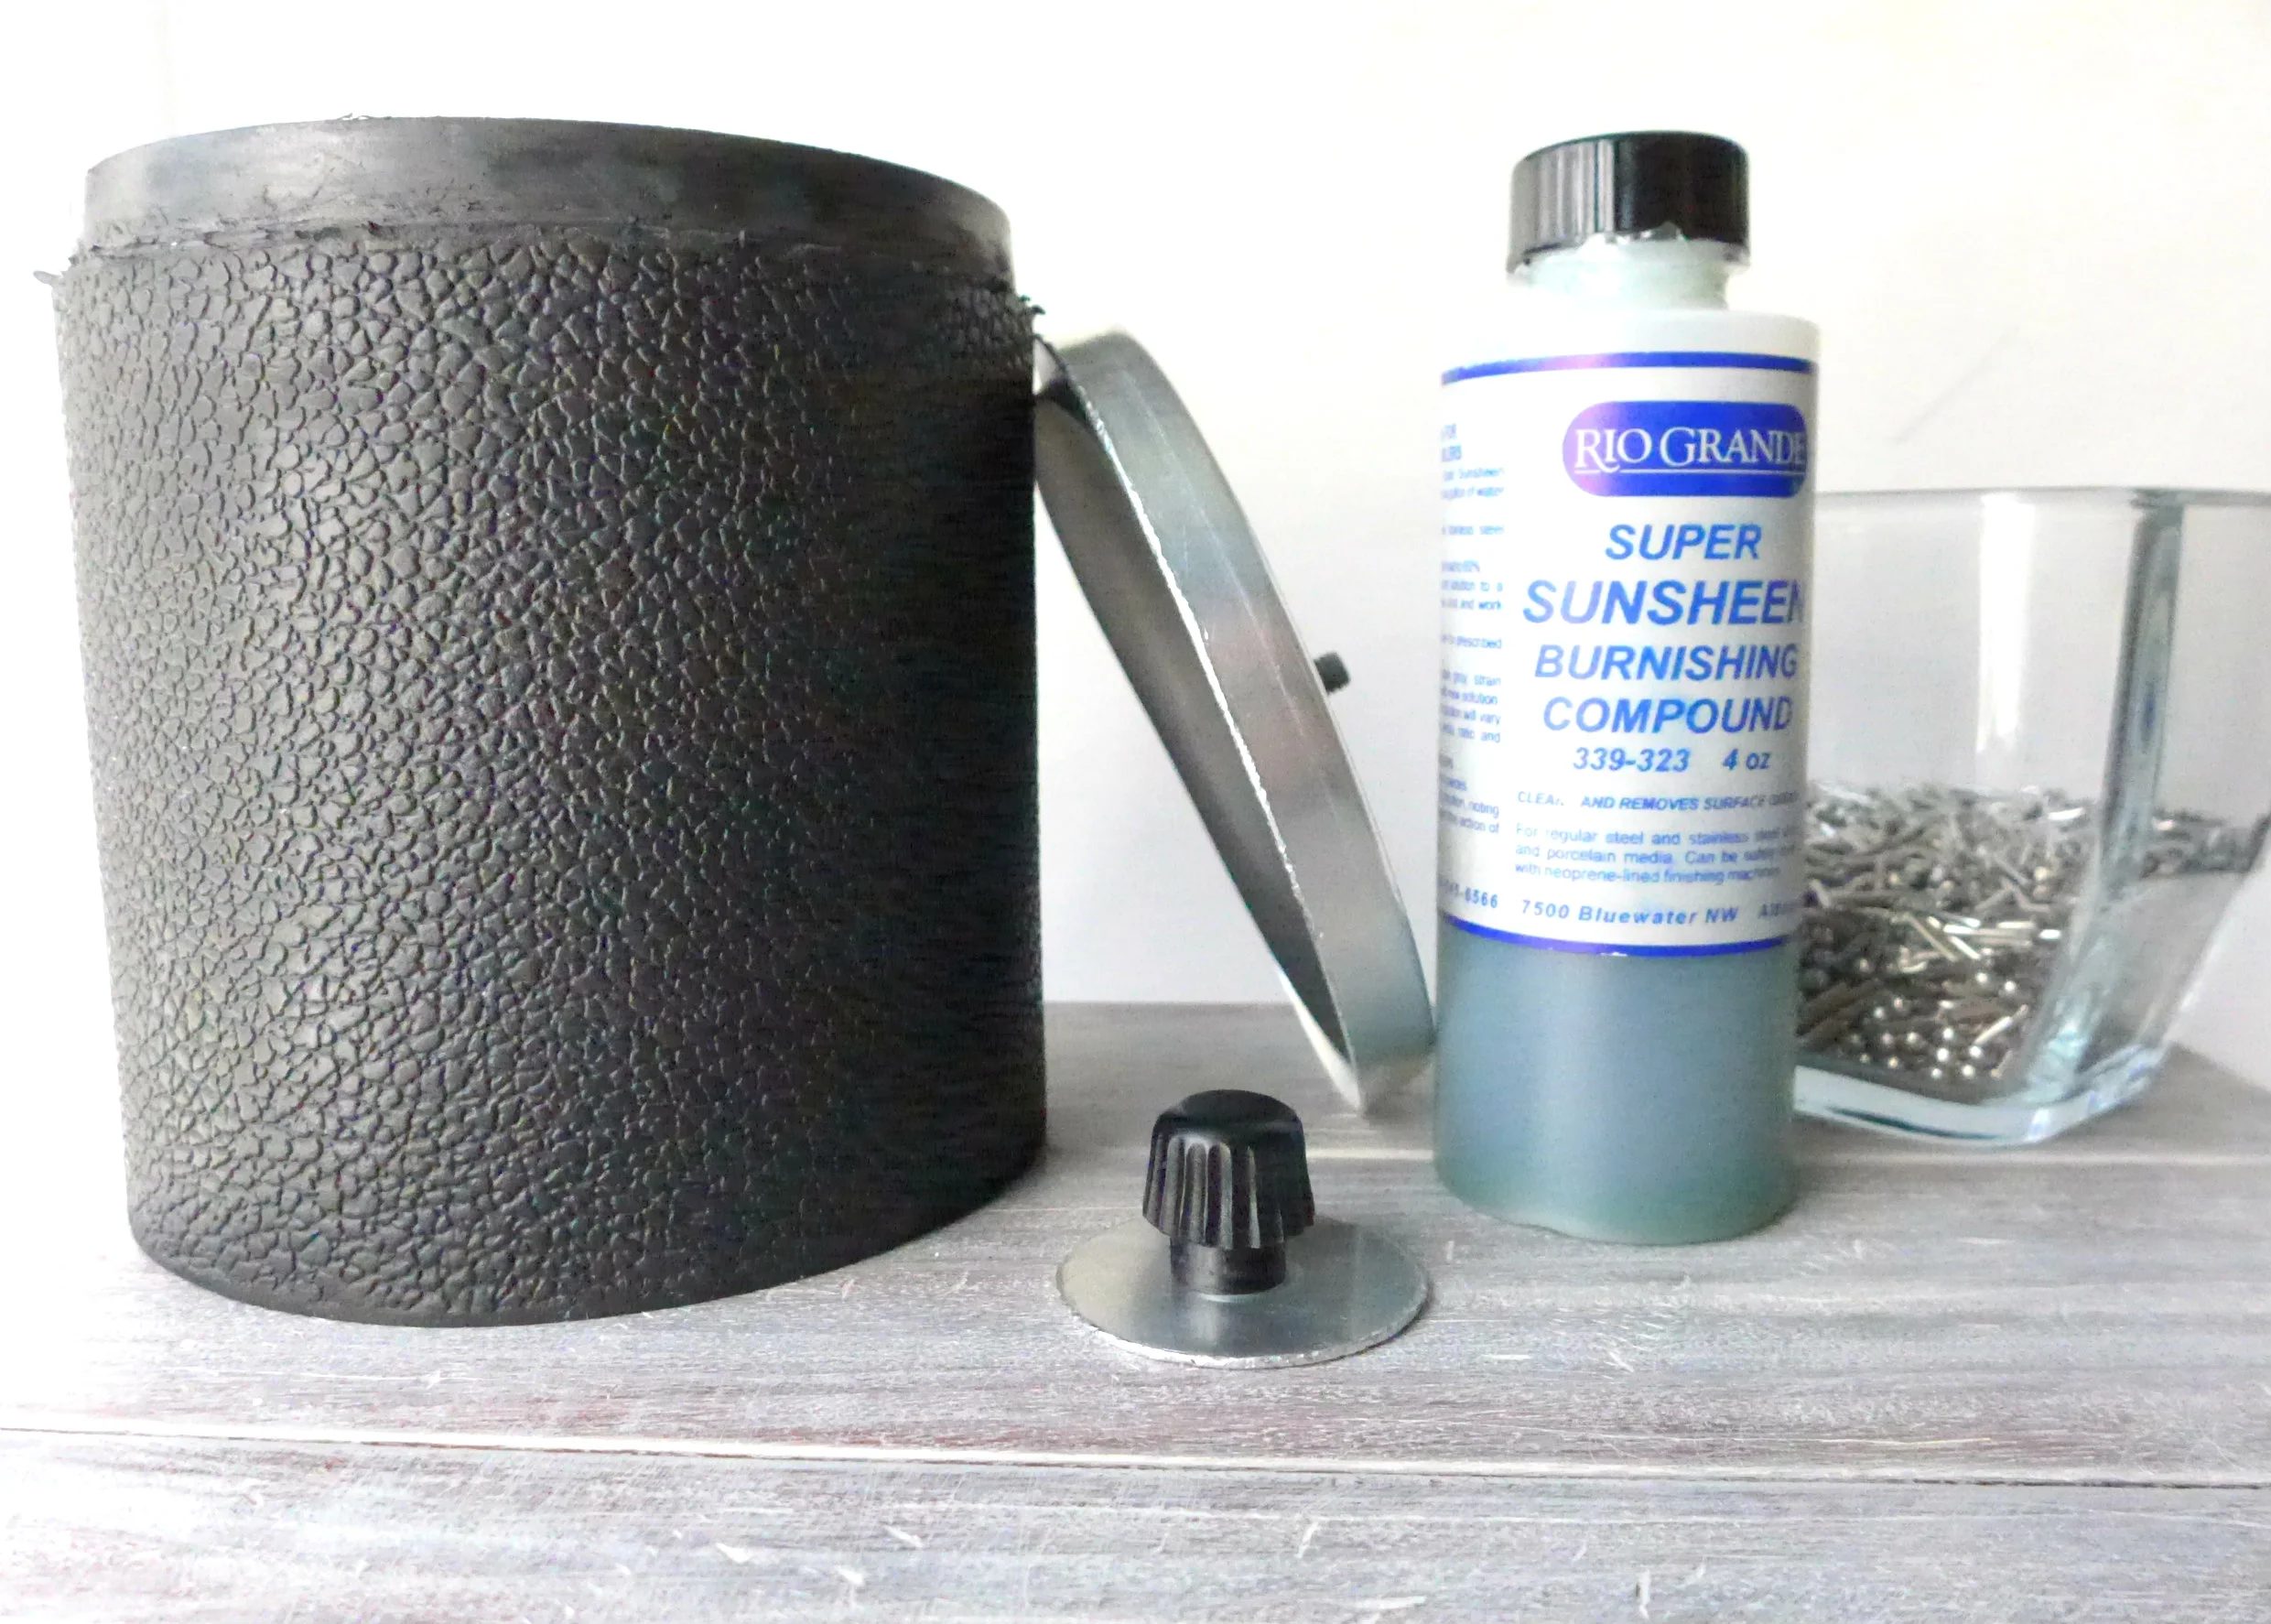
Duel barrel tumbler (single barrel here) This is optional
- 1lb stainless steel shot
- Super Sunsheen burnishing compound
Step 1 | Cut Your Ring Shank

Take your flush cutters and cut a notch out of your ring shank. It can be as open or as closed as you'd like it to be. Hold your stones in place to gauge whether or not you like the placement of them before gluing them down.
Step 2 | Select Your Gemstones

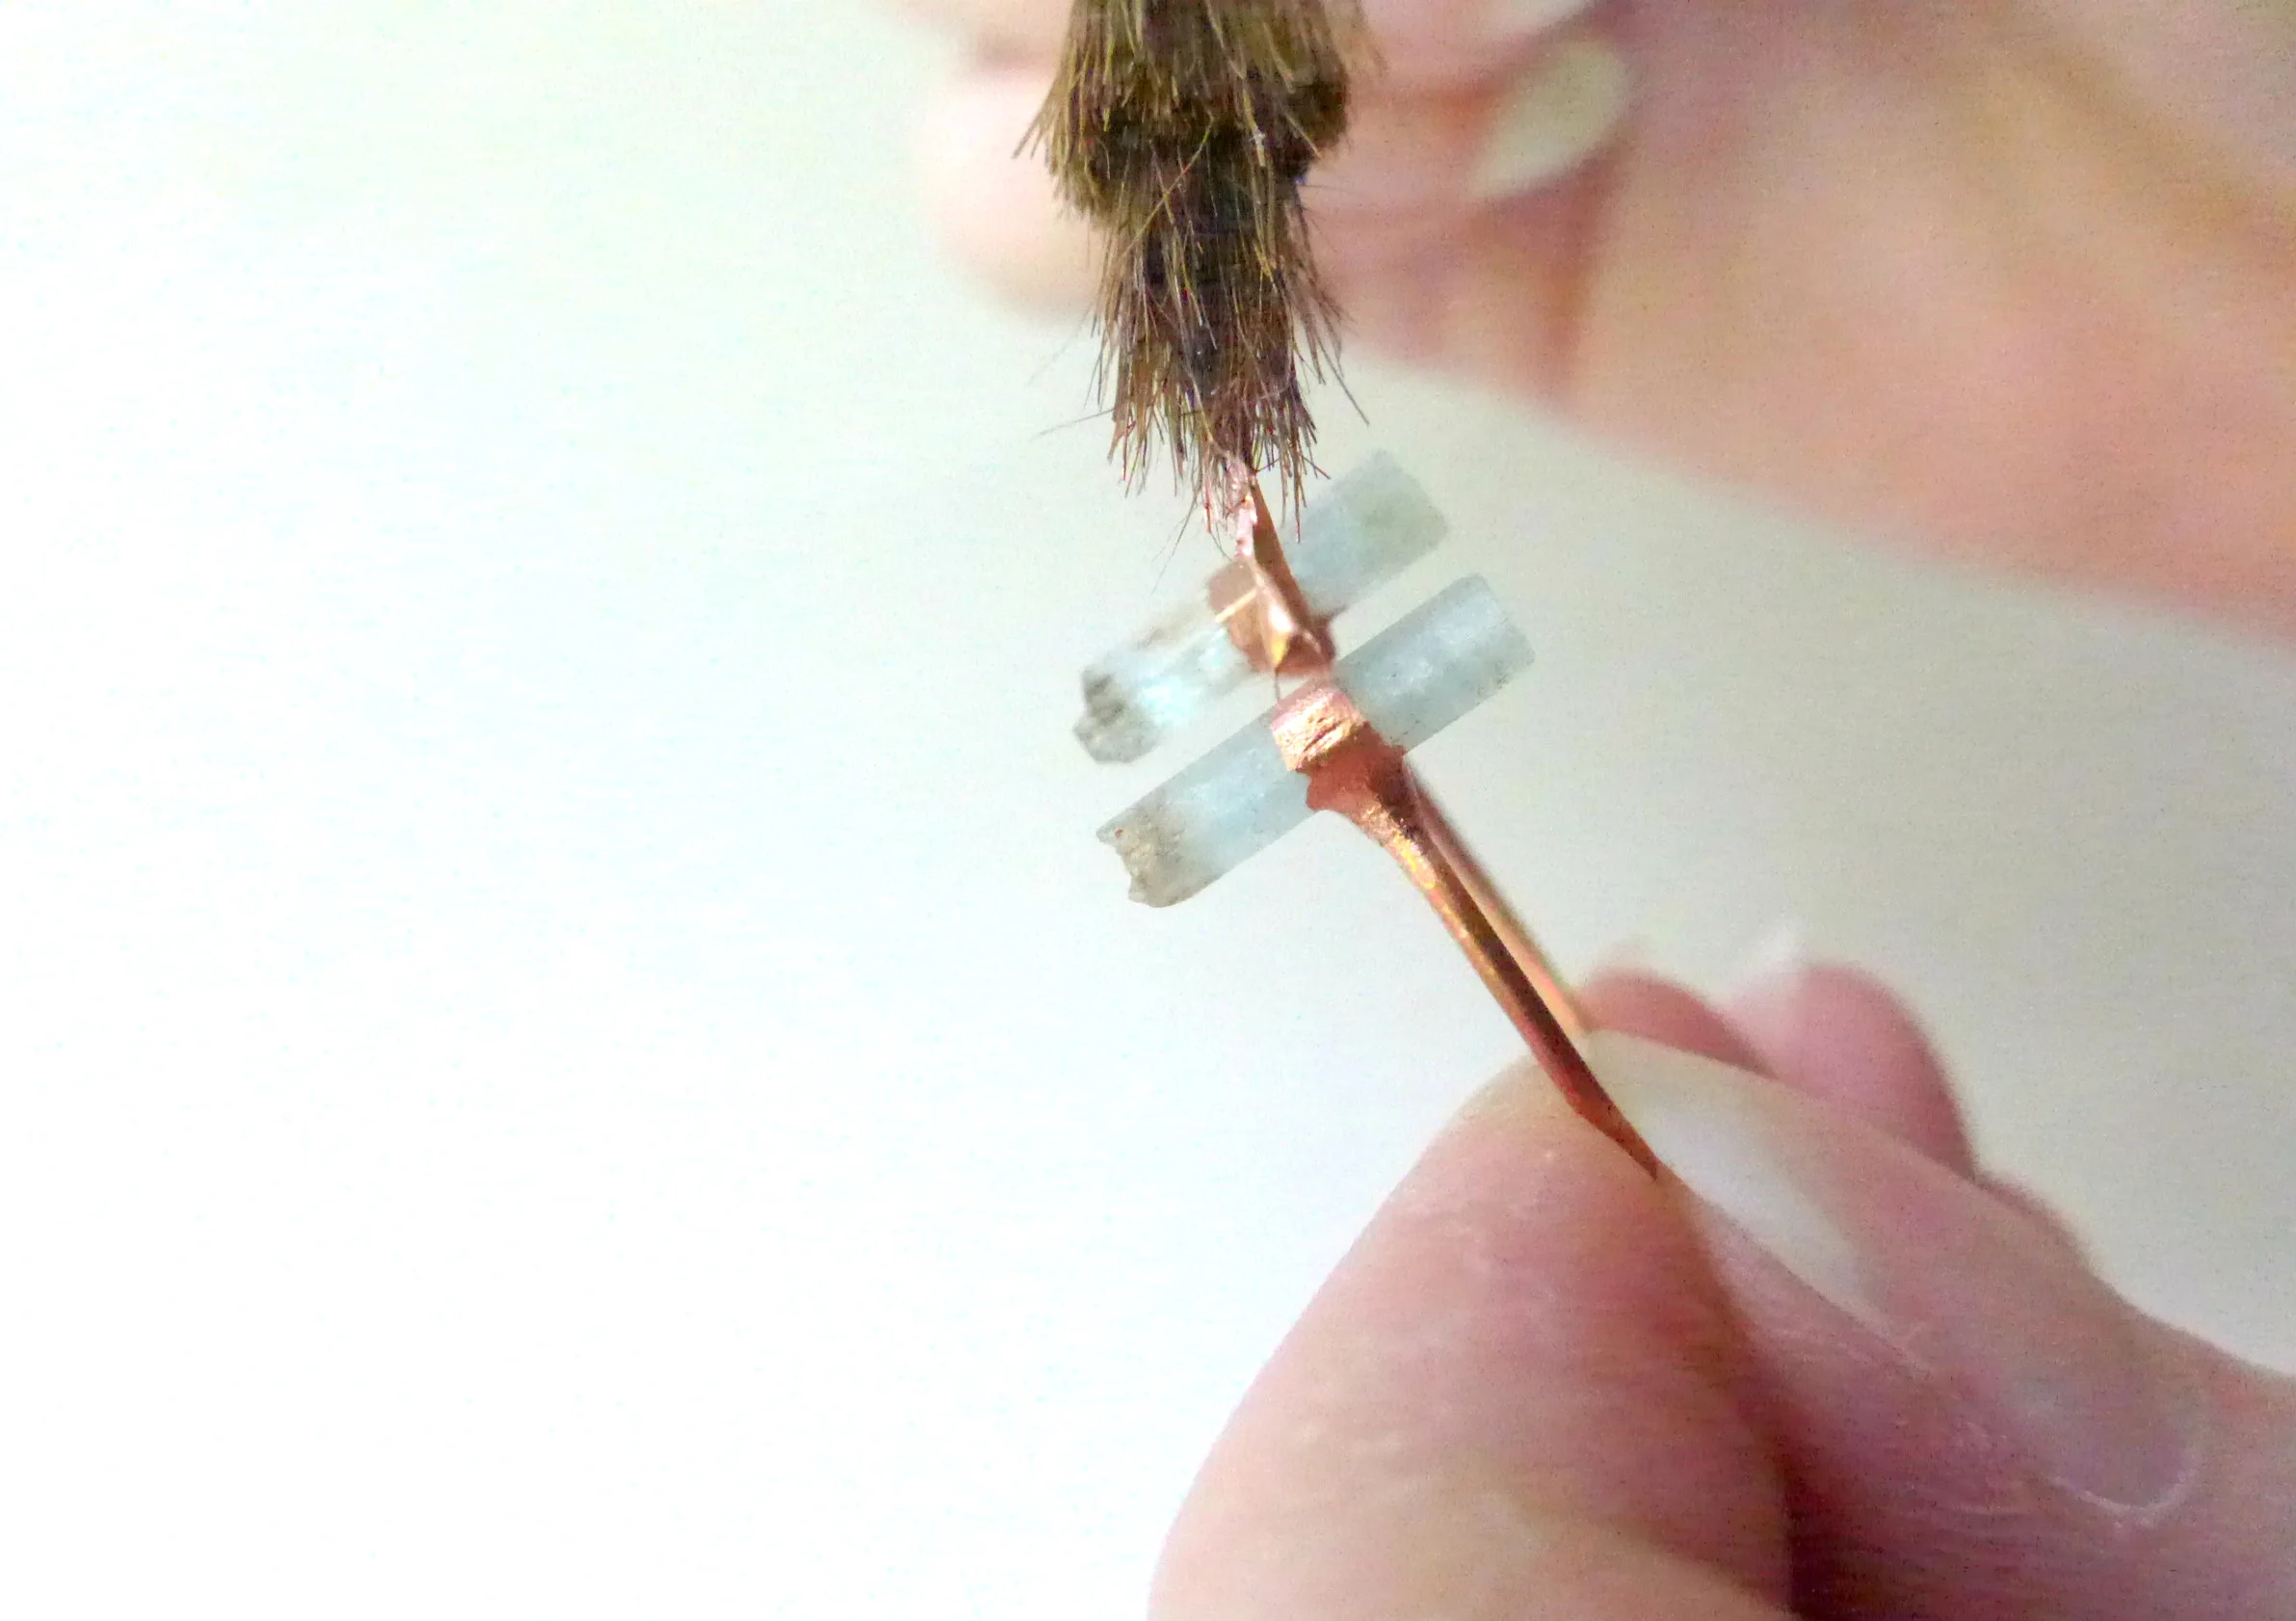
Select the gemstones you'd like to use. For this tutorial, I'm going with longer gemstones so I can copper electroform sort of a "bar" going horizontally around them. If you choose more round stones you can create a full backing like a traditional bezel setting.
These two raw aquamarines are perfect.
Step 3 | Apply Your Gemstones

Apply a dab of superglue onto each end. (Tip: file your ends flat for a stronger hold before you apply the glue.) Place your gemstone on top and hold it in place for a few seconds before moving on to the next stone.
Let dry for 5 minutes before applying the epoxy.
Step 4 | Apply The Epoxy

I like to take one of my diamond grit filers to apply the epoxy. It allows me to be precise it gets it in all the crevasses. You can use a toothpick as well. You want to apply it as a connector from your ring shank to your gemstone. It helps to give it more strength.
Allow to dry anywhere from 6-24 hours, depending on the brand you use.
Step 5 | File The Epoxy

File down the epoxy. I used to leave some epoxy around the copper ring shank which would leave a bump making the ring a smaller size than what I was anticipating. So now I file the epoxy all the way down to the copper ring shank leaving it exposed on the inside leaving the epoxy to just fill in the space between the stone and ring shank.
Step 6 | Copper Conductive Paint
Paint on your copper conductive paint covering the epoxy and also going around the stone. Let dry for 2-3 hours depending on humidity, then apply a second coat. Depending on the type of conductive paint you're using you may need up to 3-4 coats.
Let dry completely before electroforming.
Step 7 | Prep Your Cathode

Take your thin copper wire and make a hook at one end. Wrap it around your bus bar 2-3 times. I like to make a divet in my bus bar then make some sharp bends on either end so it stays on top of my mason jar and doesn't roll off. Hang your ring on the end and place it in your bath.
Step 8 | Prep Your Electroforming Bath

I'm not going to show you step by step to prepping your bath because I did so in the first tutorial. Create your anode, whether you use a copper sheet or a coil like myself. Place it inside your jar, or whatever else you're using. Pour in your copper electroforming solution, enough to completely cover your piece.
Attach the black negative lead to your cathode (your piece) and the red positive lead to your anode. Set your rectifier to your recommended setting. I'm using a different rectifier than in my last tutorial. This one is a 10-amp, no brand, I don't recommend you buy from this supplier because I originally recommended them in my supplies list but they had a 50/50 success rate, a lot of their rectifiers were faulty, I got lucky that mine worked.
For my settings, though, I put it on the very lowest setting for 1-3 rings at 00.1 amps (my volts go to 00.4). I tried taking a photo of my settings but there's some slight blinking in the number's digital display so my camera can't catch the entire number. I leave one ring in there for about 4 hours. (Edit: Funnily this ring only took about 1 hour, that was oddly fast.)
Step 9 | Polish Your Piece
If your piece has bumps on the inside of the ring from electroforming, take your half-round metal file and file it down. If it has any other bumps (that you don't aesthetically like) then go ahead and file those down. Once you're happy with the texture go ahead and throw it in your tumbler.

For this tutorial, I'm using my tumbler to polish the ring. You can use a Dremel or just simply a polishing cloth.
Take 1lb of stainless steel mixed shot and pour it into your barrel. Drop the ring in. Mix 2 1/2 to 3oz. of the Super Sunsheen with 1 gallon of water (regular water is ok). Pour it in your barrel so it covers about 1/4" to 1/2" over the shot. Put the lid on and tumble for about 1 hour.
After the tumbler, if you want a super high shine, take your Dremel, use a felt polishing tip (like these), and red rouge polishing compound (like this). Spin the felt tip on your red rouge and use it to polish your ring. It gives such an amazing high shine. You can also use a Foredom Flex Shaft.
This last step is completely optional, you can use just the tumbler to polish your piece or just the Dremel/flex shaft, or you can get those polishing cloths and polish them by hand.
Next, you can oxidize your piece, I'm choosing to not oxidize this piece but if you'd like me to write a post on just oxidizing your copper let me know!
Step 10 | Seal Your Copper
Final step! I hope you all use the hashtag #MakerMonologuesProject so I can see your pieces! Anyway, onto the last step.
I've used both Renaissance Wax and ProtetaClear, hands down ProtectaClear is MUCH better. While there's no product out there that will keep copper sealed forever, I think ProtectaClear is the longest lasting. (Comparison review of the two products coming up soon!)
So, assuming you have ProtectaClear, paint on your first layer over your copper piece. Don't paint over your stones. The best way I've found to store your piece to dry in between coatings is this:

I took a large third-hand tool (similar here) and took a thin piece of copper wire and wrapped it around each "arm." Then I made a bunch of tiny copper hooks using my round nose pliers (similar here) and hung my piece just like that. It's perfect!
The first layer should be dry enough for the second layer to go on within 30mins to an hour. Apply your second layer. Let dry for the same time. Apply your third layer then let cure overnight (or 6-8 hours). (Tip: while your piece is hanging to dry, use your round nose pliers to rotate the ring so the tiny copper hook doesn't create a bump where the ring is hanging from it, hopefully, that makes sense. You'll get it once you test it out.)
Your piece is now finished! Hurray! All you have to do now is fix up those pretty nails you just ruined from making your ring so you can wear it and show it off to your friends! Or sell it, let's be honest, that's what we're really trying to do here. ;)

Now, as I mentioned at the beginning of this post since I now have social media channels for the new Maker Monologues blog I want to see the projects you create! Post the new piece you created with the help of this tutorial with #MakerMonologuesProject so I can see what your piece looks like and share it on my feeds!
I'm thinking of hosting a contest with these tutorials but I'm not sure what the prize should be. I'm so used to doing giveaways with my own jewelry that I'm not sure what a good prize would be for makers. Probably supplies, though, right? Help me out, leave a comment below on what type of prize you'd like to win that's maker-related!
I kinda zoomed through this tutorial because I went in-depth with the last one. I wanted this to be more for the design of the ring instead of how to electroform. But please let me know if you'd prefer the more in-depth tutorials, however, there's a lot that can start to get redundant when it comes to prepping your bath, setting your rectifier, etc.
If you have any questions about anything I've mentioned here please leave a comment below rather than emailing me your question. It would be better if I answered your question publicly for all to see who may have the same question rather than answering the same question multiple times via email. I get to questions a lot quicker via blog comments. Thanks!